
Grow Chives in Kitchen? Absolutely! Imagine snipping fresh, flavorful chives right from your kitchen counter to garnish your omelets, salads, or soups. No more last-minute grocery store runs or wilted herbs from the back of the fridge. This isn’t just a gardening trend; it’s a culinary game-changer!
For centuries, chives have been a staple in gardens and kitchens worldwide, prized for their delicate onion flavor and vibrant green color. From ancient Roman gardens to modern-day culinary creations, these versatile herbs have added a touch of freshness to countless dishes. But who says you need a sprawling garden to enjoy them?
In today’s fast-paced world, convenience is key. We’re all looking for ways to simplify our lives and bring a little bit of nature indoors. That’s where this DIY trick comes in. Learning how to grow chives in kitchen is not only incredibly easy and rewarding, but it also offers a sustainable way to enjoy fresh herbs year-round. Plus, it’s a fantastic way to add a touch of green to your living space and impress your friends with your newfound gardening skills. I’m excited to share my simple, step-by-step guide to help you cultivate your own thriving chive garden right in your kitchen!
Growing Chives in the Kitchen: Your DIY Guide for Fresh Herbs
Hey herb friend! Are you tired of wilted herbs from the supermarket? I’ll show you how you can easily grow chives in your kitchen—fresh, aromatic, and always on hand! It’s easier than you think and brings a touch of spring into your home.
What you need:
- A chive plant (from the supermarket or garden center)
- A pot (approx. 15-20 cm / 6-8 inches in diameter)
- High-quality potting soil or herb soil
- Scissors or a knife
- A watering can or spray bottle
- (Optional) Liquid fertilizer for herbs
Step-by-Step Guide:
1. Choosing the right plant:
When buying your chive plant, make sure it looks healthy. The stalks should be a strong green and have no yellow or brown spots. A dense plant is a good sign! Sometimes supermarkets sell chives in a bunch without roots. Unfortunately, that won’t work. You need a plant with a root ball.
2. Preparing the pot:
Choose a pot with enough space for the roots. A diameter of 15-20 cm (6-8 inches) is ideal. Make sure the pot has a drainage hole in the bottom so excess water can run off. This prevents waterlogging, which chives do not like at all.
3. Filling the pot:
Fill the pot with potting soil or herb soil. Leave about 2-3 cm (1 inch) of space to the rim. The soil should be loose and permeable. Press the soil down lightly.
4. Preparing the chive plant:
Carefully remove the chive plant from its plastic pot. Loosen the root ball a bit by gently pulling it apart with your fingers. This helps the roots establish themselves better in the new soil.
5. Planting the chive plant:
Place the chive plant in the center of the pot. The top of the root ball should be roughly level with the soil surface. Fill the pot with soil and press it down lightly.
6. Watering in:
Water the chive plant thoroughly. The water should run out of the drainage hole in the bottom. This ensures that the soil is well-moistened.
7. Finding the right location:
Chives love light! Place the pot in a bright spot, ideally on a windowsill with direct sunlight (at least 6 hours daily). A south-facing window is perfect, but an east or west-facing window can also work. If you don’t have such a bright spot, you can also use a grow light.
8. Regular watering:
Chives need regular watering, but they don’t like waterlogging. Water when the top layer of soil feels dry. In the summer, this might be daily; in the winter, less often. Check the soil’s moisture with your finger.
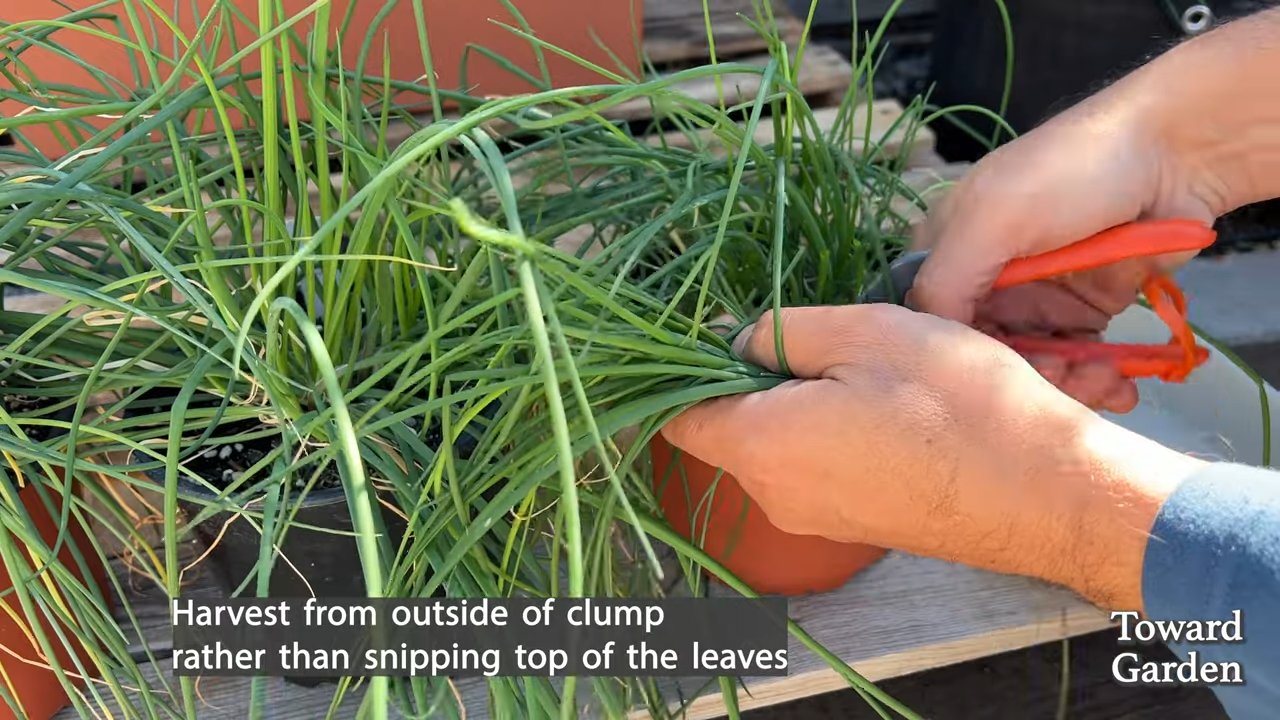
9. Cutting and harvesting:
Cutting promotes growth! Cut the chive stalks regularly with scissors or a knife. Cut them about 2-3 cm (1 inch) above the soil. This way, the chives will keep sprouting new growth. You can use the chives directly in your dishes or freeze them.
10. Fertilizing (optional):
If you wish, you can fertilize your chives regularly. Use a liquid fertilizer for herbs and follow the instructions on the package. Fertilizing is especially important when the chives are growing in a pot, as the nutrients in the soil will eventually be used up.
Troubleshooting: What to do if…?
- …the chives turn yellow: This can have several causes. Either it’s getting too little light, too much water, or there’s a lack of nutrients. Check the location, your watering habits, and fertilize if necessary.
- …the chives don’t grow: Here too, it could be a lack of light, water, or nutrients. Move the pot to a brighter spot, water regularly, and fertilize.
- …the chives are infested with pests: Chives are relatively robust, but sometimes aphids or other pests can settle in. Rinse the plant with a strong jet of water or use a biological pesticide.
Additional Tips for Your Kitchen Chives:
- Propagating chives: You can easily propagate chives by dividing the root ball. Take the plant out of the pot and carefully divide the root ball into several parts with a knife or your hands. Plant the individual parts in separate pots.
- Overwintering chives: Chives are hardy, but in a pot, they could use some protection. Move the pot to a cool, bright place (e.g., the basement or garage) and water only sparingly. In the spring, you can put it back outside.
- Chive blossoms: Chives produce flowers in the summer. The flowers are edible and look pretty, but they can slightly affect the taste of the stalks. If you want, you can cut the flowers off.
Chives in the Kitchen:
Chives are a versatile herb that can be used in many dishes. They pair wonderfully with egg dishes, salads, soups, sauces, and dips. You can also use them as a garnish.
Recipe Idea: Chive Quark Dip
Ingredients:
- 250 g quark (or Greek yogurt/sour cream)
- 2 tbsp milk or yogurt
- 1 bunch of chives, finely chopped
- Salt and pepper to taste
Preparation:
- Mix the quark, milk or yogurt, and chives in a bowl.
- Season with salt and pepper to taste.
- Done! Tastes delicious with potatoes, bread, or vegetables.
I hope this guide helps you grow your own chives in the kitchen. It’s really simple and fun! Good luck and enjoy your meal
Conclusion
So, there you have it! Growing chives in your kitchen is not just a fun project; it’s a game-changer for anyone who loves fresh, flavorful ingredients at their fingertips. Forget those sad, wilted bunches from the grocery store. Imagine snipping vibrant, aromatic chives directly onto your omelets, salads, baked potatoes, or creamy dips. The difference in taste and freshness is truly remarkable, and the satisfaction of nurturing your own little herb garden is an added bonus.
This DIY trick is a must-try for several compelling reasons. First and foremost, it’s incredibly easy and accessible, even for those without a green thumb. You don’t need a sprawling garden or specialized equipment. A simple pot, some soil, and a sunny windowsill are all you need to embark on this rewarding culinary adventure. Secondly, it’s cost-effective. A single purchase of chive seeds or a small starter plant will provide you with a continuous supply of fresh herbs for months, if not years, to come, saving you money on those frequent grocery store trips.
But perhaps the most compelling reason to grow chives in your kitchen is the sheer convenience. No more last-minute dashes to the store when you realize you’re missing that crucial ingredient. No more settling for dried herbs that lack the vibrant flavor of fresh ones. With your own kitchen chive garden, you’ll always have a burst of fresh, oniony goodness ready to elevate your dishes.
Looking for variations? Consider planting different varieties of chives, such as garlic chives, for a slightly different flavor profile. You can also experiment with companion planting, placing your chives alongside other herbs like parsley or basil to create a miniature kitchen garden ecosystem. For a decorative touch, choose a stylish pot that complements your kitchen décor. You can even repurpose old teacups or mason jars for a rustic, charming look.
Don’t be afraid to get creative and personalize your chive-growing experience. The possibilities are endless!
We wholeheartedly encourage you to try this DIY trick and experience the joy of growing your own fresh chives. It’s a simple, rewarding, and delicious way to enhance your culinary creations. Once you’ve given it a try, we’d love to hear about your experience! Share your tips, tricks, and photos in the comments below. Let’s create a community of kitchen gardeners and inspire others to embrace the freshness and flavor of homegrown herbs. Let us know how your **grow chives in kitchen** project went!
Frequently Asked Questions (FAQ)
How much sunlight do chives need when grown indoors?
Chives thrive in bright, indirect sunlight. Aim for at least 6 hours of sunlight per day. A south-facing windowsill is ideal, but an east- or west-facing window can also work. If you don’t have enough natural light, consider using a grow light to supplement. Rotate the pot regularly to ensure even growth on all sides. If your chives start to look leggy or pale, it’s a sign that they’re not getting enough light.
What type of soil is best for growing chives in a pot?
Use a well-draining potting mix that’s rich in organic matter. A mix of equal parts potting soil, compost, and perlite is a good option. Avoid using garden soil, as it can be too heavy and may not drain well in a pot. Good drainage is crucial to prevent root rot, which can be a common problem with potted herbs.
How often should I water my chives?
Water your chives regularly, keeping the soil consistently moist but not waterlogged. Check the soil moisture by sticking your finger about an inch deep. If the soil feels dry, it’s time to water. Avoid overwatering, as this can lead to root rot. During the warmer months, you may need to water more frequently.
How do I harvest chives?
Harvest chives by snipping the leaves with scissors, cutting them about an inch above the soil level. This encourages new growth and keeps the plant productive. You can harvest chives as needed, but avoid cutting more than one-third of the plant at a time. Regular harvesting will also prevent the chives from flowering, which can make the leaves taste bitter.
Do chives need fertilizer?
Chives are not heavy feeders, but they will benefit from occasional fertilization. Use a balanced liquid fertilizer diluted to half strength every 2-3 weeks during the growing season. Avoid over-fertilizing, as this can lead to leggy growth and a less intense flavor.
How do I prevent pests and diseases?
Chives are generally pest-resistant, but they can occasionally be affected by aphids or spider mites. If you notice any pests, wash the leaves with a strong stream of water or use an insecticidal soap. To prevent fungal diseases, ensure good air circulation around the plants and avoid overwatering.
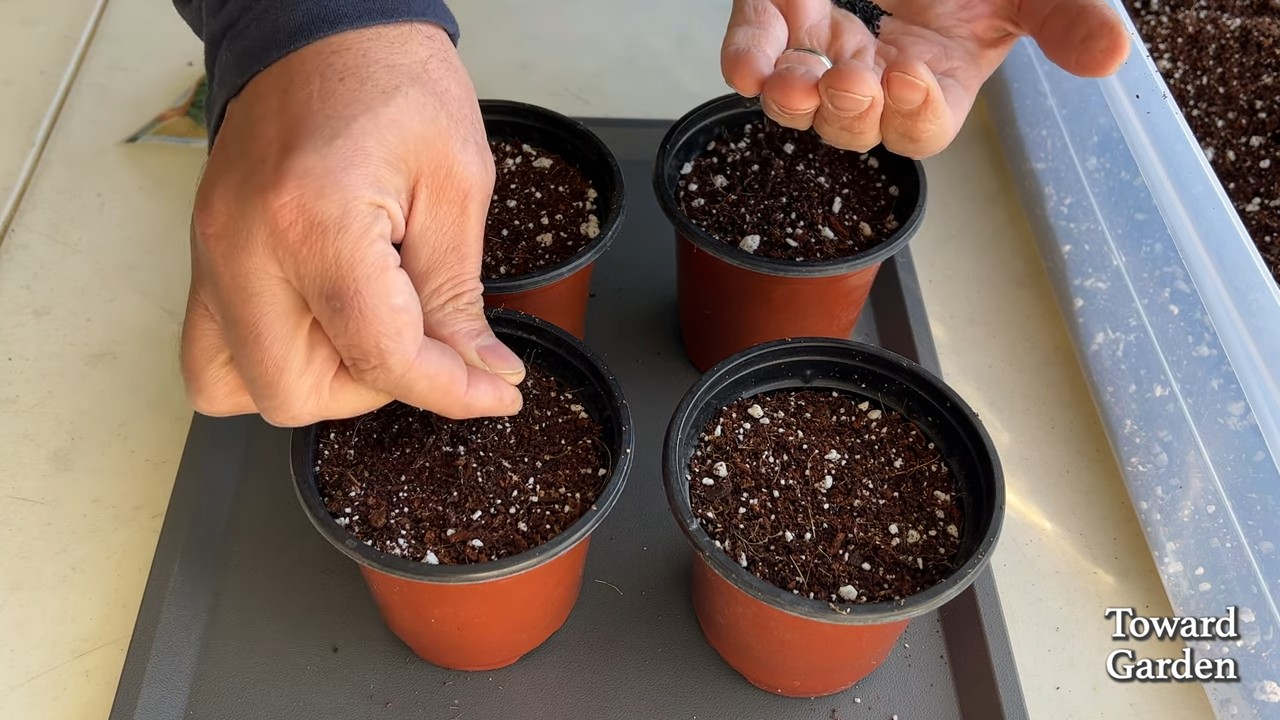
Can I grow chives from seed?
Yes, you can easily grow chives from seed. Sow the seeds indoors 6-8 weeks before the last frost or directly outdoors after the last frost. Keep the soil moist and warm until the seeds germinate. Once the seedlings are large enough to handle, transplant them into individual pots.
How do I overwinter chives indoors?
Chives are perennial, meaning they can live for several years. If you live in a cold climate, you can overwinter your chives indoors. Before the first frost, cut the plants back to a few inches above the soil level and bring them indoors. Place them in a cool, bright location and water sparingly. The chives may go dormant during the winter, but they will start to grow again in the spring.
My chives are flowering. Should I remove the flowers?
Yes, it’s generally recommended to remove the flowers from chives. While the flowers are edible and have a mild onion flavor, they can also make the leaves taste bitter. Removing the flowers will also encourage the plant to focus its energy on producing more leaves.
Can I freeze chives for later use?
Yes, you can freeze chives for later use. Wash and dry the chives thoroughly, then chop them into small pieces. Place the chopped chives in a freezer bag or container and freeze them. Frozen chives will retain their flavor for several months. You can also freeze chives in ice cube trays with water or olive oil for easy portioning.
Leave a Comment