
Grow Mint at Home with these simple, yet effective DIY tricks! Have you ever dreamed of stepping outside and snipping fresh mint for your mojito, tea, or that delicious lamb dish? I know I have! For centuries, mint has been cherished not only for its refreshing flavor but also for its medicinal properties. From ancient Egyptians using it in their rituals to Romans flavoring their sauces, mint boasts a rich history that continues to thrive in our modern kitchens and gardens.
But let’s be honest, sometimes growing mint can feel like a battle. It’s notorious for its enthusiastic spreading, often taking over entire garden beds if left unchecked. That’s where these DIY hacks come in! I’m going to share some clever and easy ways to grow mint at home, keeping it contained and thriving, even if you only have a small balcony or windowsill.
Why do you need these tricks? Because fresh mint elevates everything! Plus, knowing you grew it yourself? That’s a special kind of satisfaction. So, ditch the wilted grocery store mint and let’s get started on creating your own fragrant, thriving mint patch. Get ready to unlock the secrets to a bountiful mint harvest, right at your fingertips!
Growing Mint at Home: A Comprehensive DIY Guide
Hello, dear garden friends! I love the fresh scent and taste of mint, and nothing is better than harvesting it directly from your own garden. Mint is not only incredibly versatile in the kitchen (think mojitos, tea, salads!), but also relatively easy to grow. However, it has one little quirk: it tends to spread like crazy. That’s why today I’m showing you how to successfully grow mint at home without it taking over your entire garden.
Why Grow Mint in a Pot?
Before we get started, a quick explanation of why I recommend growing mint in a pot:
- Control: Mint is invasive. If you simply plant it in the garden, it will spread quickly and crowd out other plants. In a pot, you can control its spread.
- Flexibility: A pot allows you to move the mint to the optimal location depending on the season and weather conditions.
- Easier Harvest: You always have the mint handy, wherever you happen to need it.
What You’ll Need for Growing Mint
Here is a list of the things you’ll need for successfully growing mint in a pot:
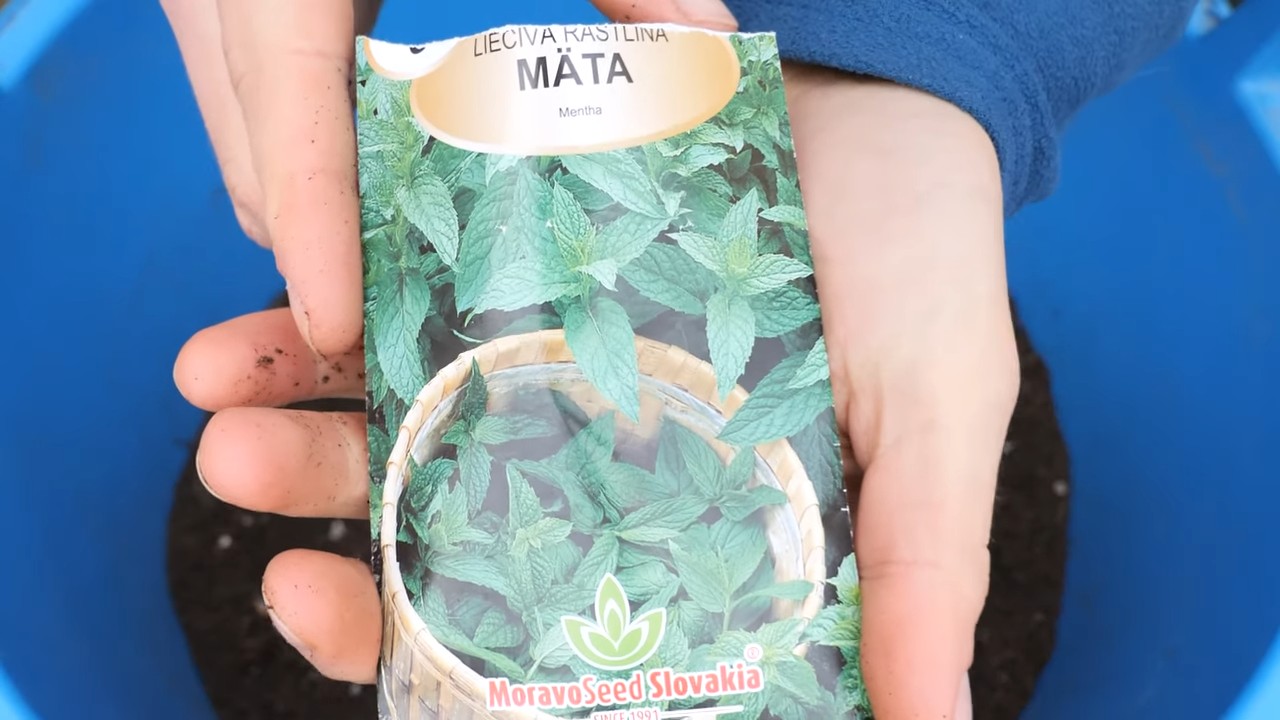
- Mint seedling or seeds: You can either buy a mint seedling at a garden center or grow it from seed. I personally prefer seedlings because they grow faster and you can harvest immediately.
- Pot: Choose a pot with a diameter of at least 20 cm (8 inches). It must have drainage holes so that water can drain well.
- Potting soil: Use a high-quality potting soil that is well-draining.
- Gravel or clay shards: These serve as a drainage layer at the bottom of the pot.
- Watering can: For regular watering.
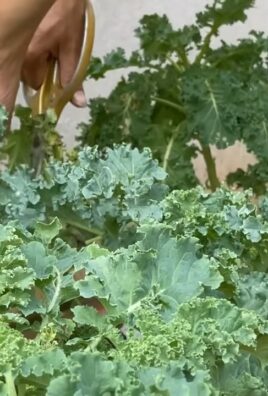
- Scissors or garden shears: For harvesting and cutting back the mint.
- Optional: Liquid fertilizer: For an additional supply of nutrients.
Step-by-Step Guide to Growing Mint in a Pot
Now let’s get down to it! Here is a detailed guide on how to successfully grow your mint in a pot:
1. Preparing the Pot:
- First, place a layer of gravel or clay shards at the bottom of the pot. This layer ensures good drainage and prevents waterlogging, which mint does not like at all.
- Then fill the pot with potting soil, but leave about 2-3 cm (1 inch) of space at the top.
2. Planting the Mint:
- If you have a mint seedling, carefully remove it from its nursery pot. Loosen the roots a bit so they can spread out better in the new pot.
- Place the seedling in the center of the pot and fill the remaining space with potting soil. Make sure the top of the root ball is level with the soil surface.
- If you are growing mint from seed, sprinkle the seeds evenly on the soil surface and cover them lightly with soil.
3. Watering:
- Water the mint thoroughly after planting until water runs out of the drainage holes. This helps the soil to settle and moistens the roots.
4. Choosing the Right Location:
- Mint prefers a partially shaded location. Direct midday sun can burn the leaves. An east- or west-facing window is ideal.
- Place the pot in a spot where the mint gets enough light but is protected from the scorching sun.
5. Regular Care:
- Watering: Water the mint regularly, especially during the warm summer months. The soil should always be slightly moist, but not wet. Check the moisture by sticking your finger into the soil.
- Fertilizing: During the growing season (spring and summer), you can fertilize the mint every two weeks with a liquid fertilizer for herbs. This promotes growth and flavor development.
- Pruning: Prune the mint regularly to encourage growth and prevent it from flowering. When mint flowers, it loses its aroma. Simply cut the stems with scissors or garden shears.
- Overwintering: Mint is hardy, but in a pot, it is somewhat more susceptible to frost. In winter, move the pot to a protected place, such as a cool basement or a garage. Water the mint only sparingly so the soil does not dry out.
Common Problems and Solutions
Problems can also arise when growing mint. Here are some common issues and how you can solve them:
- Yellow leaves: Yellow leaves can be a sign of overwatering or a nutrient deficiency. Check the soil moisture and adjust watering accordingly. Fertilize the mint if necessary.
- Brown leaves: Brown leaves can be caused by too much sun or drought. Move the pot to a shadier location and water the mint regularly.
- Pests: Mint can be infested by aphids or spider mites. Spray the leaves with a mild soap solution to combat the pests.
Harvesting and Using Mint
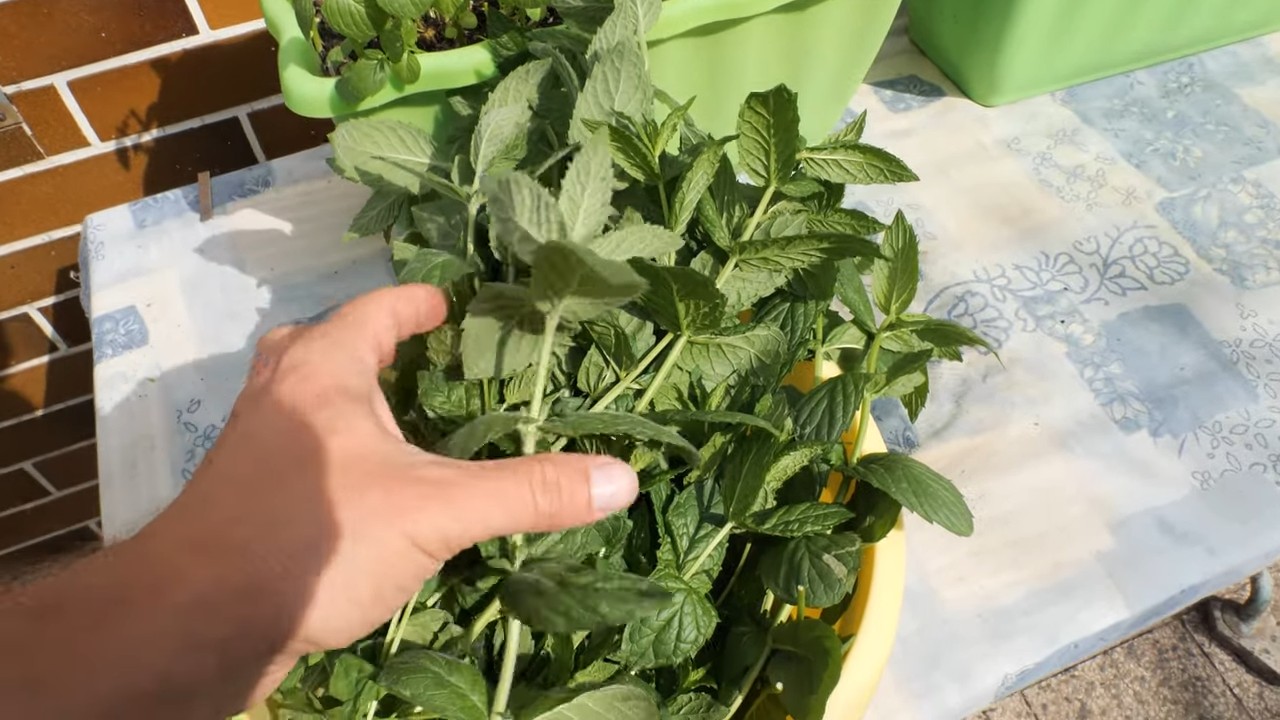
The best part of growing mint is, of course, the harvest! You can harvest the mint anytime you need it. Simply cut the stems with scissors or garden shears. It’s best to harvest mint in the morning when the essential oils are most concentrated.
Here are some ideas on how to use your fresh mint:
- Tea: Pour hot water over fresh mint leaves and let the tea steep for a few minutes.
- Mojitos: Mint is an essential ingredient in mojitos.
- Salads: Add fresh mint to your salads to give them a fresh flavor.
- Desserts: Use mint in desserts like chocolate mousse or ice cream.
- Sauces: Mint pairs excellently with lamb dishes and can be used in sauces.
Mint Varieties
There are many different mint varieties, each with its own unique taste and aroma. Here are some popular varieties:
- Peppermint: Has a strong, refreshing taste.
- Spearmint: Has a milder, sweeter taste.
- Chocolate Mint: Has a chocolatey taste and scent.
- Orange Mint: Has a fruity taste and scent.
Try different varieties to find your favorite mint!
Additional Tips for Successful Mint Cultivation
- Use a sufficiently large pot: A pot that is too small can restrict the growth of the mint.
- Ensure good drainage: Waterlogging can lead to root rot.
- Prune the mint regularly: This promotes growth and prevents it from flowering.
- Use high-quality potting soil: Good potting soil provides the mint with the necessary nutrients.
- Observe your mint regularly: Watch for signs of problems and act accordingly.
I hope this guide helps you to successfully grow your own mint at home. Have fun gardening and enjoy
Conclusion
So, there you have it! Growing mint at home isn’t just a fun project; it’s a game-changer for your culinary creations, your beverages, and even your home’s ambiance. We’ve walked you through the simple steps, from choosing the right container to harvesting your fragrant bounty. But why is this DIY trick a must-try?
Firstly, the flavor. Store-bought mint, while convenient, often lacks the vibrant, intense flavor of freshly grown mint. Imagine the difference a handful of your own homegrown mint will make in your mojitos, your lamb dishes, or even a simple cup of tea. The aroma alone is enough to elevate your mood and transform your kitchen into a fragrant oasis.
Secondly, it’s incredibly cost-effective. A single mint plant can provide you with a continuous supply of fresh mint for months, even years, saving you money on those expensive grocery store bunches. Plus, you’re reducing your reliance on commercially grown produce, which often involves pesticides and long-distance transportation.
Thirdly, it’s therapeutic. Gardening, even on a small scale, has been proven to reduce stress and improve mental well-being. Tending to your mint plant, watching it grow, and harvesting its leaves can be a deeply satisfying and rewarding experience.
But the benefits don’t stop there. Growing mint at home allows you to experiment with different varieties. Why not try growing peppermint for a refreshing twist, spearmint for classic cocktails, or even chocolate mint for a decadent dessert topping? The possibilities are endless!
Variations and Suggestions:
* Vertical Gardening: If you’re short on space, consider a vertical mint garden. Use a tiered planter or even repurpose old pallets to create a stunning and space-saving display.
* Hydroponics: For a more advanced approach, try growing mint hydroponically. This method involves growing plants without soil, using nutrient-rich water solutions.
* Companion Planting: Mint is a great companion plant for many vegetables, as it helps to repel pests. Plant it near your tomatoes, cabbage, or broccoli to protect them from unwanted visitors.
* Mint Tea Blends: Experiment with different mint tea blends by combining your homegrown mint with other herbs like chamomile, lavender, or lemon balm.
* Mint-Infused Water: Add a few sprigs of mint to your water bottle for a refreshing and hydrating beverage. You can also add other fruits like cucumber, lemon, or berries for extra flavor.
We’re confident that once you experience the joy of growing mint at home, you’ll never go back to store-bought again. It’s a simple, rewarding, and delicious way to enhance your life. So, grab a pot, some soil, and a mint plant, and get started today!
We encourage you to try this DIY trick and share your experience with us. Let us know what varieties you’re growing, what recipes you’re using your mint in, and any tips or tricks you’ve discovered along the way. Share your photos and stories on social media using #HomegrownMint and inspire others to join the fun. We can’t wait to see what you create!
Frequently Asked Questions (FAQ)
What kind of container should I use to grow mint?
The best container for growing mint is one that is at least 6 inches deep and has drainage holes. Mint spreads rapidly, so it’s best to grow it in a container to prevent it from taking over your garden. You can use terracotta pots, plastic pots, or even repurposed containers like buckets or tubs. Just make sure the container is clean and has adequate drainage.
What kind of soil is best for growing mint?
Mint thrives in well-draining soil that is rich in organic matter. A good potting mix will work well, or you can create your own by mixing equal parts of garden soil, compost, and perlite or vermiculite. The soil should be slightly acidic to neutral, with a pH between 6.0 and 7.0.
How much sunlight does mint need?
Mint prefers partial shade, especially during the hottest part of the day. It can tolerate full sun, but the leaves may become scorched if exposed to intense sunlight for too long. Aim for at least 4-6 hours of sunlight per day. If you’re growing mint indoors, place it near a sunny window or use a grow light.
How often should I water my mint plant?
Water your mint plant regularly, keeping the soil consistently moist but not waterlogged. Check the soil moisture by sticking your finger into the soil. If the top inch feels dry, it’s time to water. Avoid overwatering, as this can lead to root rot. During hot weather, you may need to water your mint plant more frequently.
How do I harvest mint?
You can harvest mint leaves as needed, once the plant is established. Simply pinch or cut off the stems just above a leaf node. This will encourage the plant to produce more leaves. Avoid harvesting more than one-third of the plant at a time, as this can stress the plant. For the best flavor, harvest mint in the morning, after the dew has dried.
How do I propagate mint?
Mint is very easy to propagate from stem cuttings. Simply cut a 4-6 inch stem from a healthy plant, remove the lower leaves, and place the stem in a glass of water. Roots should start to form within a week or two. Once the roots are about an inch long, you can transplant the cutting into a pot filled with potting mix. You can also propagate mint by dividing the roots of an established plant.
How do I prevent mint from spreading?
As mentioned earlier, mint spreads rapidly through its roots. To prevent it from taking over your garden, grow it in a container or plant it in a raised bed with a barrier around the edges. You can also prune the roots regularly to keep the plant contained. Another option is to plant mint in a bottomless container buried in the ground.
What are some common problems with growing mint?
Some common problems with growing mint include pests like aphids and spider mites, and diseases like powdery mildew and rust. To prevent these problems, keep your mint plant healthy by providing it with adequate sunlight, water, and nutrients. Inspect your plant regularly for signs of pests or diseases, and treat them promptly if you find any. You can use organic pesticides or fungicides to control these problems.
Can I grow mint indoors?
Yes, you can grow mint indoors. Place it near a sunny window or use a grow light to provide it with adequate sunlight. Water it regularly and fertilize it every few weeks. Make sure the container has drainage holes to prevent waterlogging. Indoor mint may not grow as vigorously as outdoor mint, but it can still provide you with a steady supply of fresh leaves.
How do I store fresh mint?
To store fresh mint, wrap the stems in a damp paper towel and place them in a plastic bag in the refrigerator. This will help to keep the mint fresh for up to a week. You can also freeze mint leaves by placing them in a single layer on a baking sheet and freezing them until solid. Then, transfer the frozen leaves to a freezer bag or container. Frozen mint can be used in smoothies, sauces, and other dishes. You can also dry mint leaves by hanging them upside down in a cool, dry place. Once the leaves are completely dry, store them in an airtight container.
Leave a Comment