
Grow Melons Faster? Absolutely! Imagine biting into a juicy, sun-ripened melon you nurtured from seed to fruit, all in record time. That’s the magic we’re unlocking today. For centuries, melons have been symbols of abundance and summer’s sweet reward, gracing tables from ancient Egypt to modern-day picnics. But let’s face it, waiting for those delicious fruits to mature can feel like an eternity, especially when summer’s fleeting.
That’s where these DIY tricks and hacks come in. I’m going to share some simple, yet effective techniques to help you grow melons faster and enjoy a bountiful harvest sooner than you ever thought possible. Whether you’re a seasoned gardener or just starting out, these tips will empower you to maximize your melon-growing potential.
Why do you need these hacks? Because time is precious, and who wants to wait longer than necessary for a taste of summer sweetness? Plus, with unpredictable weather patterns, getting a head start can be the difference between a successful harvest and a disappointing one. So, let’s dive in and discover the secrets to accelerating your melon growth!
DIY: Supercharge Your Melon Patch for a Bountiful Harvest!
Okay, melon lovers, listen up! I’m about to share my secret weapon for getting those juicy, sweet melons weeks earlier than your neighbors. Forget waiting all summer 鈥?with a few simple tricks, you can be enjoying homegrown goodness in no time. This isn’t just about planting and hoping; it’s about actively giving your melons the boost they need to thrive. Let’s get started!
Choosing the Right Melon Variety
Before we dive into the nitty-gritty, it’s crucial to pick melon varieties that are known for their shorter growing seasons. This gives us a head start!
* Consider your climate: Different melons thrive in different climates. Watermelons generally need a longer, hotter growing season than cantaloupes or honeydews.
* Look for “early” varieties: Seed packets and plant labels will often indicate if a variety is “early” or “fast-maturing.” These are your best bet.
* My personal favorites: For watermelons, I love ‘Sugar Baby’ and ‘Bush Sugar Baby’ (great for smaller gardens!). For cantaloupes, ‘Athena’ and ‘Sarah’s Choice’ are fantastic. Honeydew ‘Early Dew’ is a reliable choice.
Starting Seeds Indoors (The Early Bird Gets the Melon!)
This is where the magic begins! Starting your melon seeds indoors gives them a significant head start, bypassing the unpredictable weather of early spring.
1. Gather your supplies: You’ll need seed starting trays or small pots (I prefer peat pots because they’re biodegradable), seed starting mix (not regular potting soil!), melon seeds, a spray bottle, and a heat mat (optional, but highly recommended).
2. Prepare the seed starting mix: Moisten the seed starting mix with water until it’s damp but not soggy.
3. Sow the seeds: Plant 2-3 seeds per pot, about 陆 inch deep. Gently cover with the seed starting mix.
4. Water gently: Use a spray bottle to mist the surface of the soil. Avoid overwatering, which can lead to rot.
5. Provide warmth: Place the seed starting trays on a heat mat, if using. Melons love warmth for germination. The ideal soil temperature is between 70-85掳F (21-29掳C).
6. Maintain moisture: Cover the seed starting trays with a clear plastic dome or plastic wrap to create a humid environment. Remove the cover once the seedlings emerge.
7. Provide light: Once the seedlings emerge, they need plenty of light. Place them under grow lights or in a very sunny window. If using a window, rotate the trays regularly to prevent the seedlings from leaning towards the light.
8. Thin the seedlings: Once the seedlings have their first true leaves (the second set of leaves), thin them to one strong seedling per pot. Snip off the weaker seedlings at the soil line with scissors. Don’t pull them out, as this can disturb the roots of the remaining seedling.
9. Harden off the seedlings: About a week before you plan to transplant the seedlings outdoors, you need to “harden them off.” This means gradually exposing them to outdoor conditions. Start by placing them outside in a sheltered spot for an hour or two each day, gradually increasing the amount of time they spend outdoors. This will help them adjust to the sun, wind, and temperature changes.
Preparing the Melon Patch (Location, Location, Location!)
Melons are sun-worshippers! They need at least 6-8 hours of direct sunlight per day. Soil preparation is also key.
1. Choose a sunny location: As I said, melons need lots of sun. Pick the sunniest spot in your garden.
2. Improve the soil: Melons thrive in well-drained, fertile soil. Amend the soil with plenty of compost or well-rotted manure. This will improve drainage, add nutrients, and help retain moisture.
3. Check the soil pH: Melons prefer a slightly acidic soil pH, between 6.0 and 6.8. You can test your soil pH with a soil testing kit. If the pH is too high, you can lower it by adding sulfur or peat moss.
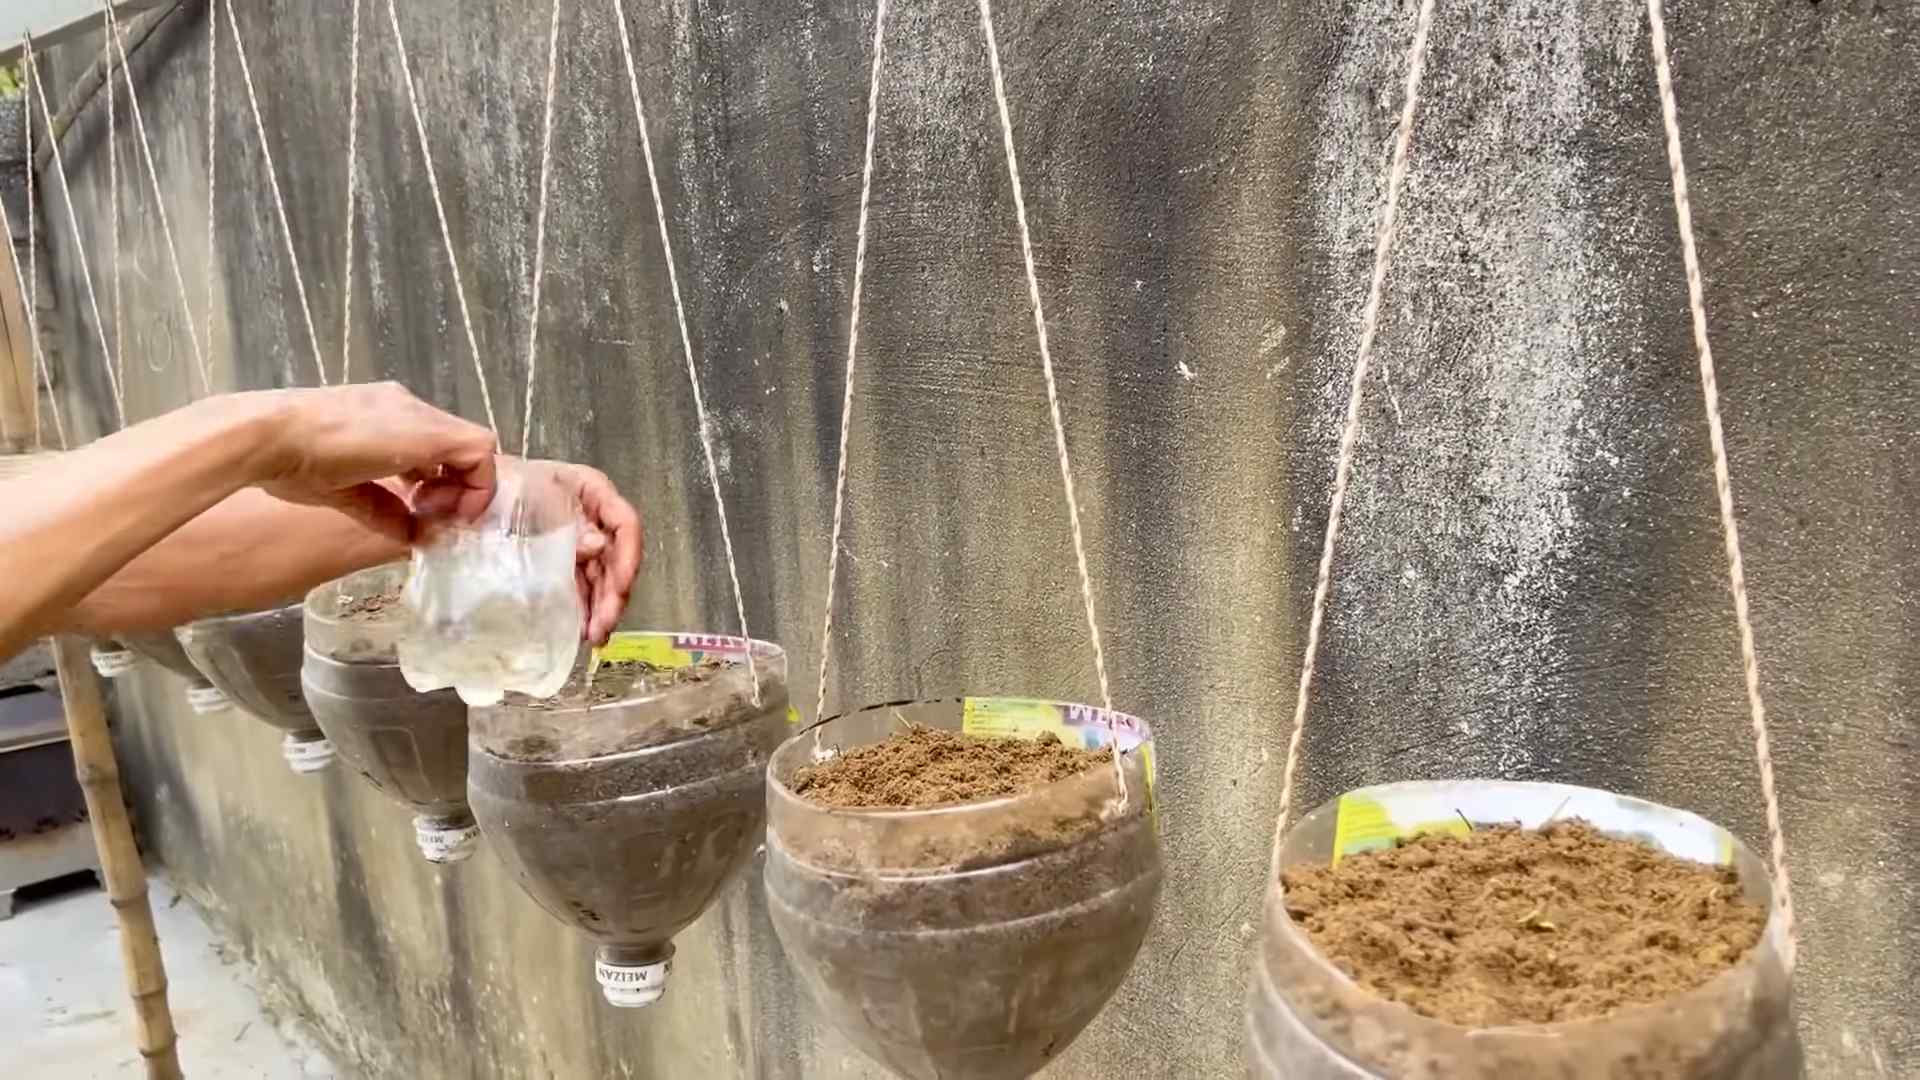
4. Create raised beds (optional): Raised beds can improve drainage and warm up the soil faster in the spring. This is especially helpful in cooler climates.
5. Consider using black plastic mulch: Black plastic mulch warms the soil, suppresses weeds, and helps retain moisture. Lay the plastic mulch before transplanting the seedlings.
Transplanting and Protecting Your Melon Seedlings
This is a delicate stage, so handle your seedlings with care.
1. Wait for warm weather: Don’t transplant your melon seedlings outdoors until the danger of frost has passed and the soil has warmed up to at least 60掳F (15掳C).
2. Prepare the planting holes: Dig holes that are slightly larger than the root balls of the seedlings. Space the holes according to the recommended spacing for your chosen melon variety (usually 2-3 feet apart).
3. Transplant carefully: Gently remove the seedlings from their pots. If you used peat pots, you can plant the entire pot directly into the ground. Otherwise, gently loosen the roots and place the seedlings in the planting holes.
4. Water thoroughly: Water the seedlings immediately after transplanting.
5. Protect from pests: Young melon seedlings are vulnerable to pests like cutworms and squash bugs. Use row covers or netting to protect them. You can also sprinkle diatomaceous earth around the base of the plants to deter pests.
6. Provide support (for vining varieties): If you’re growing vining melon varieties, provide them with support, such as a trellis or fence. This will help keep the fruits off the ground and prevent rot.
Boosting Growth with Smart Watering and Feeding
Consistent watering and proper fertilization are essential for healthy melon growth.
1. Water deeply and regularly: Melons need consistent moisture, especially during fruit development. Water deeply and regularly, especially during dry spells. Aim for about 1-2 inches of water per week.
2. Avoid overhead watering: Overhead watering can lead to fungal diseases. Water at the base of the plants, using a soaker hose or drip irrigation system.
3. Fertilize regularly: Melons are heavy feeders. Fertilize them regularly with a balanced fertilizer, such as 10-10-10. Follow the instructions on the fertilizer label.
4. Side-dress with compost: In addition to regular fertilization, side-dress the plants with compost every few weeks. This will provide them with a slow-release source of nutrients.
5. Foliar feed (optional): You can also foliar feed the plants with a seaweed extract or fish emulsion. This will provide them with micronutrients and help boost their growth.
The Secret Weapon: The Epsom Salt Boost!
This is my little secret for sweeter, more abundant melons. Epsom salt (magnesium sulfate) provides magnesium, which is essential for chlorophyll production and nutrient uptake.
1. Mix the Epsom salt solution: Dissolve 1 tablespoon of Epsom salt in 1 gallon of water.
2. Apply the solution: Spray the foliage of the melon plants with the Epsom salt solution every 2-3 weeks, starting when the plants begin to flower.
3. Don’t overdo it: Too much Epsom salt can be harmful to the plants. Stick to the recommended dosage.
Hand-Pollinating for Guaranteed Fruit Set
Sometimes, bees aren’t as reliable as we’d like. Hand-pollinating ensures you get a good fruit set.
1. Identify male and female flowers: Male flowers have a long, thin stem, while female flowers have a small, immature fruit at the base of the flower.
2. Pollinate in the morning: Pollinate the flowers in the morning, when the pollen is most viable.
3. Transfer the pollen: Use a small paintbrush or cotton swab to collect pollen from the male flower. Then, gently brush the pollen onto the stigma (the sticky part) of the female flower.
4. Repeat daily: Repeat the hand-pollination process daily until you see the fruit starting to develop.
Protecting Developing Melons
As your melons grow, protect them from pests and diseases.
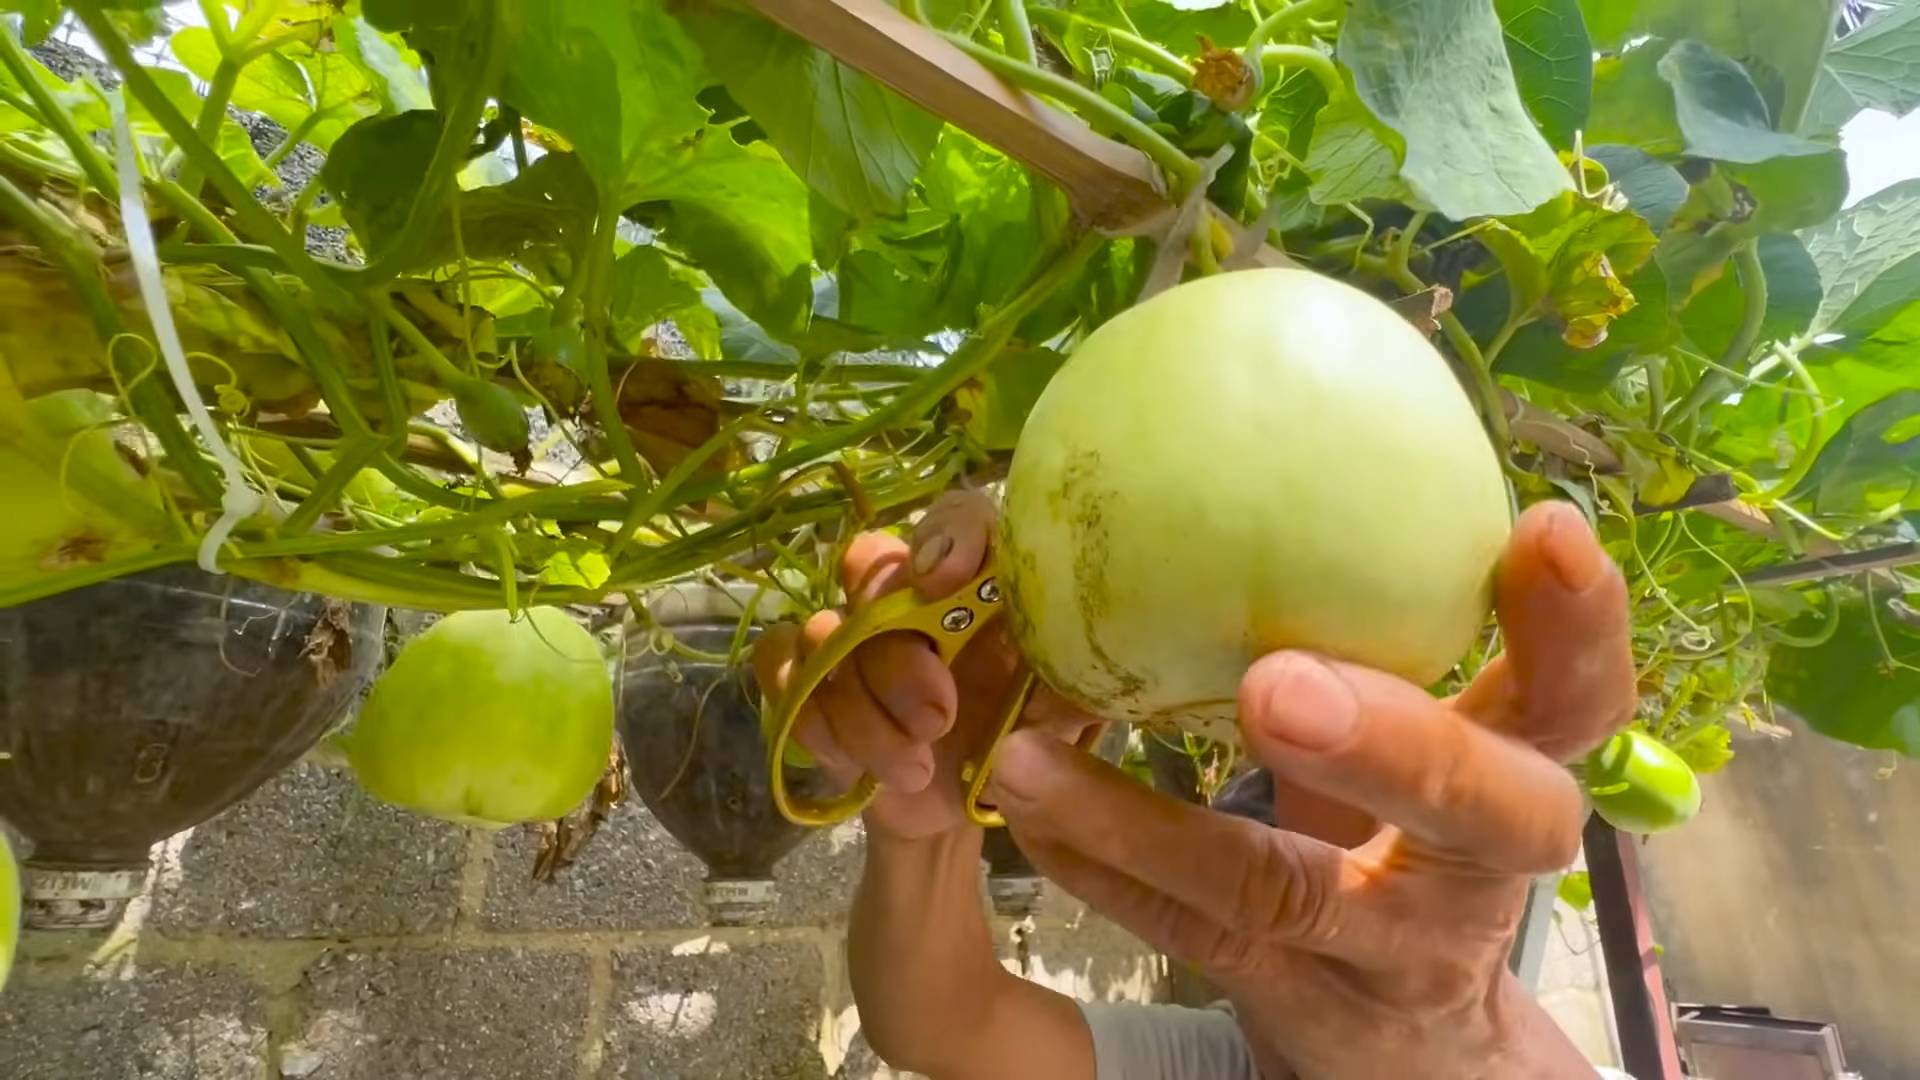
1. Elevate the melons: Place the developing melons on a piece of wood, cardboard, or straw to prevent them from rotting on the ground.
2. Protect from pests: Continue to monitor the plants for pests and diseases. Use organic pest control methods, such as insecticidal soap or neem oil, to control pests.
3. Prevent fungal diseases: To prevent fungal diseases, ensure good air circulation around the plants and avoid overhead watering. You can also spray the plants with a copper fungicide.
Harvesting Your Prize-Winning Melons
Knowing when to harvest is
Conclusion
So, there you have it! This simple, yet effective DIY trick to grow melons faster is a game-changer for any gardener, regardless of experience level. We’ve walked you through the process, highlighting the benefits of increased warmth, improved drainage, and enhanced nutrient absorption. No more waiting impatiently for those juicy, sweet melons to ripen. Imagine biting into a perfectly ripe watermelon, cantaloupe, or honeydew that you nurtured from seed to table in record time.
This isn’t just about speed; it’s about maximizing your yield and enjoying the fruits (literally!) of your labor. By implementing this method, you’re creating an optimal environment for your melon plants to thrive, leading to healthier, more robust growth and ultimately, a more abundant harvest. Think of the satisfaction of sharing your homegrown melons with friends and family, knowing you played a key role in their deliciousness.
But don’t just take our word for it. We encourage you to try this DIY trick in your own garden. Experiment with different melon varieties to see which ones respond best. Consider using different types of mulch, such as straw or black plastic, to further enhance the warming effect. You could even try combining this technique with other melon-growing strategies, like companion planting, for even better results.
For those in cooler climates, consider starting your melon seeds indoors a few weeks before the last expected frost. This will give your plants a head start and ensure they have enough time to mature before the growing season ends. You can also use row covers to protect your plants from frost and pests, further extending the growing season.
Remember, gardening is all about experimentation and learning. Don’t be afraid to tweak this method to suit your specific needs and conditions. The key is to provide your melon plants with the warmth, drainage, and nutrients they need to flourish.
We’re confident that this DIY trick will help you grow melons faster and enjoy a bountiful harvest. Now, it’s your turn to get your hands dirty and experience the magic for yourself. We can’t wait to hear about your results! Share your experiences, tips, and photos in the comments below. Let’s build a community of melon-growing enthusiasts and learn from each other. Happy gardening!
Frequently Asked Questions (FAQ)
Q: What kind of melons does this DIY trick work best for?
A: This trick is effective for a wide variety of melons, including watermelons, cantaloupes, honeydews, and even smaller varieties like Galia melons. The key is to ensure the melon variety you choose is suitable for your climate and growing conditions. Some melons are more heat-tolerant than others, so do your research before planting. Generally, larger melons like watermelons will benefit the most from the extra warmth and drainage provided by this method, as they require a longer growing season. However, even smaller melons will ripen faster and produce a sweeter flavor with this technique.
Q: How much faster can I expect my melons to grow using this method?
A: The exact time frame will vary depending on several factors, including your climate, the specific melon variety, and the overall growing conditions. However, you can generally expect to see a noticeable difference in the ripening time. In some cases, you may be able to harvest your melons up to two weeks earlier than you would without using this trick. The increased warmth and improved drainage will help the plants grow faster and more efficiently, leading to earlier fruit production. Keep in mind that consistent watering and fertilization are also crucial for optimal growth.
Q: What if I live in a very hot climate? Will this trick still work?
A: Yes, this trick can still be beneficial even in hot climates, but you may need to make some adjustments. In extremely hot weather, the black plastic or dark-colored mulch can actually overheat the soil, potentially damaging the plants. To prevent this, consider using a lighter-colored mulch, such as straw or wood chips, which will reflect some of the sunlight and help keep the soil cooler. You can also provide some shade for your melon plants during the hottest part of the day, using shade cloth or other materials. Monitor the soil temperature closely and adjust your watering schedule as needed to prevent the soil from drying out too quickly.
Q: Can I use this trick in containers or raised beds?
A: Absolutely! This DIY trick is easily adaptable for container gardening and raised beds. In fact, it can be even more effective in these settings, as you have greater control over the soil composition and drainage. When using containers, make sure they are large enough to accommodate the mature size of the melon plants. Choose a well-draining potting mix and add some compost or other organic matter to improve fertility. In raised beds, you can create a similar mound of soil as described in the instructions, ensuring good drainage and ample space for the melon plants to spread.
Q: What kind of fertilizer should I use for my melon plants?
A: Melons are heavy feeders and require a balanced fertilizer to thrive. Look for a fertilizer that is specifically formulated for fruits and vegetables, or one that has a balanced NPK ratio (nitrogen, phosphorus, and potassium). During the early stages of growth, a fertilizer with a higher nitrogen content will promote leafy growth. Once the plants start to flower and produce fruit, switch to a fertilizer with a higher phosphorus and potassium content, which will encourage fruit development and sweetness. Be sure to follow the instructions on the fertilizer label and avoid over-fertilizing, as this can damage the plants. Organic fertilizers, such as compost tea or fish emulsion, are also excellent options for feeding your melon plants.
Q: How often should I water my melon plants?
A: Melons need consistent watering, especially during hot weather and when the fruits are developing. Water deeply and regularly, aiming to keep the soil consistently moist but not waterlogged. The frequency of watering will depend on your climate, soil type, and the size of your plants. As a general rule, water deeply every few days, or more often if the soil feels dry to the touch. Avoid overhead watering, as this can promote fungal diseases. Instead, water at the base of the plants, using a soaker hose or drip irrigation system. Mulching around the plants will also help to retain moisture in the soil.
Q: Are there any common pests or diseases that affect melon plants?
A: Yes, melon plants can be susceptible to a variety of pests and diseases, including aphids, squash bugs, vine borers, powdery mildew, and fusarium wilt. To prevent these problems, practice good garden hygiene, such as removing weeds and debris from around the plants. Inspect your plants regularly for signs of pests or diseases and take action promptly if you notice any problems. You can use organic pest control methods, such as insecticidal soap or neem oil, to control aphids and other pests. For fungal diseases, ensure good air circulation around the plants and avoid overhead watering. If you suspect your plants have a serious disease, consult with your local agricultural extension office for advice on treatment options.
Q: What are some tips for knowing when my melons are ripe?
A: Determining when a melon is ripe can be tricky, but there are a few telltale signs to look for. For watermelons, look for a dull, rather than shiny, rind. The spot where the melon rests on the ground (the “ground spot”) should be yellow or cream-colored. You can also thump the melon; a ripe watermelon will have a deep, hollow sound. For cantaloupes, the stem should slip easily from the fruit when it’s ripe. The melon should also have a fragrant aroma. Honeydews are ripe when the rind turns a creamy yellow color and the blossom end is slightly soft to the touch. With practice, you’ll develop a knack for knowing when your melons are perfectly ripe and ready to harvest.

Leave a Comment