
Grow Iceberg Lettuce From Seed? Absolutely! Imagine biting into a crisp, refreshing head of iceberg lettuce that you nurtured from a tiny seed right in your own backyard. Forget those limp, pre-packaged heads from the grocery store. We’re talking about vibrant, flavorful lettuce bursting with freshness, ready to elevate your salads and sandwiches.
Home gardening, especially growing your own vegetables, has seen a huge resurgence in recent years. It’s not just a trend; it’s a return to our roots! Historically, cultivating our own food was a necessity, a skill passed down through generations. Now, it’s a way to connect with nature, reduce our carbon footprint, and enjoy the unparalleled taste of homegrown produce. And let’s be honest, there’s a certain satisfaction in knowing exactly where your food comes from and that it’s free from unwanted chemicals.
Many people shy away from growing iceberg lettuce, thinking it’s too difficult. But I’m here to tell you that with a few simple tricks and a little patience, you can successfully grow iceberg lettuce from seed, even if you’re a beginner gardener. This DIY guide will walk you through every step of the process, from selecting the right seeds to harvesting your own delicious heads of lettuce. So, let’s ditch the store-bought stuff and embark on this rewarding gardening adventure together!

Grow Your Own Crisp Iceberg Lettuce: A DIY Guide From Seed to Salad!
Hey there, fellow gardening enthusiasts! I’m so excited to share my tried-and-true method for growing crisp, refreshing iceberg lettuce right in your own backyard (or even on your balcony!). Forget those sad, wilted heads at the grocery store – with a little patience and these simple steps, you’ll be enjoying fresh, homegrown lettuce in no time. Let’s dive in!
What You’ll Need: The Essential Supplies
Before we get our hands dirty, let’s gather everything we need. Trust me, having everything organized beforehand will make the whole process much smoother.
* Iceberg Lettuce Seeds: Choose a reputable seed supplier for the best germination rates. I personally love [mention a brand you like].
* Seed Starting Trays or Small Pots: These are essential for starting your seeds indoors. I prefer trays with individual cells to minimize root disturbance when transplanting.
* Seed Starting Mix: This is a light, sterile soil mix specifically designed for seedlings. Don’t use regular garden soil – it’s too heavy and can harbor diseases.
* Watering Can or Spray Bottle: Gentle watering is key, especially for delicate seedlings.
* Grow Lights (Optional but Recommended): If you don’t have a sunny windowsill, grow lights will provide the necessary light for healthy seedling growth.
* Garden Soil or Potting Mix: For transplanting your seedlings into their final growing location.
* Fertilizer (Optional): A balanced fertilizer can help boost growth, but it’s not strictly necessary. I like to use a liquid seaweed extract.
* Gardening Gloves: To keep your hands clean and protected.
* Trowel or Small Shovel: For transplanting.
* Slug and Snail Bait (Optional): These pests love lettuce, so be prepared to protect your crop.
* Row Covers (Optional): To protect your lettuce from extreme weather and pests.
Section 1: Starting Your Seeds Indoors
Starting your lettuce seeds indoors gives them a head start, especially if you live in an area with a short growing season. This also allows you to control the environment and protect your seedlings from harsh weather.
1. Prepare Your Seed Starting Trays: Fill each cell of your seed starting tray with seed starting mix. Gently tap the tray to settle the mix.
2. Sow the Seeds: Place 2-3 lettuce seeds in each cell. Cover the seeds with a thin layer of seed starting mix (about 1/4 inch).
3. Water Gently: Use a spray bottle or watering can with a gentle rose to moisten the soil. Avoid overwatering, as this can lead to damping off (a fungal disease that kills seedlings).
4. Provide Light: Place the seed starting tray under grow lights or on a sunny windowsill. If using grow lights, keep them about 2-4 inches above the seedlings.
5. Maintain Moisture: Keep the soil consistently moist, but not soggy. Check the soil daily and water as needed.
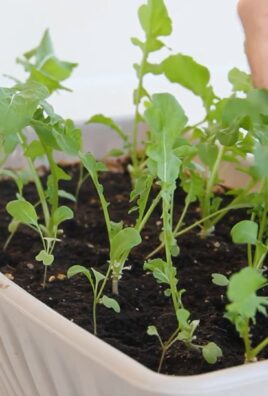
6. Thin Seedlings (If Necessary): Once the seedlings have their first true leaves (the second set of leaves), thin them to one seedling per cell. Choose the strongest, healthiest seedling and snip off the others at the soil line. Don’t pull them out, as this can disturb the roots of the remaining seedling.
7. Harden Off Seedlings: About a week before you plan to transplant your seedlings outdoors, you’ll need to “harden them off.” This means gradually exposing them to outdoor conditions to help them adjust. Start by placing the seedlings outdoors in a sheltered location for a few hours each day, gradually increasing the amount of time they spend outside. Protect them from direct sunlight and strong winds.
Section 2: Transplanting Your Lettuce Seedlings Outdoors
Once your seedlings are hardened off and the weather is right, it’s time to transplant them into your garden.
1. Choose a Location: Iceberg lettuce prefers a sunny location with well-drained soil. Aim for at least 6 hours of sunlight per day.
2. Prepare the Soil: Amend the soil with compost or other organic matter to improve drainage and fertility. Lettuce prefers a slightly acidic soil pH (around 6.0-6.8).
3. Dig Holes: Dig holes that are slightly larger than the root balls of your seedlings. Space the holes about 12 inches apart.
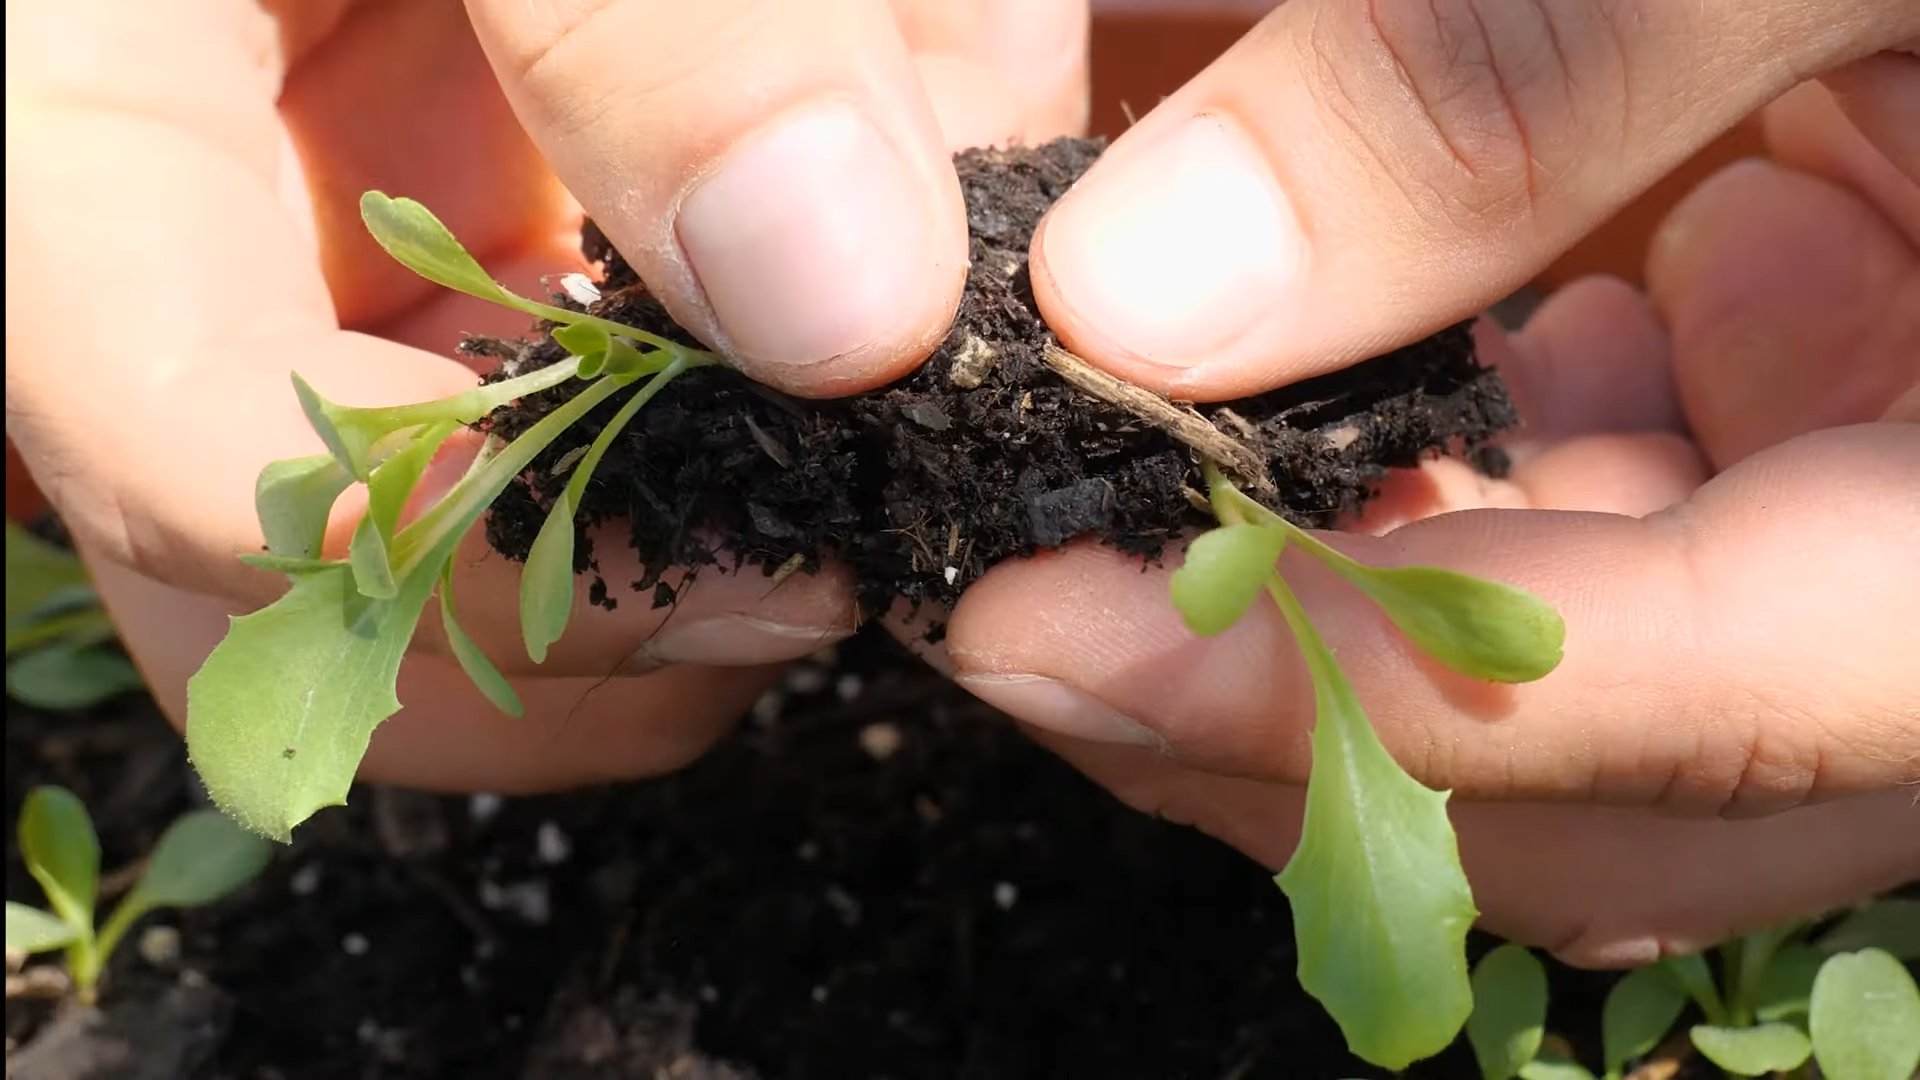
4. Gently Remove Seedlings: Carefully remove the seedlings from their cells, being careful not to damage the roots. If the roots are tightly bound, gently loosen them with your fingers.
5. Transplant Seedlings: Place the seedlings in the holes and backfill with soil. Gently firm the soil around the base of the plants.
6. Water Thoroughly: Water the transplanted seedlings thoroughly to help them settle in.
7. Apply Slug and Snail Bait (Optional): If you’ve had problems with slugs and snails in the past, apply slug and snail bait around the base of the plants.
8. Install Row Covers (Optional): Row covers can protect your lettuce from pests, extreme weather, and even help to retain moisture.
Section 3: Caring for Your Growing Lettuce
Now that your lettuce is planted, it’s time to provide the care it needs to thrive.
1. Water Regularly: Lettuce needs consistent moisture to grow well. Water deeply whenever the top inch of soil feels dry. Avoid overhead watering, as this can promote fungal diseases. Drip irrigation is a great option.
2. Fertilize (Optional): If you choose to fertilize, use a balanced fertilizer or a liquid seaweed extract every few weeks. Follow the instructions on the fertilizer package.
3. Weed Regularly: Keep the area around your lettuce plants free of weeds. Weeds compete with lettuce for water and nutrients.
4. Monitor for Pests and Diseases: Keep an eye out for pests such as aphids, slugs, and snails. Treat any infestations promptly. Also, watch for signs of fungal diseases, such as powdery mildew.
5. Protect from Extreme Weather: Lettuce is a cool-season crop and can bolt (go to seed) in hot weather. If temperatures are consistently above 80°F (27°C), provide shade for your lettuce plants. Row covers can also help protect them from frost.
Section 4: Harvesting Your Iceberg Lettuce
The moment we’ve all been waiting for! Harvesting your own homegrown iceberg lettuce is incredibly satisfying.
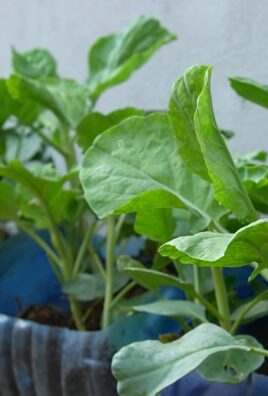
1. Check for Maturity: Iceberg lettuce is ready to harvest when the head is firm and feels solid when gently squeezed. The head should be about 6-8 inches in diameter.
2. Harvest in the Morning: Harvest your lettuce in the morning, before the sun heats up the leaves. This will help to keep them crisp and fresh.
3. Cut the Head: Use a sharp knife to cut the head of lettuce from the base of the plant.
4. Remove Outer Leaves: Remove any damaged or wilted outer leaves.
5. Wash and Store: Wash the lettuce head thoroughly and store it in a plastic bag in the refrigerator. It should keep for about a week.
Troubleshooting Tips: Common Lettuce Growing Problems
Even with the best care, you might encounter some challenges along the way. Here are a few common problems and how to address them:
* Bolting (Going to Seed): This happens when lettuce is exposed to hot weather. The plant will send up a flower stalk and the leaves will become bitter. To prevent bolting, choose heat-tolerant varieties, provide shade during hot weather, and harvest your lettuce promptly.
* Aphids: These tiny pests can suck the sap from lettuce leaves, causing them to become distorted and yellow. Spray aphids with a strong stream of water or use insecticidal soap.
* Slugs and Snails: These pests can chew holes in lettuce leaves. Use slug and snail bait or handpick them off the plants.
* Damping Off: This fungal disease can kill seedlings. To prevent damping off, use a sterile seed starting mix, avoid overwatering, and provide good ventilation.
* Tipburn: This condition causes the edges of lettuce leaves to turn brown. It’s often caused by calcium deficiency or inconsistent watering. Ensure your soil has adequate calcium and water regularly.
Extra Tips for a Bountiful Harvest
* Succession Planting: Plant new lettuce seeds every few weeks to ensure a continuous harvest throughout the growing season.
* Choose the Right Variety: Select iceberg lettuce varieties that are well-suited to your climate.
* Companion Planting: Plant lettuce alongside other vegetables that can help to deter pests or improve growth. Good companions for lettuce include carrots, radishes, and onions.
* Enjoy Your Harvest! Use your homegrown lettuce in salads, sandwiches, or wraps. It’s also delicious in soups and stir-fries.
Growing your own iceberg lettuce is a
Conclusion
So, there you have it! Growing iceberg lettuce from seed might seem daunting at first, but with a little patience and the right approach, you can enjoy crisp, homegrown lettuce straight from your garden. This DIY trick isn’t just about saving money; it’s about experiencing the satisfaction of nurturing a plant from its earliest stages to a delicious, healthy harvest. Think about the difference in flavor – the subtle sweetness and satisfying crunch that surpasses anything you can find at the grocery store. Plus, you’ll know exactly what went into growing your lettuce, ensuring it’s free from unwanted pesticides and chemicals.
But the benefits extend beyond just taste and health. Growing your own iceberg lettuce is a fantastic way to connect with nature, reduce your carbon footprint, and even get a little exercise. It’s a rewarding hobby that can bring joy and a sense of accomplishment to your life.
Why is this DIY trick a must-try? Because it empowers you to take control of your food source, offering a fresher, healthier, and more flavorful alternative to store-bought lettuce. It’s also a sustainable practice that reduces waste and promotes a more environmentally conscious lifestyle.
Now, let’s talk about variations. While we’ve focused on the traditional iceberg variety, don’t be afraid to experiment with other types of lettuce. Romaine, butterhead, and even loose-leaf varieties can be grown using similar techniques. You can also try succession planting, sowing seeds every few weeks to ensure a continuous harvest throughout the growing season. Consider companion planting too! Marigolds can help deter pests, while carrots can improve soil drainage.
Another fun variation is growing your lettuce in containers. This is perfect for those with limited space or who want to keep their lettuce closer at hand. Just make sure your containers have adequate drainage and are filled with a high-quality potting mix. You can even grow iceberg lettuce indoors under grow lights, allowing you to enjoy fresh lettuce year-round.
Finally, think about the presentation. Imagine serving a salad made entirely from your homegrown lettuce, garnished with herbs and vegetables also grown in your garden. It’s a truly special experience that you can share with family and friends.
We wholeheartedly encourage you to give this DIY trick a try. Don’t be discouraged if your first attempt isn’t perfect. Gardening is a learning process, and every mistake is an opportunity to improve. Embrace the challenge, enjoy the journey, and savor the delicious rewards.
And most importantly, we want to hear about your experience! Share your tips, tricks, and photos with us in the comments below. Let’s create a community of iceberg lettuce enthusiasts and inspire others to grow their own food. What challenges did you face? What successes did you celebrate? Your feedback is invaluable and will help us refine this guide for future gardeners. So, get your hands dirty, plant those seeds, and let’s grow some amazing iceberg lettuce together!
Frequently Asked Questions (FAQ)
What is the best time of year to plant iceberg lettuce from seed?
The best time to plant iceberg lettuce depends on your climate. Generally, it’s a cool-season crop, so you should aim to plant it in early spring or late summer/early fall. For a spring crop, start seeds indoors 6-8 weeks before the last expected frost. For a fall crop, sow seeds directly into the garden in late summer, about 8-10 weeks before the first expected frost. Check your local frost dates to determine the optimal planting time for your region.
How much sunlight does iceberg lettuce need?
Iceberg lettuce needs at least 6 hours of sunlight per day. While it can tolerate some shade, especially during the hottest part of the day, insufficient sunlight can lead to leggy growth and reduced yields. If you’re growing lettuce indoors, use grow lights to supplement natural sunlight.
What type of soil is best for growing iceberg lettuce?
Iceberg lettuce prefers well-drained, fertile soil with a pH between 6.0 and 7.0. Amend your soil with compost or other organic matter to improve drainage and fertility. Avoid heavy clay soils, as they can become waterlogged and inhibit root growth. A slightly sandy loam is ideal.
How often should I water iceberg lettuce?
Water iceberg lettuce regularly, keeping the soil consistently moist but not waterlogged. Water deeply whenever the top inch of soil feels dry. Avoid overhead watering, as this can promote fungal diseases. Drip irrigation or soaker hoses are excellent options for delivering water directly to the roots.
How long does it take for iceberg lettuce to mature from seed?
Iceberg lettuce typically takes 70-80 days to mature from seed. However, this can vary depending on the variety, growing conditions, and climate. You can start harvesting outer leaves earlier for a continuous supply of lettuce.
What are some common pests and diseases that affect iceberg lettuce?
Common pests that affect iceberg lettuce include aphids, slugs, snails, and cutworms. Diseases include downy mildew, powdery mildew, and lettuce mosaic virus. Use organic pest control methods, such as introducing beneficial insects or using insecticidal soap, to manage pests. Ensure good air circulation and avoid overhead watering to prevent diseases. Choose disease-resistant varieties whenever possible.
How do I prevent my iceberg lettuce from bolting (going to seed)?
Bolting occurs when lettuce is exposed to high temperatures or long days. To prevent bolting, plant lettuce in a location that receives some afternoon shade, especially during the summer months. Water regularly to keep the soil cool and moist. Choose bolt-resistant varieties. Harvest lettuce promptly when it reaches maturity.
Can I grow iceberg lettuce in containers?
Yes, you can grow iceberg lettuce in containers. Choose a container that is at least 12 inches deep and wide to provide enough room for the roots to grow. Use a high-quality potting mix and ensure the container has adequate drainage. Water regularly and fertilize as needed.
How do I harvest iceberg lettuce?
Harvest iceberg lettuce when the head is firm and well-formed. Use a sharp knife to cut the head at the base of the plant. You can also harvest outer leaves as needed for a continuous supply of lettuce.
How do I store iceberg lettuce after harvesting?
To store iceberg lettuce, rinse it thoroughly and pat it dry. Wrap the head in a paper towel and place it in a plastic bag in the refrigerator. It should stay fresh for up to a week.
What fertilizer should I use for iceberg lettuce?
Use a balanced fertilizer with equal amounts of nitrogen, phosphorus, and potassium (e.g., 10-10-10) or a fertilizer specifically formulated for leafy greens. Apply fertilizer according to the package directions. You can also amend the soil with compost or other organic matter to provide nutrients.
Is iceberg lettuce nutritious?
While iceberg lettuce isn’t as nutrient-dense as some other leafy greens, it still provides some vitamins and minerals, including vitamin K, vitamin A, and folate. It’s also a good source of fiber and water, which can help with digestion and hydration. Plus, it’s low in calories, making it a healthy addition to your diet.
Can I save seeds from my iceberg lettuce plants?
Saving seeds from iceberg lettuce can be tricky because it’s often a hybrid variety. Hybrid seeds may not produce plants that are true to type. If you want to save seeds, choose an heirloom or open-pollinated variety. Allow the plant to bolt and flower, then collect the seeds when they are dry and mature. Store the seeds in a cool, dry place.
What are some good companion plants for iceberg lettuce?
Good companion plants for iceberg lettuce include carrots, radishes, onions, garlic, marigolds, and nasturtiums. Carrots and radishes help to loosen the soil, while onions and garlic deter pests. Marigolds and nasturtiums also repel pests and attract beneficial insects.
How do I know when my iceberg lettuce is ready to harvest?
The best way to know when your iceberg lettuce is ready to harvest is to gently squeeze the head. If it feels firm and compact, it’s ready to go. If it feels loose or soft, it needs more time to mature. Don’t wait too long to harvest, as the head can become bitter and bolt if left in the ground for too long.

Leave a Comment