
Grow Rosemary Kitchen: Imagine stepping into your kitchen, not just to cook, but to snip fresh, fragrant rosemary straight from your own little indoor garden. Sounds dreamy, right? Well, it’s more achievable than you think! For centuries, rosemary has been cherished not only for its culinary prowess but also for its medicinal and symbolic significance, representing remembrance and love in various cultures. From ancient Greece, where students wore rosemary garlands to boost memory, to modern kitchens worldwide, this herb has a rich and fascinating history.
But let’s be honest, sometimes life gets in the way, and maintaining an outdoor herb garden feels like a Herculean task. That’s where the magic of DIY comes in! I’m here to show you some simple, effective tricks to grow rosemary kitchen style, even if you have limited space or a less-than-green thumb. We’ll explore easy methods to propagate rosemary cuttings, choose the perfect containers, and provide the ideal environment for your rosemary to thrive indoors. No more relying on expensive, often wilted, supermarket herbs. Get ready to enjoy the satisfaction of harvesting your own fresh rosemary, adding a burst of flavor and fragrance to your culinary creations. Let’s get started!
Growing Rosemary in the Kitchen: Your DIY Guide for a Green Thumb
Hey there! Are you tired of wilted rosemary from the supermarket that loses its scent after just two days? Then let’s do something about it together! I’ll show you how you can easily grow your own rosemary in the kitchen—fresh, aromatic, and always on hand. Don’t worry, it’s easier than you think!
What You Need: Your Rosemary Starter Kit
Before we get started, here is a list of everything you’ll need:
- Rosemary sprigs: Preferably from a healthy, established rosemary plant. Ask friends, neighbors, or check at a garden center. Make sure the sprigs are at least 10-15 cm (4-6 inches) long and are not flowering.
- A sharp knife or garden shears: For clean cuts that don’t unnecessarily stress the plant.
- A glass or vase: For rooting the rosemary sprigs.
- Water: Tap water that has sat out for a bit or rainwater is best.
- Rooting hormone (optional): Speeds up the rooting process, but is not strictly necessary.
- Seed-starting mix: Special soil for young plants that contains fewer nutrients and is well-draining.
- Pots: For planting the rooted rosemary sprigs. Choose pots with good drainage.
- Small stones or clay shards: For drainage in the pot.
- Spray bottle: For moistening the rosemary plants.
- A sunny spot: Rosemary loves the sun!
Phase 1: Preparing and Rooting Rosemary Sprigs
This step is crucial for success. We want to get healthy roots that will establish well in the soil later.
- Cut the rosemary sprigs: Choose healthy rosemary sprigs and cut them at an angle with a sharp knife or garden shears. The cut should be about 10-15 cm (4-6 inches) from the end of the sprig. Remove the lower leaves along about 5 cm (2 inches) of the stem. This prevents the leaves from rotting in the water.
- Rooting hormone (optional): If you are using rooting hormone, briefly dip the bottom end of the sprig into the powder or liquid. Shake off any excess hormone.
- Place rosemary sprigs in water: Fill a glass or vase with water. Place the rosemary sprigs in it so that the bottom 5 cm (2 inches) are in the water. Make sure no leaves are in the water.
- Choose a location: Place the glass with the rosemary sprigs in a bright, warm spot, but not in direct sun. A windowsill is ideal.
- Change the water: Change the water every few days to prevent the formation of bacteria.
- Be patient: It can take several weeks for roots to form. Be patient and observe the sprigs regularly. You will see small, white roots growing from the bottom end of the sprig.
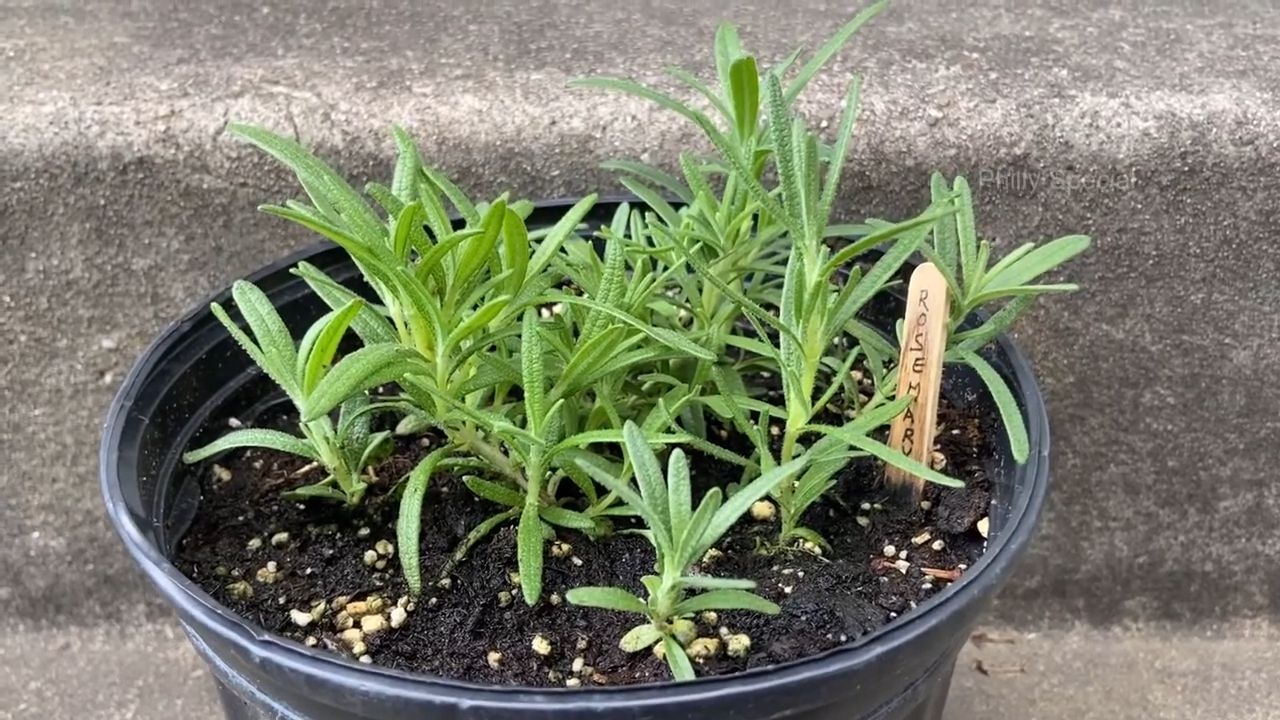
Phase 2: Planting and Caring for Rosemary
Once the roots are strong enough, we can plant the rosemary in pots.
- Prepare the pots: Choose pots with good drainage. Place a layer of small stones or clay shards at the bottom of the pot to prevent waterlogging.
- Fill the pots with seed-starting mix: Fill the pots with the mix. Leave about 2-3 cm (1 inch) of space at the top.
- Plant the rosemary sprigs: Dig a small hole in the soil and carefully place the rooted rosemary sprig inside. Be careful not to damage the roots. Fill the hole with soil and press it down lightly.
- Water: Water the rosemary plants thoroughly after planting. The soil should be damp, but not wet.
- Choose a location: Place the pots in a sunny spot. Rosemary needs at least 6 hours of sun per day.
- Watering: Water the rosemary plants regularly, but not too much. The soil should dry out slightly between waterings. Avoid waterlogging.
- Fertilizing (optional): During the growing season (spring and summer), fertilize the rosemary plants every few weeks with an organic fertilizer.
- Pruning: Prune the rosemary plants regularly to make them bushier and to encourage the formation of new shoots. You can use the cut sprigs for cooking or dry them.
- Overwintering: Rosemary is not frost-hardy. If you live in a region with cold winters, you should bring the rosemary plants indoors in the fall. Place them in a bright, cool spot and water them sparingly.
Additional Tips for Happy Rosemary
- Humidity: Rosemary does not like high humidity. Ensure good ventilation, especially if you keep it indoors.
- Pests: Watch out for pests like aphids or spider mites. If infested, you can treat the plants with a natural insecticide.
- Repotting: When the rosemary plant becomes too large for its pot, you should repot it into a larger one.
- Soil: Rosemary prefers alkaline soil. You can mix a little lime into the soil.
- Don’t overwater: This is the most common mistake! Rosemary tolerates drought better than waterlogging.
Common Problems and Solutions
- Yellow leaves: Can be a sign of overwatering or a nutrient deficiency. Reduce watering and fertilize the plant.
- Brown leaves: Can be a sign of drought or sunburn. Water the plant and move it to a shadier spot.
- No roots: It can take a while for roots to form. Be patient and change the water regularly. You can also use rooting hormone.
Rosemary in the Kitchen: Creative Ideas
Now that you have your own rosemary, you can use it versatilely in the kitchen:
- Rosemary oil: Place rosemary sprigs in a bottle of olive oil and let them infuse for a few weeks.
- Rosemary potatoes: Roast potatoes with rosemary, garlic, and olive oil.
- Rosemary bread: Bake bread with fresh rosemary.
- Rosemary chicken: Season chicken with rosemary, garlic, and lemon.
- Rosemary tea: Pour hot water over rosemary sprigs and let them steep.
I hope this guide helps you grow your own rosemary in the kitchen. It’s a great feeling to harvest fresh herbs right from the windowsill! Good luck and have fun gardening

Conclusion
So, there you have it! Growing rosemary in your kitchen is not just a whimsical dream for aspiring herbalists; it’s an achievable reality that can transform your culinary experience and bring a touch of the Mediterranean to your home. We’ve walked you through the simple steps, from selecting the right rosemary variety to providing the optimal growing conditions, and even troubleshooting common issues. But why is this DIY trick a must-try?
Firstly, the unparalleled freshness. Imagine snipping off a sprig of fragrant rosemary just moments before adding it to your roast chicken, focaccia bread, or infused olive oil. The aroma alone is enough to elevate your cooking, and the flavor is simply unmatched by dried herbs. You’re not just adding rosemary; you’re adding a burst of vibrant, living flavor.
Secondly, the cost-effectiveness. Think about how often you buy rosemary from the grocery store, only to use a small portion and watch the rest wilt away in your refrigerator. By growing your own, you eliminate this waste and save money in the long run. A single rosemary plant can provide you with a continuous supply of fresh herbs for months, even years, with proper care.
Thirdly, the sheer joy of nurturing a living thing. There’s something incredibly rewarding about watching a tiny rosemary cutting take root and flourish under your care. It’s a connection to nature, a reminder of the simple beauty of the natural world, and a source of constant satisfaction. Plus, rosemary is known for its air-purifying qualities, so you’re not just adding flavor to your food; you’re also improving the air quality in your kitchen.
But don’t stop there! The possibilities are endless. Experiment with different varieties of rosemary, such as creeping rosemary for hanging baskets or upright varieties for a more traditional look. Try propagating new plants from cuttings to expand your rosemary garden or share with friends and family. Infuse your own rosemary oil, create rosemary-infused vinegar, or even use the sprigs to decorate your home.
Consider these variations to enhance your rosemary growing experience:
* Rosemary Topiary: Train your rosemary plant into a beautiful topiary shape for a decorative and fragrant addition to your kitchen.
* Rosemary Companion Planting: Plant rosemary alongside other herbs like thyme and sage in a larger container for a mini herb garden.
* Rosemary Tea: Harvest fresh rosemary leaves to brew a soothing and aromatic tea.
Growing rosemary in your kitchen is more than just a gardening project; it’s an investment in your culinary creativity, your well-being, and your connection to nature. So, what are you waiting for? Grab a rosemary cutting or seedling, find a sunny spot in your kitchen, and embark on this rewarding journey. We encourage you to try this DIY trick and share your experiences with us! Let us know what varieties you’re growing, what recipes you’re using your fresh rosemary in, and any tips or tricks you’ve discovered along the way. Share your photos and stories in the comments below – we can’t wait to see your kitchen rosemary gardens flourish!
Frequently Asked Questions (FAQ)
What is the best type of rosemary to grow indoors?
While many rosemary varieties can be grown indoors, some are better suited than others. Upright varieties like ‘Blue Boy’ or ‘Spice Islands’ tend to thrive in containers and are relatively easy to manage. Prostrate or creeping varieties like ‘Prostratus’ can also be grown indoors, but they may require more space as they tend to spread. Ultimately, the best type of rosemary for you will depend on your personal preferences and the space you have available. Consider the size and growth habit of the plant when making your selection.
How much sunlight does indoor rosemary need?
Rosemary thrives in bright, sunny conditions. Ideally, your indoor rosemary plant should receive at least six to eight hours of direct sunlight per day. If you don’t have a south-facing window that provides sufficient sunlight, you may need to supplement with a grow light. Position the grow light a few inches above the plant and leave it on for several hours each day. Insufficient sunlight can lead to leggy growth, pale leaves, and a lack of fragrance.
What type of soil is best for growing rosemary in containers?
Rosemary prefers well-draining soil that is slightly acidic to neutral. A good potting mix for rosemary should consist of a combination of potting soil, perlite, and sand. This will ensure that the soil drains properly and doesn’t become waterlogged. Avoid using heavy, clay-based soils, as these can retain too much moisture and lead to root rot. You can also add a small amount of compost to the potting mix to provide additional nutrients.
How often should I water my indoor rosemary plant?
Rosemary is relatively drought-tolerant and doesn’t like to be overwatered. Allow the soil to dry out slightly between waterings. When you do water, water thoroughly until the water drains out of the bottom of the pot. Avoid letting the plant sit in standing water, as this can lead to root rot. The frequency of watering will depend on factors such as the size of the pot, the type of soil, and the temperature and humidity of your home. Check the soil moisture regularly and adjust your watering schedule accordingly.
How do I fertilize my indoor rosemary plant?
Rosemary doesn’t require heavy fertilization. In fact, over-fertilizing can actually harm the plant. Fertilize your rosemary plant sparingly, using a balanced liquid fertilizer diluted to half strength. Fertilize every two to three months during the growing season (spring and summer). Avoid fertilizing during the dormant season (fall and winter).
How do I prune my indoor rosemary plant?
Pruning is essential for maintaining the shape and health of your rosemary plant. Prune regularly to encourage bushier growth and prevent the plant from becoming leggy. Use sharp, clean pruning shears to trim back the stems, removing any dead or damaged growth. You can also prune to harvest fresh rosemary for cooking. Avoid removing more than one-third of the plant at a time.
What are some common problems with growing rosemary indoors?
Some common problems with growing rosemary indoors include root rot, spider mites, and powdery mildew. Root rot is caused by overwatering and can be prevented by using well-draining soil and allowing the soil to dry out between waterings. Spider mites are tiny pests that can infest rosemary plants, causing yellowing and stippling of the leaves. They can be controlled with insecticidal soap or neem oil. Powdery mildew is a fungal disease that can cause a white, powdery coating on the leaves. It can be prevented by providing good air circulation and avoiding overhead watering.
Can I propagate rosemary from cuttings?
Yes, propagating rosemary from cuttings is a relatively easy way to create new plants. Take a 4-6 inch cutting from a healthy rosemary plant, removing the lower leaves. Dip the cut end in rooting hormone and plant it in a small pot filled with well-draining potting mix. Keep the soil moist but not soggy, and place the pot in a warm, sunny location. Roots should develop within a few weeks. Once the cutting has rooted, you can transplant it into a larger pot.
How do I overwinter my indoor rosemary plant?
Rosemary is a perennial plant, meaning it can live for several years. To overwinter your indoor rosemary plant, reduce watering and fertilization during the dormant season (fall and winter). Keep the plant in a cool, bright location. Avoid exposing the plant to freezing temperatures. In the spring, gradually increase watering and fertilization as the plant begins to grow again.
Is rosemary safe for pets?
Rosemary is generally considered safe for pets in small amounts. However, consuming large quantities of rosemary can cause gastrointestinal upset in some animals. If you have pets, it’s best to keep your rosemary plant out of their reach.


Leave a Comment