
Growing Green Beans at Home can be incredibly rewarding, offering fresh, delicious produce right at your fingertips! Have you ever imagined stepping into your backyard and harvesting a vibrant bowl of crisp, tender green beans for dinner? It’s easier than you think, and this guide is packed with simple DIY tricks to make your home gardening dreams a reality.
For centuries, cultivating beans has been a cornerstone of sustainable agriculture. From ancient civilizations relying on them as a protein source to modern-day gardeners embracing their ease of growth, beans have nourished both bodies and souls. My grandmother always had a thriving bean patch, and I remember the joy of snapping them fresh off the vine – a tradition I’m excited to share with you!
In today’s busy world, finding time for gardening can seem daunting. But with a few clever hacks, growing green beans at home doesn’t have to be a chore. Whether you’re short on space, time, or experience, these DIY tips will empower you to cultivate a bountiful harvest. Imagine the satisfaction of serving homegrown green beans to your family, knowing exactly where they came from and how they were grown. Plus, you’ll save money at the grocery store and reduce your carbon footprint – it’s a win-win!
So, grab your gardening gloves, and let’s dive into the wonderful world of growing green beans at home. I’m here to guide you every step of the way, from seed to table!
Growing Green Beans at Home: A Beginner’s Guide
Hey there, fellow gardening enthusiasts! I’m so excited to share my experience and guide you through the wonderful process of growing your own green beans at home. There’s nothing quite like the taste of fresh, homegrown green beans, and trust me, it’s easier than you think! This guide will walk you through everything you need to know, from choosing the right variety to harvesting your delicious bounty.
Choosing Your Green Bean Variety
Before we get our hands dirty, let’s talk about the different types of green beans you can grow. This is a crucial first step because it will influence how you set up your garden.
* **Bush Beans:** These are compact and don’t require any support. They’re perfect for smaller gardens or containers. They produce a large harvest all at once, making them great for canning or freezing. Some popular bush bean varieties include ‘Blue Lake Bush,’ ‘Contender,’ and ‘Provider.’
* **Pole Beans:** These beans are climbers and need a trellis or other support structure. They produce beans over a longer period, offering a continuous harvest. ‘Kentucky Wonder,’ ‘Blue Lake Pole,’ and ‘Scarlet Runner’ are excellent choices.
* **Half-Runner Beans:** As the name suggests, these are somewhere in between bush and pole beans. They’re shorter than pole beans but still benefit from some support.
I personally love growing both bush and pole beans. Bush beans are great for a quick harvest, while pole beans keep me supplied with fresh beans for weeks!
Preparing Your Garden Bed
Okay, now for the fun part – getting our hands dirty! Green beans need a sunny spot with well-drained soil. Here’s how to prepare your garden bed:
1. **Choose a Sunny Location:** Green beans need at least 6-8 hours of sunlight per day. Find a spot in your yard that gets plenty of sunshine.
2. **Test Your Soil:** It’s always a good idea to test your soil’s pH level. Green beans prefer a pH between 6.0 and 7.0. You can buy a soil testing kit at most garden centers.
3. **Amend the Soil:** Green beans thrive in well-drained soil that is rich in organic matter. If your soil is heavy clay or sandy, amend it with compost, aged manure, or other organic materials. This will improve drainage and provide essential nutrients. I usually add a generous layer of compost to my garden bed before planting.
4. **Loosen the Soil:** Use a garden fork or tiller to loosen the soil to a depth of about 12 inches. This will make it easier for the bean roots to grow.
5. **Remove Rocks and Debris:** Clear the area of any rocks, weeds, or other debris that could hinder growth.
Planting Your Green Beans
Now that your garden bed is prepped, it’s time to plant those beans!
1. **Check the Last Frost Date:** Green beans are sensitive to frost, so wait until after the last expected frost in your area to plant them. You can find the average last frost date for your region online or by contacting your local extension office.
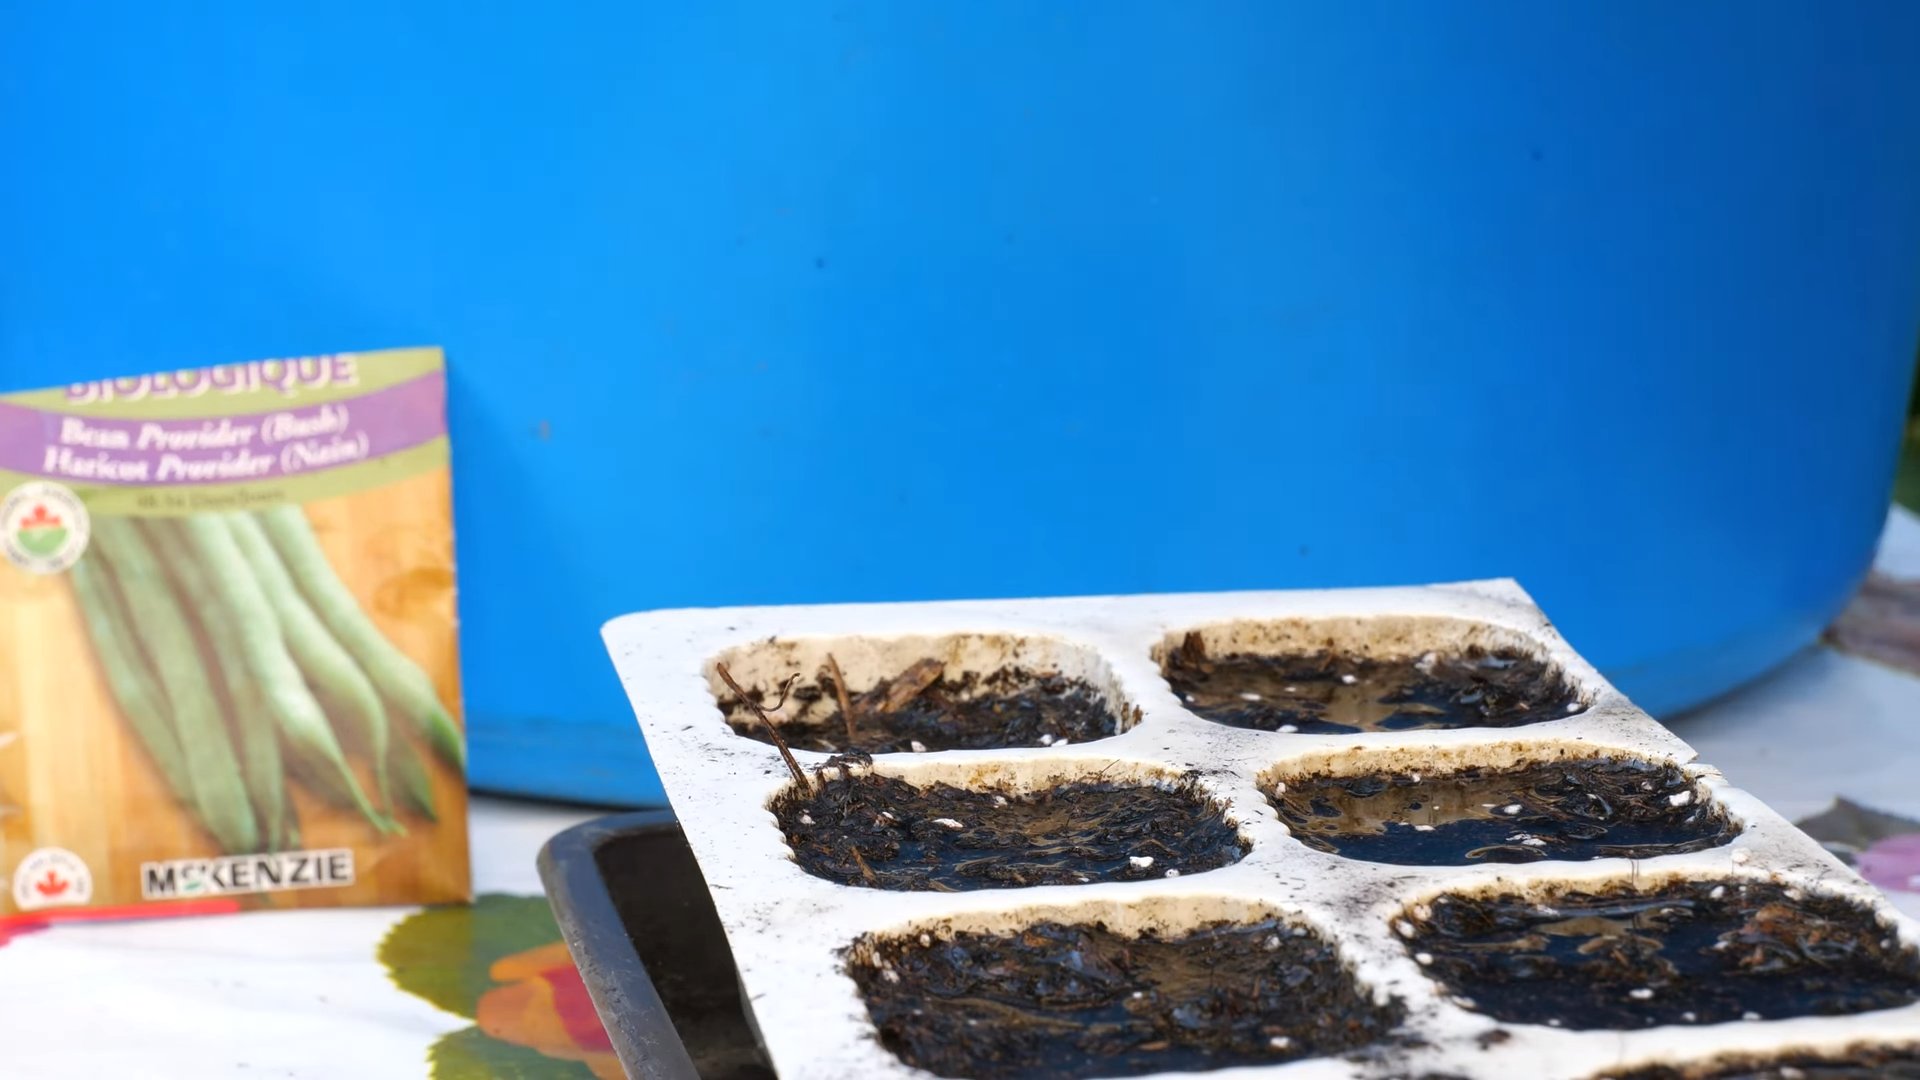
2. **Direct Sow the Seeds:** Green beans are best direct sown, meaning you plant the seeds directly into the garden bed. They don’t transplant well.
3. **Planting Bush Beans:**
* Sow seeds 1 inch deep and 2-3 inches apart in rows.
* Space rows 18-24 inches apart.
* Gently cover the seeds with soil and water thoroughly.
4. **Planting Pole Beans:**
* Install your trellis or support structure before planting.
* Sow seeds 1 inch deep and 4-6 inches apart at the base of the trellis.
* Gently cover the seeds with soil and water thoroughly.
5. **Water Regularly:** Keep the soil consistently moist, but not waterlogged, until the seeds germinate. Germination usually takes 5-10 days, depending on the soil temperature.
I like to soak my bean seeds in water for a few hours before planting. This helps to soften the seed coat and speed up germination.
Caring for Your Green Bean Plants
Once your green bean plants have sprouted, it’s important to provide them with the care they need to thrive.
1. **Watering:** Water your green bean plants regularly, especially during dry periods. Aim to keep the soil consistently moist, but avoid overwatering, which can lead to root rot. Water deeply at the base of the plants, rather than overhead, to prevent fungal diseases.
2. **Weeding:** Keep your garden bed free of weeds, which can compete with your green bean plants for nutrients and water. Hand-pull weeds regularly or use a hoe to cultivate the soil around the plants.
3. **Fertilizing:** Green beans don’t require a lot of fertilizer, but a side dressing of compost or a balanced organic fertilizer can help boost growth. Apply fertilizer according to the package directions. Avoid using fertilizers that are high in nitrogen, as this can promote leafy growth at the expense of bean production.
4. **Supporting Pole Beans:** As your pole bean plants grow, they will need support to climb. Train the vines to climb the trellis or support structure by gently guiding them in the right direction. You may need to tie the vines to the trellis with twine or plant clips.
5. **Pest and Disease Control:** Keep an eye out for common green bean pests, such as aphids, bean beetles, and spider mites. You can control these pests with insecticidal soap, neem oil, or by hand-picking them off the plants. Fungal diseases, such as powdery mildew and bean rust, can also affect green bean plants. Prevent these diseases by providing good air circulation, avoiding overhead watering, and applying a fungicide if necessary.
I’ve found that companion planting can also help to deter pests. Marigolds, for example, are known to repel bean beetles.
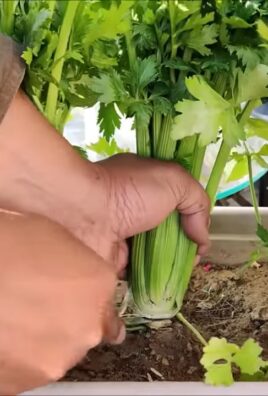
Harvesting Your Green Beans
The moment we’ve all been waiting for – harvesting those delicious green beans!
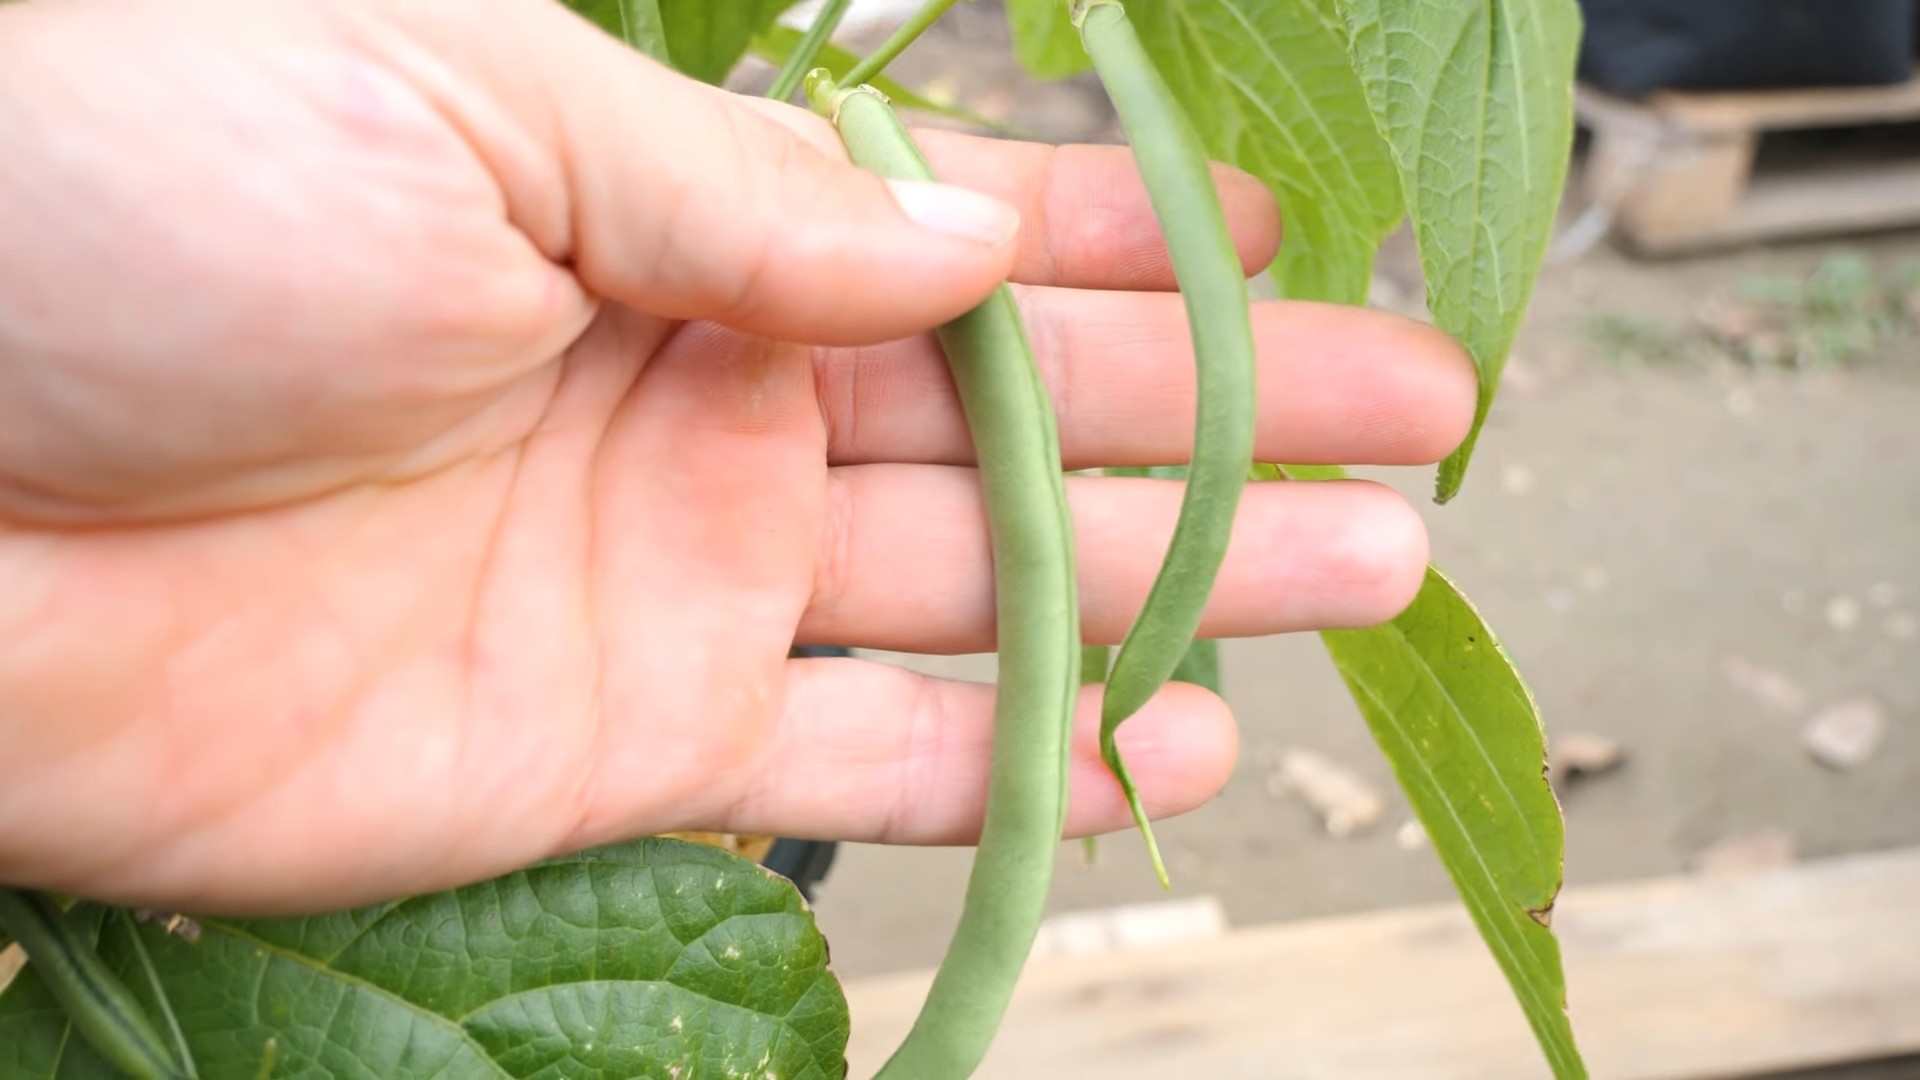
1. **Harvest Time:** Green beans are typically ready to harvest 50-60 days after planting, depending on the variety. The beans should be firm, crisp, and snap easily when bent.
2. **Harvesting Technique:** Harvest green beans by gently snapping them off the plant. Be careful not to damage the plant or surrounding beans.
3. **Regular Harvesting:** Harvest your green beans regularly, every few days, to encourage continued production. Overripe beans can become tough and stringy, and they will signal the plant to stop producing new beans.
4. **Storage:** Freshly harvested green beans can be stored in the refrigerator for up to a week. Store them in a plastic bag or container to prevent them from drying out.
I love to eat my green beans fresh from the garden, but they’re also delicious steamed, sautéed, or roasted. You can also preserve them by canning, freezing, or pickling.
Troubleshooting Common Problems
Even with the best care, you may encounter some problems while growing green beans. Here are a few common issues and how to address them:
* **Poor Germination:** If your bean seeds aren’t germinating, it could be due to cold soil, poor soil drainage, or old seeds. Make sure the soil temperature is at least 60°F before planting, improve soil drainage by adding compost, and use fresh seeds.
* **Yellowing Leaves:** Yellowing leaves can be a sign of nutrient deficiency, overwatering, or disease. Test your soil to check for nutrient deficiencies, avoid overwatering, and treat any diseases promptly.
* **Lack of Bean Production:** If your green bean plants are growing well but not producing beans, it could be due to lack of pollination, high temperatures, or excessive nitrogen fertilizer. Ensure that bees and other pollinators have access to your garden, avoid planting during periods of extreme heat, and use a balanced fertilizer.
* **Pest Infestations:** As mentioned earlier, aphids, bean beetles, and spider mites can be a problem. Use insecticidal soap, neem oil, or hand-pick the pests off the plants.
* **Diseases:** Fungal diseases like powdery mildew and bean rust can affect green bean plants. Provide good air circulation, avoid overhead watering, and apply a fungicide if necessary.
Growing green beans at home is a rewarding experience that anyone can enjoy. With a little planning and care, you can have a bountiful harvest of fresh, delicious green beans right in your own backyard. Happy gardening!
Conclusion
So, there you have it! Growing green beans at home is not only achievable, but it’s also incredibly rewarding. From the satisfying crunch of a freshly picked bean to the vibrant green hues adorning your garden, this DIY project offers a multitude of benefits that far outweigh the minimal effort required. We’ve walked you through the essential steps, from selecting the right variety and preparing your soil to providing adequate support and diligently watering your plants.
But why is this DIY trick a must-try? Beyond the obvious advantage of having fresh, organic green beans readily available, growing your own offers a deeper connection to your food. You control the entire process, ensuring that no harmful pesticides or chemicals come near your dinner table. Plus, gardening is a fantastic stress reliever! The simple act of nurturing a plant and watching it thrive can be incredibly therapeutic. And let’s not forget the cost savings! Over time, growing your own green beans can significantly reduce your grocery bill.
Now, for a few suggestions and variations to truly personalize your green bean growing experience. Consider companion planting! Marigolds, for example, are known to deter bean beetles, while nasturtiums can attract aphids away from your precious green beans. Experiment with different varieties! Bush beans are great for smaller spaces, while pole beans offer a more abundant harvest if you have the room. You can also try succession planting, sowing new seeds every few weeks to ensure a continuous supply of fresh green beans throughout the growing season. For a unique twist, try growing purple or yellow wax beans – they add a splash of color to your garden and your plate! Think about adding a trellis or teepee structure for your pole beans. This not only provides support but also adds an aesthetic element to your garden.
Growing green beans at home is a journey, not just a destination. Don’t be afraid to experiment, learn from your mistakes, and adapt your approach as needed. The key is to be patient, observant, and responsive to the needs of your plants.
We wholeheartedly encourage you to give this DIY trick a try. Imagine the satisfaction of serving a meal featuring green beans that you nurtured from seed to table. It’s an experience that’s both fulfilling and delicious.
And finally, we want to hear from you! Share your experiences, successes, and challenges in the comments below. What varieties did you try? What tips and tricks did you discover along the way? Your insights can help other aspiring gardeners embark on their own green bean growing adventures. Let’s create a community of green bean enthusiasts, sharing our knowledge and celebrating the joys of homegrown goodness. So, grab your seeds, get your hands dirty, and start growing your own delicious green beans today! We can’t wait to see what you create!
Frequently Asked Questions (FAQ)
What is the best time of year to plant green beans?
The ideal time to plant green beans is after the last frost in spring, when the soil has warmed to at least 60°F (15°C). Green beans are sensitive to cold temperatures, so planting too early can stunt their growth or even kill them. In most regions, this typically falls between late spring and early summer. You can also plant a second crop in late summer for a fall harvest, provided you have enough time before the first frost. Check your local frost dates to determine the best planting time for your area.
How much sun do green beans need?
Green beans require at least 6-8 hours of direct sunlight per day to thrive. Choose a location in your garden that receives full sun throughout the day. If you live in a particularly hot climate, some afternoon shade can be beneficial to prevent the plants from overheating. Insufficient sunlight can lead to leggy growth, reduced yields, and increased susceptibility to diseases.
What kind of soil is best for growing green beans?
Green beans prefer well-drained, fertile soil with a pH between 6.0 and 7.0. Amend your soil with compost or other organic matter to improve drainage and fertility. Avoid heavy clay soils, as they can become waterlogged and inhibit root growth. A slightly sandy loam is ideal. Before planting, test your soil pH and amend accordingly to ensure optimal growing conditions.
How often should I water my green beans?
Green beans need consistent moisture, especially during flowering and pod development. Water deeply and regularly, aiming to keep the soil consistently moist but not waterlogged. Water at the base of the plants to avoid wetting the foliage, which can increase the risk of fungal diseases. The frequency of watering will depend on the weather conditions and soil type. Check the soil moisture regularly and water when the top inch feels dry to the touch.
Do green beans need fertilizer?
While green beans don’t require heavy fertilization, a balanced fertilizer can help promote healthy growth and abundant yields. Apply a fertilizer with a ratio of 5-10-10 (nitrogen-phosphorus-potassium) at planting time, following the instructions on the package. Avoid over-fertilizing with nitrogen, as this can lead to excessive foliage growth at the expense of pod production. You can also side-dress your plants with compost tea or other organic fertilizers during the growing season.
How do I prevent pests and diseases from affecting my green beans?
Several pests and diseases can affect green beans, including bean beetles, aphids, and fungal diseases like powdery mildew. To prevent problems, practice good garden hygiene, such as removing weeds and debris that can harbor pests and diseases. Inspect your plants regularly for signs of infestation or disease and take action promptly. Use organic pest control methods, such as insecticidal soap or neem oil, to control pests. Ensure good air circulation around your plants to prevent fungal diseases. Crop rotation can also help reduce the risk of soilborne diseases.
When are green beans ready to harvest?
Green beans are typically ready to harvest 50-60 days after planting, depending on the variety. Harvest the pods when they are firm, crisp, and fully developed but before the beans inside become too large and tough. Pick the beans regularly to encourage continued production. Snap the pods off the plant carefully to avoid damaging the stems.
Can I grow green beans in containers?
Yes, green beans can be successfully grown in containers, especially bush bean varieties. Choose a large container with good drainage and fill it with a well-draining potting mix. Provide adequate support for the plants, such as a trellis or stakes. Water and fertilize regularly, as container-grown plants tend to dry out and deplete nutrients more quickly than those grown in the ground. Place the container in a sunny location that receives at least 6-8 hours of direct sunlight per day.
What are some common problems when growing green beans and how can I fix them?
Some common problems include:
* **Poor germination:** Ensure the soil is warm enough and not too wet. Use fresh seeds.
* **Yellowing leaves:** Could indicate nutrient deficiency (especially nitrogen), overwatering, or disease. Amend soil, adjust watering, and treat diseases.
* **Lack of flowers or pods:** Could be due to insufficient sunlight, over-fertilization with nitrogen, or extreme temperatures. Ensure adequate sunlight, use a balanced fertilizer, and protect plants from extreme weather.
* **Pest infestations:** Use organic pest control methods like insecticidal soap or neem oil.
How do I store green beans after harvesting?
Freshly harvested green beans can be stored in the refrigerator for up to a week. Place them in a plastic bag or container and keep them cool and moist. For longer storage, you can blanch and freeze the beans. To blanch, boil the beans for 2-3 minutes, then immediately plunge them into ice water to stop the cooking process. Drain the beans thoroughly and freeze them in freezer bags or containers. You can also can or pickle green beans for long-term storage.
Leave a Comment