
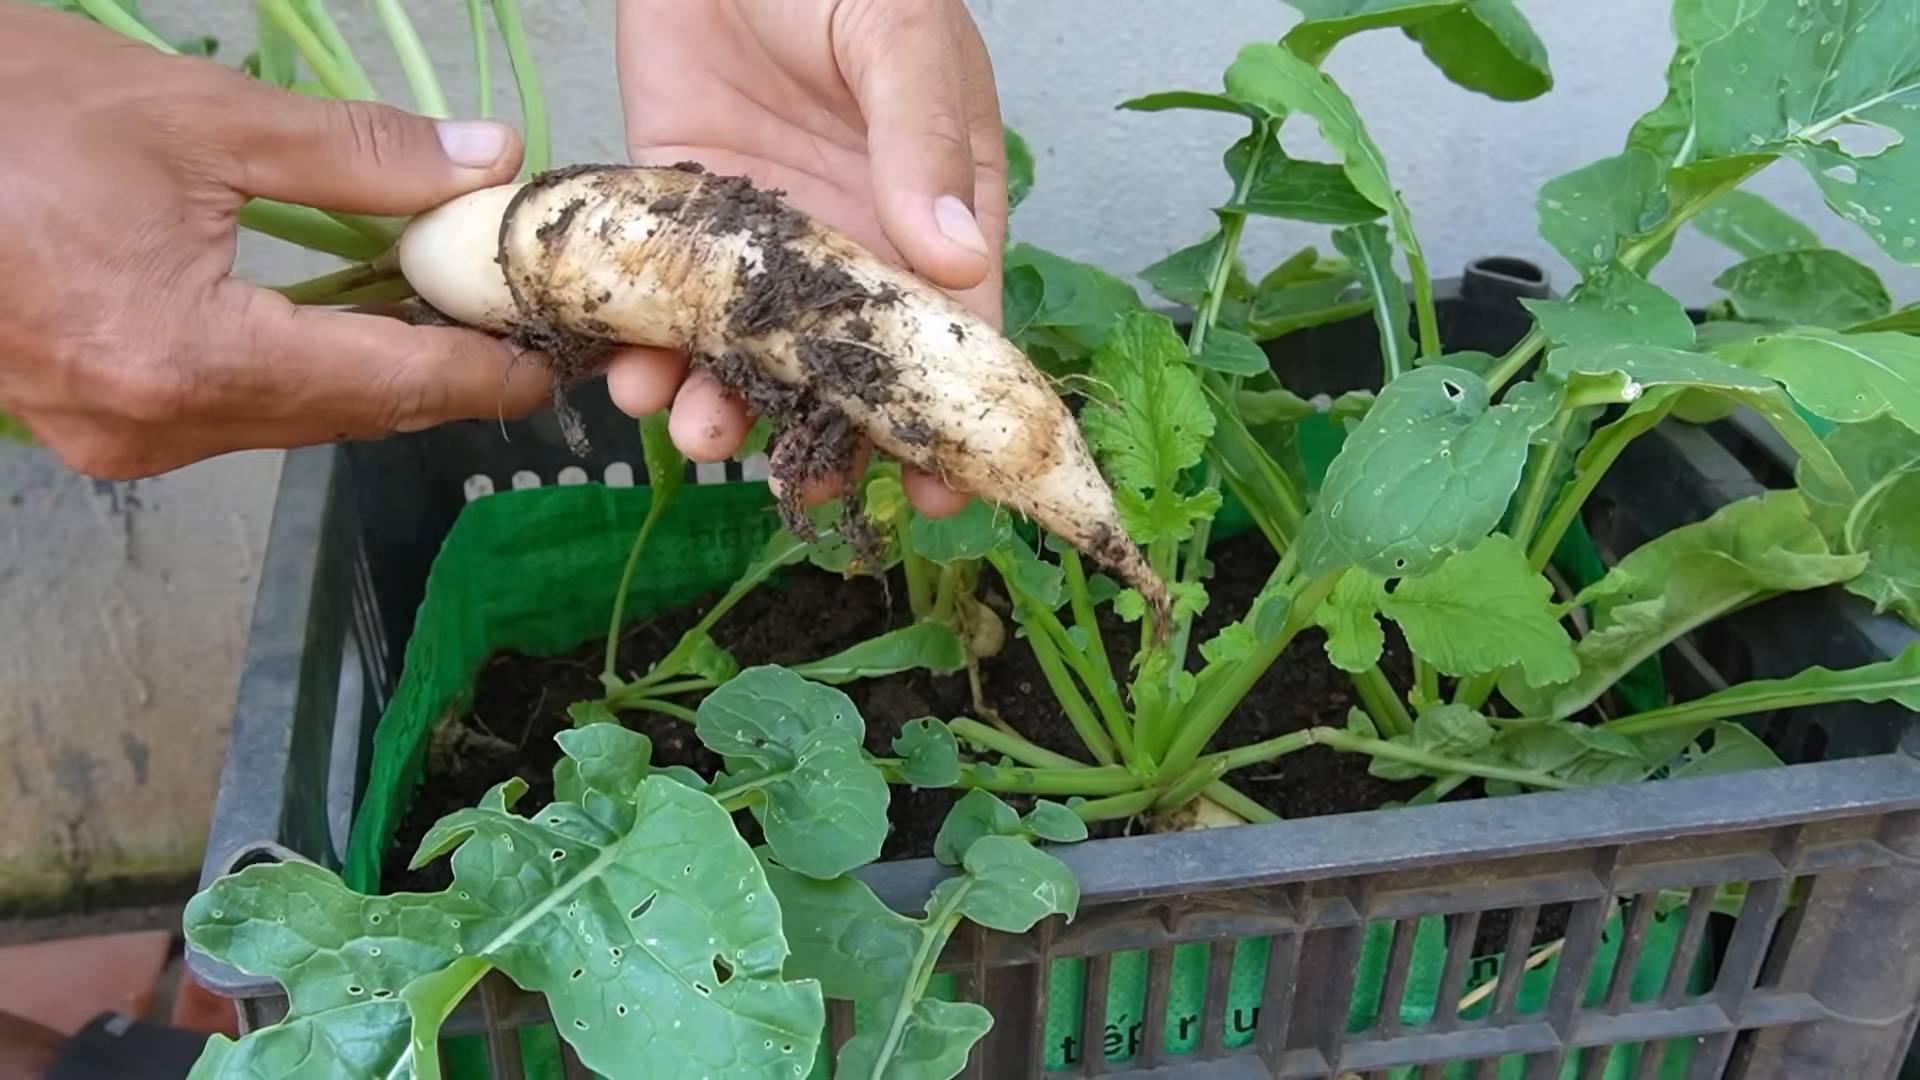
Radish yield increase tips are what every home gardener dreams about, right? Imagine plucking plump, vibrant radishes from your own backyard, enough to share with neighbors and add a peppery kick to every salad. But sometimes, those little root veggies can be a bit… underwhelming. We’ve all been there, staring at a sparse row of radishes, wondering where we went wrong.
Radishes have a surprisingly long and fascinating history, dating back to ancient Egypt! They were a staple food, even used as payment for laborers building the pyramids. Today, while we might not be paying our contractors in radishes, their quick growth and nutritional value make them a popular choice for home gardens. But getting a truly bountiful harvest requires a little know-how.
That’s where this DIY guide comes in! I’m going to share some simple, yet effective, tricks and hacks that will help you maximize your radish harvest. From soil preparation to companion planting, we’ll cover everything you need to know to achieve a radish yield increase that will make your garden the envy of the neighborhood. So, grab your gardening gloves, and let’s get started on transforming your radish patch into a thriving, peppery paradise!
Boosting Your Radish Harvest: A DIY Guide to Bigger, Better Roots!
Hey there, fellow gardeners! Are you tired of pulling up tiny, disappointing radishes? I know I was! But after some experimentation and research, I’ve discovered some simple DIY hacks that have dramatically increased my radish yield. I’m excited to share these tips with you so you can enjoy a bumper crop of crisp, spicy radishes too!
Understanding Radish Needs: The Foundation for Success
Before we dive into the DIY hacks, it’s crucial to understand what radishes need to thrive. They’re quick growers, but they’re also sensitive to certain conditions.
* Sunlight: Radishes need at least 6 hours of direct sunlight per day.
* Soil: Loose, well-draining soil is essential. Compacted soil hinders root development.
* Water: Consistent moisture is key. Radishes need regular watering, especially during hot weather.
* Nutrients: While not heavy feeders, radishes benefit from balanced soil fertility.
* Spacing: Proper spacing prevents overcrowding and allows each radish to develop fully.
DIY Hack #1: Soil Preparation is Key!
Radishes hate compacted soil. It’s like trying to grow them in concrete! So, the first and most important step is to create a loose, airy bed for them to grow in.
Step-by-Step Instructions:
1. Clear the Area: Remove any weeds, rocks, or debris from your planting area. I like to use a garden fork to loosen the soil first.
2. Amend the Soil: This is where the magic happens! I like to amend my soil with a combination of:
* Compost: Adds organic matter, improves drainage, and provides nutrients. I usually add a generous layer, about 2-3 inches thick.
* Sand: Helps to loosen heavy clay soil. If your soil is already sandy, you can skip this.
* Peat Moss or Coco Coir: Improves water retention in sandy soils.
3. Mix it Up: Use a garden fork or tiller to thoroughly mix the amendments into the top 6-8 inches of soil. You want a nice, crumbly texture.
4. Rake it Smooth: Rake the soil surface smooth to create a level planting bed. This makes it easier to sow the seeds evenly.
5. Test Your Soil (Optional): If you’re unsure about your soil’s pH or nutrient levels, consider doing a soil test. This can help you identify any deficiencies and adjust your amendments accordingly. Radishes prefer a slightly acidic to neutral pH (around 6.0-7.0).
DIY Hack #2: The Coffee Grounds Boost!
Did you know that coffee grounds are a fantastic amendment for radishes? They add nitrogen to the soil, which promotes healthy leaf growth, and they also help to improve soil drainage. Plus, they’re free!
Step-by-Step Instructions:
1. Collect Coffee Grounds: Save your used coffee grounds. Make sure they’re cool and dry before using them.
2. Apply to the Soil: You can either mix the coffee grounds directly into the soil before planting (as described in Hack #1) or use them as a side dressing after the radishes have sprouted.
3. Side Dressing Method: Gently sprinkle a thin layer of coffee grounds around the base of the radish plants, being careful not to bury the stems.
4. Water Thoroughly: Water the area well after applying the coffee grounds. This helps to leach the nutrients into the soil.
5. Repeat as Needed: You can reapply coffee grounds every 2-3 weeks throughout the growing season.
Important Note: Don’t use too many coffee grounds, as they can make the soil too acidic. A thin layer is all you need.
DIY Hack #3: Strategic Planting and Thinning
Radishes need space to grow! Overcrowding leads to small, stunted roots. Proper spacing and thinning are crucial for maximizing your yield.
Step-by-Step Instructions:
1. Choose the Right Variety: Consider the size of the radish variety you’re planting. Smaller varieties can be planted closer together than larger varieties.
2. Sow Seeds Evenly: Sow the seeds about ½ inch deep and ½ to 1 inch apart. I like to use a seed dispenser to ensure even spacing.
3. Water Gently: Water the seeds gently after planting to avoid washing them away.
4. Thin Seedlings: Once the seedlings emerge and have a few true leaves, thin them to the recommended spacing for your chosen variety. This is usually about 1-2 inches apart.
5. Thinning Technique: Gently pull out the extra seedlings, being careful not to disturb the roots of the remaining plants. You can snip them off at the soil line with scissors if you prefer.
6. Don’t Waste the Thinnings!: The radish greens are edible! Add them to salads or stir-fries for a peppery kick.
DIY Hack #4: Consistent Watering is Non-Negotiable!
Radishes need consistent moisture to develop properly. Inconsistent watering can lead to cracked, woody roots.
Step-by-Step Instructions:
1. Water Regularly: Water your radishes deeply and regularly, especially during hot, dry weather. Aim for about 1 inch of water per week.
2. Check Soil Moisture: Stick your finger into the soil to check the moisture level. If the top inch of soil feels dry, it’s time to water.
3. Water in the Morning: Water in the morning to allow the foliage to dry before nightfall. This helps to prevent fungal diseases.
4. Use a Soaker Hose or Drip Irrigation: These methods deliver water directly to the roots, minimizing water waste and keeping the foliage dry.
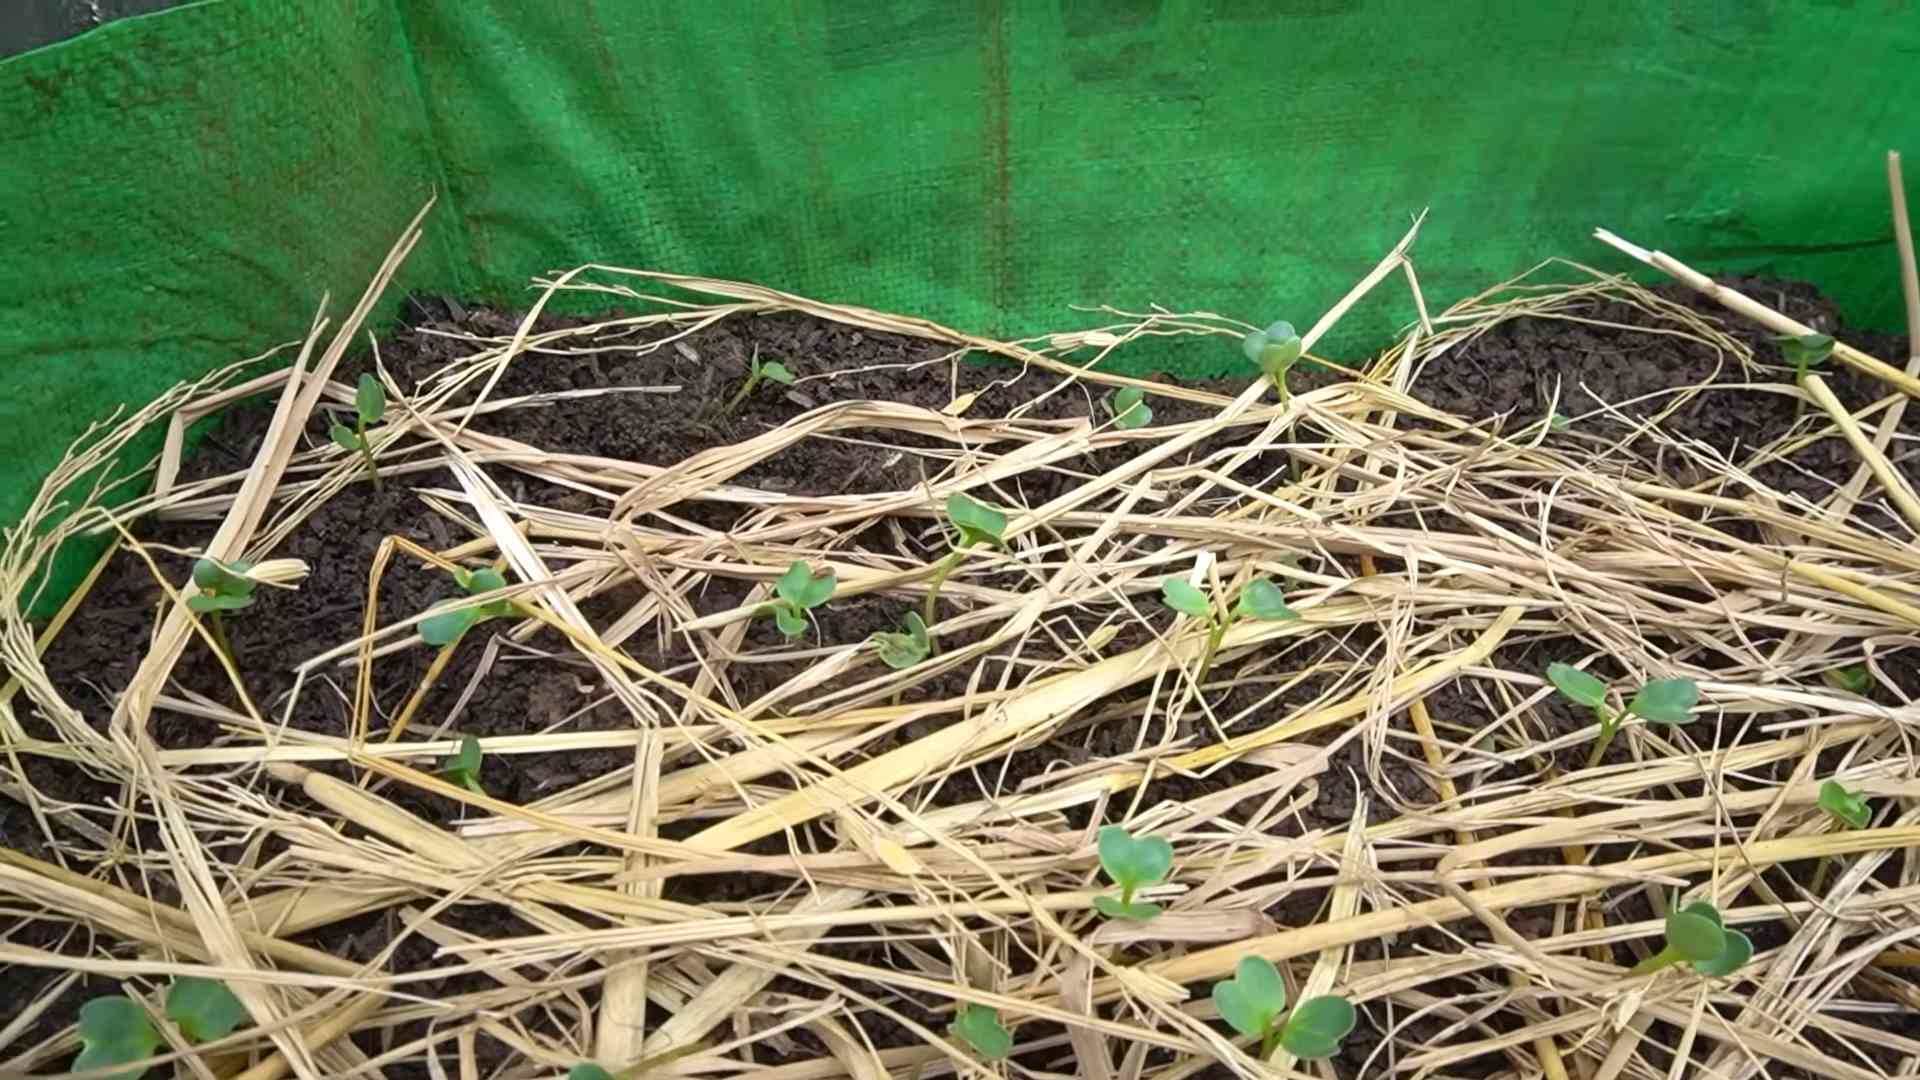
5. Mulch to Retain Moisture: Apply a layer of mulch around the radish plants to help retain moisture in the soil. Straw, wood chips, or shredded leaves work well.
DIY Hack #5: Companion Planting for Radish Success
Companion planting is the practice of planting different crops together to benefit each other. Radishes have several beneficial companions that can help to improve their growth and deter pests.
Companion Plants for Radishes:
* Carrots: Carrots and radishes are a classic companion planting combination. Radishes break up the soil, making it easier for carrots to grow.
* Lettuce: Lettuce provides shade for radishes, helping to keep the soil cool and moist.
* Spinach: Similar to lettuce, spinach provides shade and helps to retain moisture.
* Nasturtiums: Nasturtiums attract aphids away from radishes.
* Marigolds: Marigolds deter nematodes and other soil pests.
Step-by-Step Instructions:
1. Choose Your Companions: Select companion plants that are suitable for your climate and growing conditions.
2. Plant Strategically: Plant the companion plants around the radishes, taking into account their growth habits and sunlight requirements. For example, plant taller companions like lettuce or spinach on the south side of the radishes to provide shade.
3. Monitor for Pests: Keep an eye out for pests and diseases, and take action promptly if necessary.
DIY Hack #6: Row Covers for Pest Protection
Flea beetles can be a major problem for radishes, especially in the spring. These tiny pests chew small holes in the leaves, weakening the plants and reducing their yield. Row covers are a simple and effective way to protect your radishes from flea beetles and other pests.
Step-by-Step Instructions:
1. Purchase Row Covers: You can purchase row covers at most garden centers or online. They are made of lightweight fabric that allows sunlight and water to pass through.
2. Install Row Covers: After planting your radishes, cover the planting bed with row covers.
3. Secure the Edges: Secure the edges of the row covers with soil, rocks, or stakes to prevent pests from getting underneath.
4. Remove for Pollination (If Necessary): If you’re growing radishes for seed, you’ll need to remove the row covers when the plants are flowering to allow for pollination.
5. Monitor for Pests: Even with row covers, it’s important to monitor your plants for pests and diseases.
DIY Hack #7: Succession Planting for a Continuous Harvest
Radishes are quick growers, maturing in as little as 3-4 weeks. To enjoy a continuous harvest throughout the growing season, practice succession planting.
Step-by-Step Instructions:
1. Plant in Stages: Sow a small batch of radish seeds every 1-2 weeks.
2. Choose Different Varieties: Consider planting different varieties of radishes with varying maturity dates.
3. Keep Track of Planting Dates
Conclusion
So, there you have it! This simple, yet incredibly effective DIY trick for boosting your radish yield is a game-changer for any gardener, whether you’re a seasoned pro or just starting out. We’ve explored how optimizing the soil with readily available materials and employing strategic planting techniques can lead to a significantly larger and healthier radish harvest. Forget those tiny, sparse radishes of the past; prepare to be amazed by the vibrant, crisp, and abundant bounty you’ll reap.
Why is this a must-try? Because it’s accessible, affordable, and yields tangible results. You don’t need fancy equipment or expensive fertilizers. This method focuses on harnessing the power of readily available resources and simple gardening practices to create the ideal environment for radish growth. Think of it as unlocking the full potential of your radish seeds! Plus, the satisfaction of growing your own food, especially when you see such a dramatic improvement in yield, is truly rewarding.
But don’t stop there! Experimentation is key to gardening success. Consider these variations to further personalize your radish-growing experience:
* Companion Planting: Try planting your radishes alongside carrots. Carrots deter root maggots that can damage radishes, while radishes deter carrot root flies. It’s a win-win!
* Succession Planting: Plant small batches of radishes every week or two to ensure a continuous harvest throughout the growing season. This prevents you from being overwhelmed with radishes all at once and extends your enjoyment of fresh, homegrown produce.
* Different Radish Varieties: Explore the diverse world of radishes! From the classic red globe to the spicy black Spanish radish, each variety offers a unique flavor and texture. Experiment with different types to find your favorites.
* Soil Amendments: While we’ve focused on basic soil improvements, consider adding other amendments like compost tea or worm castings for an extra boost of nutrients.
Ultimately, the best way to discover the full potential of this DIY trick for radish yield increase is to try it yourself. Get your hands dirty, experiment with different techniques, and observe the results. We’re confident that you’ll be thrilled with the difference it makes.
We’re eager to hear about your experiences! Share your results, tips, and variations in the comments below. Let’s build a community of radish-growing enthusiasts and learn from each other. Did you notice a significant increase in yield? Did you try any interesting variations? What challenges did you face, and how did you overcome them? Your feedback is invaluable and will help others achieve radish-growing success. So, go ahead, plant those radish seeds, and let the harvest begin! We can’t wait to hear your radish-growing stories.
Frequently Asked Questions (FAQ)
What kind of soil is best for radishes?
Radishes thrive in loose, well-drained soil that is rich in organic matter. They prefer a slightly acidic to neutral pH, ideally between 6.0 and 7.0. Heavy clay soils can hinder root development, resulting in small or misshapen radishes. Amending the soil with compost, well-rotted manure, or other organic materials will improve drainage, aeration, and nutrient content, creating the perfect environment for radish growth. If you have heavy clay soil, consider growing radishes in raised beds or containers filled with a suitable potting mix.
How often should I water my radishes?
Consistent moisture is crucial for radish growth. Radishes need regular watering, especially during hot, dry weather. Aim to keep the soil consistently moist but not waterlogged. Overwatering can lead to root rot, while underwatering can cause the radishes to become tough and bitter. A good rule of thumb is to water deeply whenever the top inch of soil feels dry to the touch. Mulching around the plants can help retain moisture and suppress weeds.
What are the most common pests and diseases that affect radishes?
Radishes are generally relatively pest-resistant, but they can be susceptible to certain problems. Common pests include flea beetles, root maggots, and aphids. Flea beetles can chew small holes in the leaves, while root maggots can damage the roots, making them unmarketable. Aphids can suck the sap from the plants, weakening them. To control these pests, consider using row covers, insecticidal soap, or diatomaceous earth. Diseases that can affect radishes include damping-off, white rust, and clubroot. Damping-off is a fungal disease that can kill seedlings, while white rust and clubroot can cause leaf and root deformities. To prevent these diseases, practice good sanitation, avoid overwatering, and rotate your crops.
How long does it take for radishes to mature?
One of the great things about radishes is that they are quick to mature. Most varieties are ready to harvest in just 20 to 30 days from planting. However, the exact time to maturity can vary depending on the variety, growing conditions, and weather. Check the seed packet for specific information on the maturity time for the variety you are growing.
How do I know when my radishes are ready to harvest?
The best way to determine if your radishes are ready to harvest is to check their size. Radishes are typically harvested when they reach about 1 inch in diameter, although this can vary depending on the variety. Gently brush away the soil around the base of the plant to check the size of the root. If the radishes are too small, they will be bland and underdeveloped. If they are too large, they may become tough and bitter. Harvest radishes promptly when they reach the desired size to ensure the best flavor and texture.
Can I grow radishes in containers?
Yes, radishes are well-suited for container gardening. Choose a container that is at least 6 inches deep and has drainage holes. Fill the container with a well-draining potting mix. Sow the radish seeds directly into the container, spacing them about 1 inch apart. Water regularly and fertilize with a balanced fertilizer. Place the container in a sunny location that receives at least 6 hours of sunlight per day. Container-grown radishes can be harvested just like those grown in the ground.
Why are my radishes cracking?
Cracking in radishes is often caused by inconsistent watering. When the soil dries out and then is suddenly saturated with water, the radishes can grow too quickly, causing the skin to crack. To prevent cracking, water your radishes regularly and consistently, especially during hot, dry weather. Mulching around the plants can also help retain moisture and prevent the soil from drying out too quickly.
Why are my radishes all tops and no bottoms?
If your radishes are producing abundant foliage but small or nonexistent roots, it could be due to several factors. Overcrowding can prevent the radishes from developing properly. Thin the seedlings to ensure they have enough space to grow. Poor soil fertility can also contribute to this problem. Amend the soil with compost or fertilizer to provide the radishes with the nutrients they need. Excessive nitrogen in the soil can also promote foliage growth at the expense of root development. Avoid using fertilizers that are high in nitrogen. Finally, hot weather can also inhibit root development. Radishes prefer cool weather, so try planting them in the spring or fall when temperatures are cooler.
Can I eat radish greens?
Yes, radish greens are edible and nutritious! They have a peppery flavor similar to the radishes themselves. You can use radish greens in salads, soups, stir-fries, or as a garnish. Choose young, tender greens for the best flavor and texture. Wash the greens thoroughly before using them.
How do I store radishes after harvesting?
To store radishes, remove the greens and wash the roots thoroughly. Place the radishes in a plastic bag or container lined with a damp paper towel. Store them in the refrigerator. Radishes can typically be stored for up to two weeks using this method.

Leave a Comment