
Growing Chillies in Pots: Unleash the fiery flavors of homegrown goodness, even if you’re short on space! Have you ever dreamt of adding a dash of spice to your meals with chillies you’ve nurtured yourself? Well, dream no more! This DIY guide is your passport to a vibrant chilli garden, right on your balcony, patio, or even a sunny windowsill.
The history of chilli cultivation is as rich and colorful as the peppers themselves, dating back thousands of years in South America. These fiery fruits weren’t just a culinary delight; they held cultural significance, used in rituals and traditional medicine. Now, you can tap into that legacy and experience the joy of cultivating your own piece of history.
Why should you embark on this chilli-growing adventure? Because fresh, homegrown chillies offer an unparalleled flavor and satisfaction that store-bought varieties simply can’t match. Plus, growing chillies in pots is incredibly rewarding. Imagine the pride you’ll feel when you harvest your first batch of vibrant, spicy peppers! This DIY trick is essential for anyone looking to add fresh, organic flavor to their cooking, save money, and enjoy the therapeutic benefits of gardening. I’m here to guide you through every step, from choosing the right pot to harvesting your fiery bounty. Let’s get started!
Growing Chillies in Pots: A Fiery Guide for Home Gardeners
Hey there, fellow spice enthusiasts! Ever dreamt of having a constant supply of fresh, fiery chillies right at your fingertips? Well, you’ve come to the right place! Growing chillies in pots is surprisingly easy, even if you don’t have a sprawling garden. I’m going to walk you through everything you need to know, from choosing the right chillies to harvesting your spicy bounty. Let’s get started!
Choosing Your Chilli Varieties
First things first, let’s talk about chilli varieties. The world of chillies is vast and exciting, ranging from mild and fruity to scorching hot. Here’s a quick rundown to help you choose:
* Beginner-Friendly: If you’re new to chilli growing, I recommend starting with milder varieties like Jalapeños, Anaheim, or Poblano. They’re relatively easy to grow and offer a good balance of flavor and heat.
* Medium Heat: For a bit more kick, try Serrano, Cayenne, or Thai chillies. These are great for adding a punch to your cooking.
* Hot Stuff: If you’re a seasoned chilli lover, go for the hotter varieties like Habanero, Scotch Bonnet, or even Ghost Peppers (Bhut Jolokia). Be warned, these are seriously hot!
* Consider your climate: Some varieties thrive better in warmer climates than others. Do a little research to see what grows well in your region.
What You’ll Need: The Essential Supplies
Before we dive into the planting process, let’s gather our supplies. Here’s what you’ll need:
* Chilli Seeds or Seedlings: You can start from seeds or buy seedlings from a garden center. Seedlings are a faster option, but starting from seeds is more rewarding (in my opinion!).
* Pots: Choose pots that are at least 12 inches in diameter. Good drainage is crucial, so make sure your pots have drainage holes. Terracotta pots are a great option as they allow the soil to breathe.
* Potting Mix: Use a high-quality potting mix specifically formulated for vegetables. Avoid using garden soil, as it can become compacted in pots.
* Fertilizer: A balanced fertilizer (e.g., 10-10-10) is essential for healthy growth and abundant fruit production. You can also use a fertilizer specifically designed for tomatoes and peppers.
* Watering Can or Hose: For regular watering.
* Sunlight: Chillies need at least 6-8 hours of sunlight per day.
* Optional: Plant labels, gloves, a small trowel, and a stake for support (especially for taller varieties).
Getting Started: Planting Your Chillies
Now for the fun part! Let’s get those chillies planted.
1. Starting from Seeds (Indoor):
* Timing is Key: Start your seeds indoors about 6-8 weeks before the last expected frost.
* Seed Starting Mix: Fill seed trays or small pots with seed starting mix.
* Sowing the Seeds: Sow the seeds about ¼ inch deep.
* Watering: Gently water the soil and keep it moist but not soggy.
* Warmth and Light: Place the seed trays in a warm location (around 70-80°F) or use a heat mat. Provide plenty of light, either from a sunny window or a grow light.
* Germination: Germination usually takes 7-14 days.
* Thinning: Once the seedlings have a few true leaves, thin them out, leaving only the strongest seedling in each pot.
2. Transplanting Seedlings (Indoor or Purchased):
* Hardening Off: If you started your seeds indoors, you’ll need to harden them off before transplanting them outdoors. This involves gradually exposing them to outdoor conditions over a period of 7-10 days. Start by placing them in a sheltered spot for a few hours each day, gradually increasing the time and exposure to sunlight and wind.
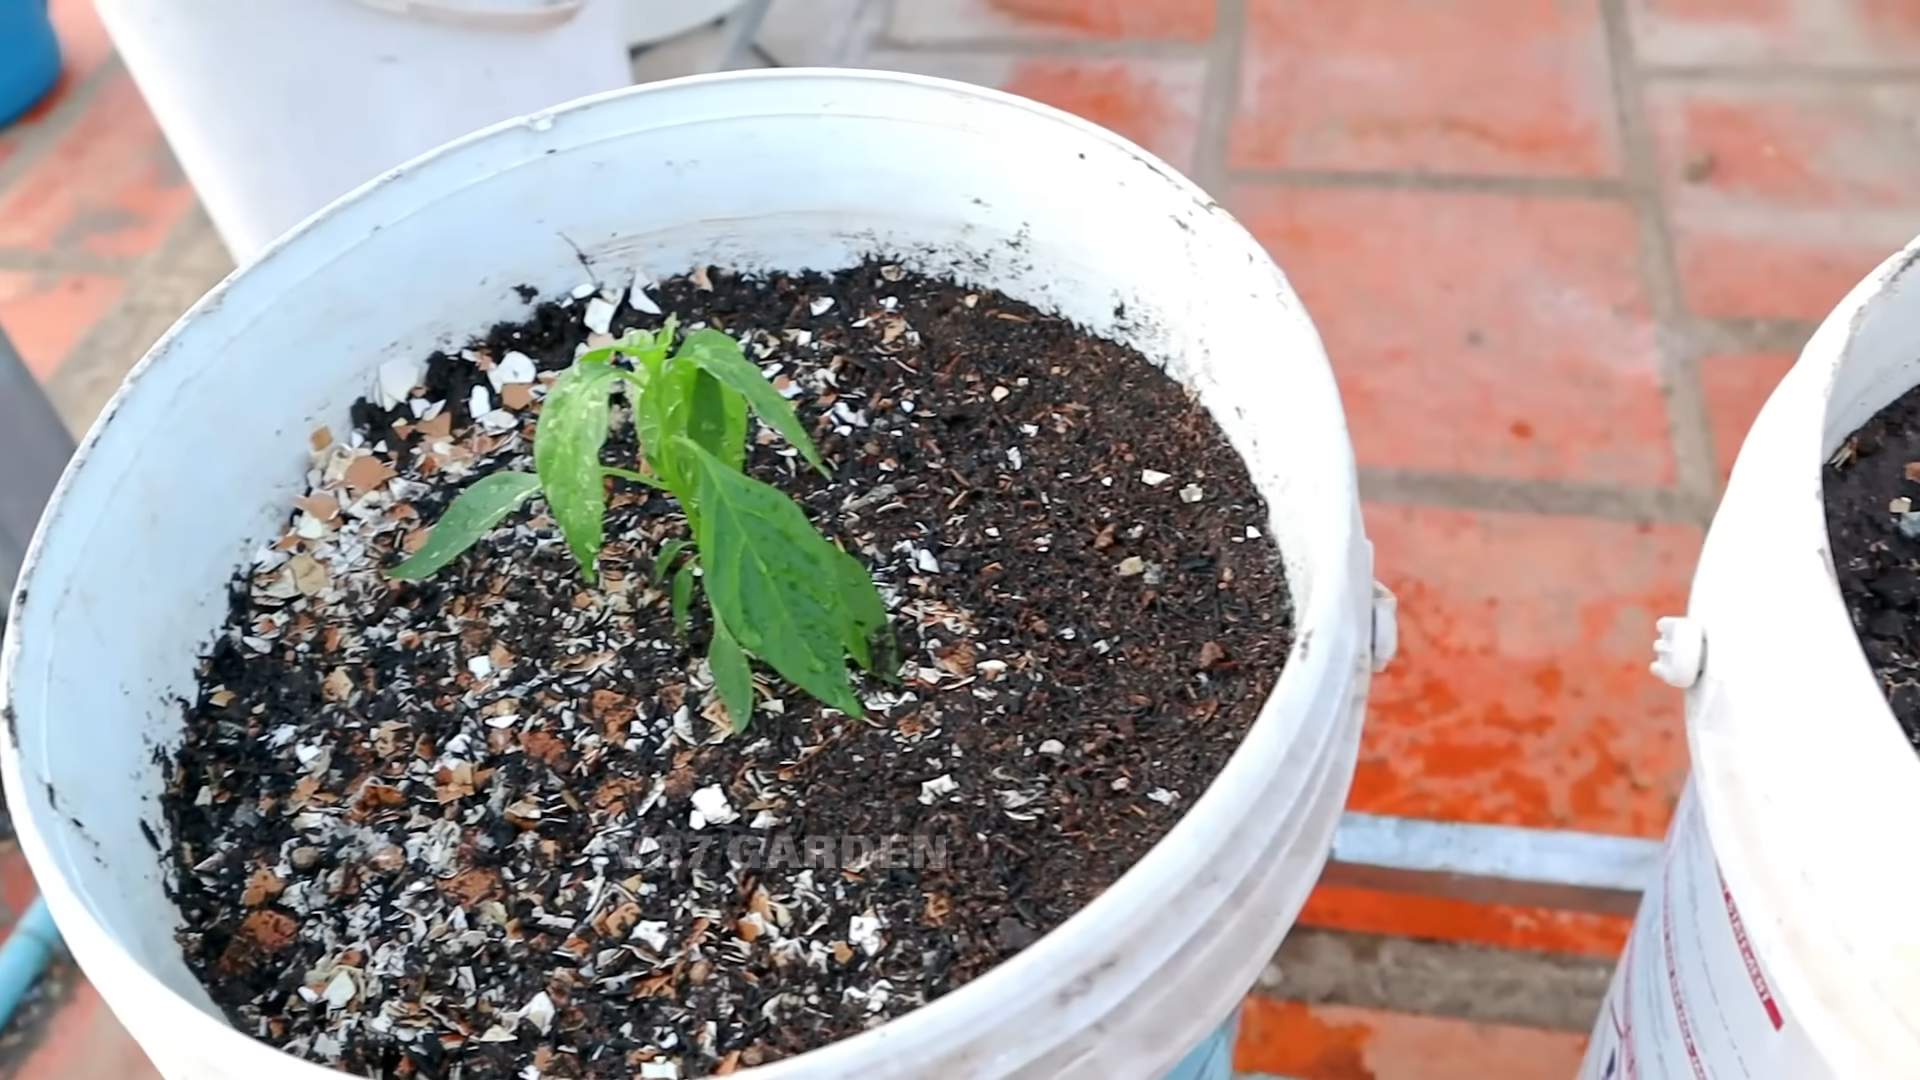
* Preparing the Pots: Fill your chosen pots with potting mix, leaving about an inch of space at the top.
* Transplanting: Gently remove the seedlings from their containers, being careful not to damage the roots.
* Planting Depth: Plant the seedlings at the same depth they were growing in their original containers.
* Spacing: If you’re planting multiple seedlings in one pot, space them at least 12 inches apart.
* Watering: Water thoroughly after planting.
Caring for Your Chilli Plants: The Secret to Success
Once your chillies are planted, it’s time to provide them with the care they need to thrive.
1. Watering:
* Regular Watering: Water your chilli plants regularly, especially during hot and dry weather.
* Check the Soil: Check the soil moisture before watering. The top inch of soil should be dry to the touch.
* Avoid Overwatering: Avoid overwatering, as this can lead to root rot.
* Watering Time: Water in the morning to allow the foliage to dry before nightfall, which can help prevent fungal diseases.
2. Fertilizing:
* Regular Feeding: Feed your chilli plants every 2-3 weeks with a balanced fertilizer.
* Follow Instructions: Follow the instructions on the fertilizer package carefully.
* Flowering Stage: Once the plants start flowering, switch to a fertilizer that is higher in phosphorus and potassium to promote fruit production.
3. Sunlight:
* Plenty of Sun: Ensure your chilli plants receive at least 6-8 hours of sunlight per day.
* Rotate Pots: Rotate the pots regularly to ensure even growth.
4. Pruning:
* Pinching: Pinch off the growing tips of young plants to encourage bushier growth.
* Removing Suckers: Remove any suckers (small shoots that grow from the base of the plant) to improve airflow and fruit production.
5. Pest and Disease Control:
* Regular Inspection: Regularly inspect your plants for pests and diseases.
* Common Pests: Common pests include aphids, spider mites, and whiteflies.
* Organic Solutions: Use organic pest control methods, such as insecticidal soap or neem oil, to control pests.
* Fungal Diseases: Fungal diseases can be a problem in humid conditions. Ensure good airflow around your plants and avoid overwatering. Use a fungicide if necessary.
6. Support:
* Staking: Taller chilli varieties may need staking to support the weight of the fruit.
* Bamboo Stakes: Use bamboo stakes or tomato cages to provide support.
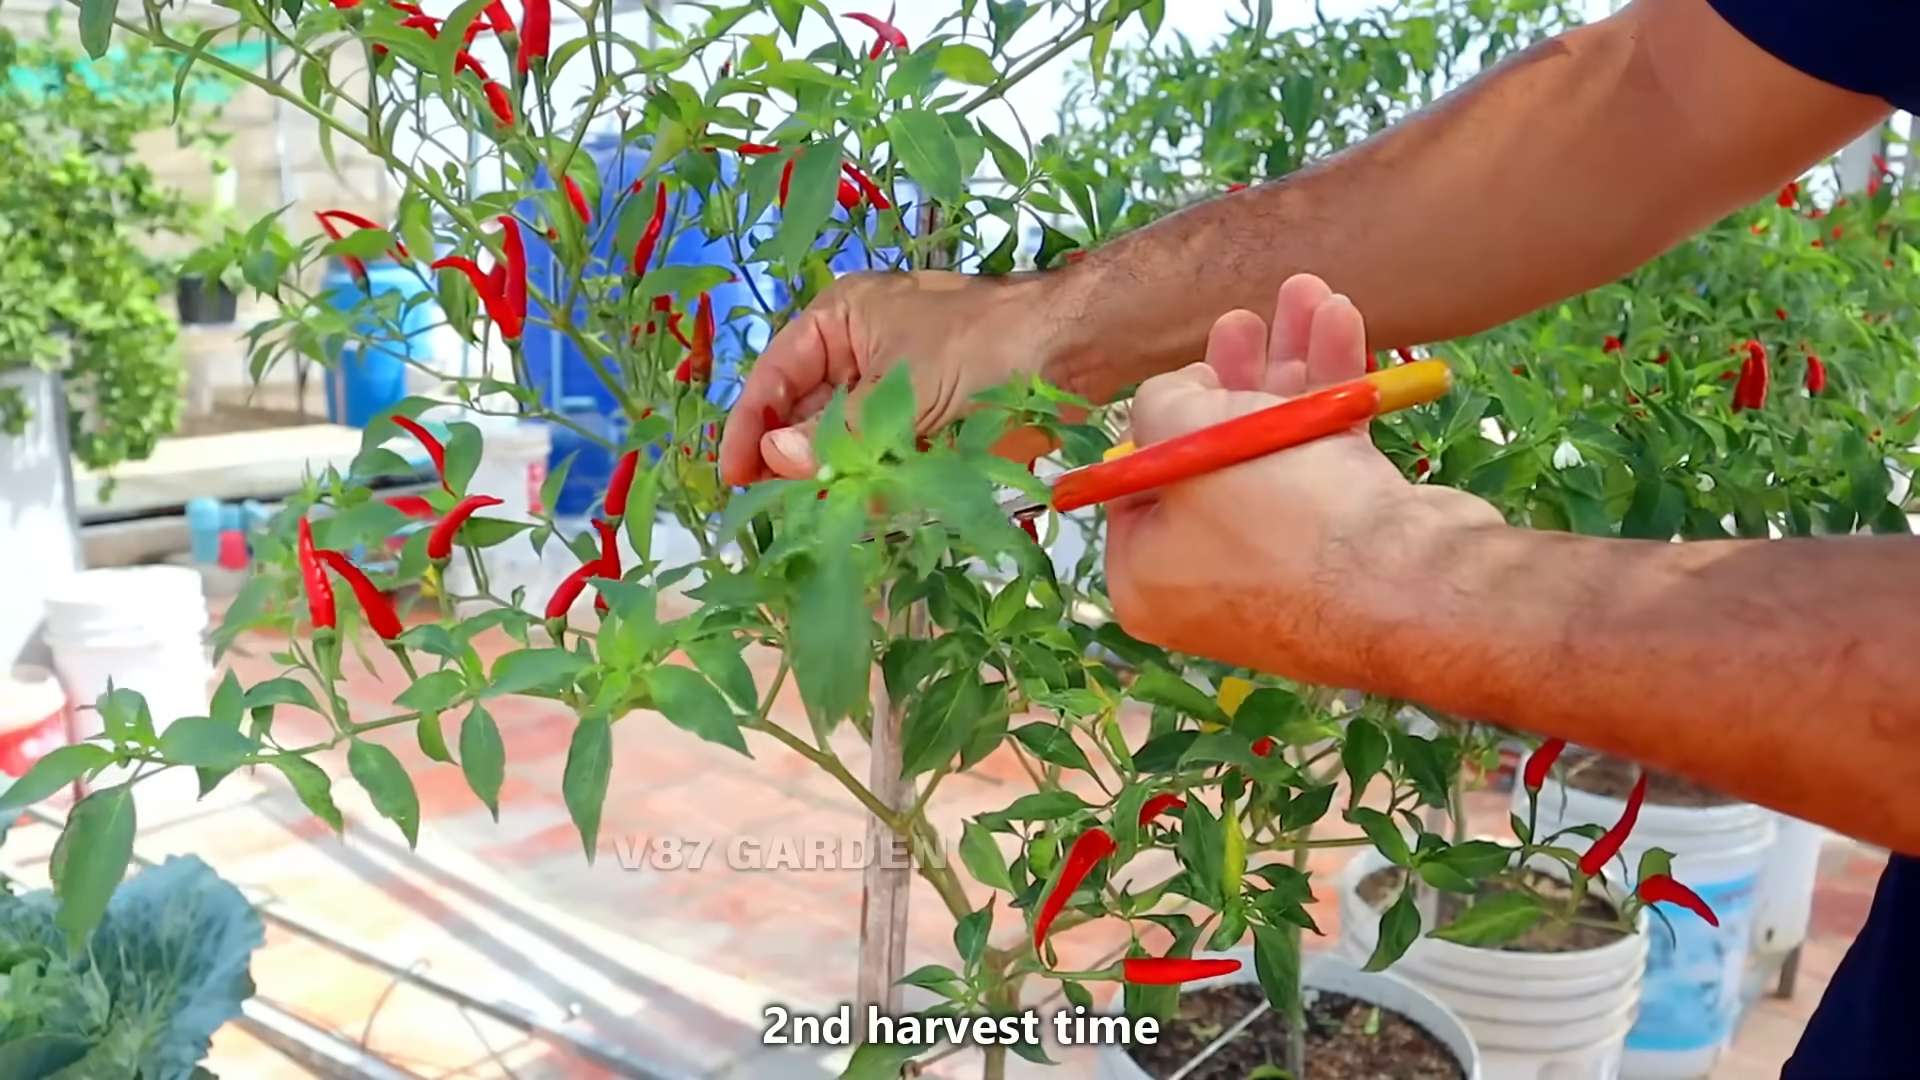
Harvesting Your Chillies: The Grand Finale
After all your hard work, it’s time to reap the rewards!
1. Timing:
* Color Change: Chillies are usually ready to harvest when they have reached their mature color. This can vary depending on the variety.
* Firmness: The chillies should be firm to the touch.
2. Harvesting Technique:
* Use Scissors or Pruners: Use scissors or pruners to cut the chillies from the plant, leaving a small stem attached.
* Avoid Pulling: Avoid pulling the chillies off the plant, as this can damage the branches.
3. Handling Hot Chillies:
* Wear Gloves: Wear gloves when handling hot chillies to avoid skin irritation.
* Avoid Touching Eyes: Avoid touching your eyes or face after handling chillies.
4. Storage:
* Fresh Use: Use your fresh chillies immediately or store them in the refrigerator for a few days.
* Drying: You can also dry your chillies for longer storage. String them together and hang them in a dry, well-ventilated place.
* Freezing: Another option is to freeze your chillies. Simply wash them, dry them, and place them in a freezer bag.
Troubleshooting: Common Problems and Solutions
Even with the best care, you might encounter some problems along the way. Here are a few common issues and how to address them:
* Yellowing Leaves: This can be caused by overwatering, underwatering, nutrient deficiencies, or pests. Check the soil moisture, fertilize regularly, and inspect for pests.
* Blossom End Rot: This is a calcium deficiency that causes the bottom of the fruit to rot. Ensure your soil has adequate calcium and water consistently.
* Lack of Fruit:
Conclusion
So, there you have it! Growing chillies in pots isn’t just a gardening project; it’s an adventure in flavor, a splash of vibrant color for your patio, and a surprisingly rewarding experience. We’ve walked through the essential steps, from selecting the perfect pot and choosing the right chilli variety to nurturing your plants and harvesting your fiery bounty.
Why is this DIY trick a must-try? Because it puts the power of fresh, flavorful chillies directly into your hands. No more bland supermarket peppers lacking that authentic kick. No more wondering about the origins of your produce. With potted chillies, you control everything, from the soil composition to the watering schedule, ensuring the highest quality and most intense flavor. Plus, it’s incredibly satisfying to watch those tiny seedlings transform into thriving plants laden with vibrant chillies.
But the fun doesn’t stop there! Feel free to experiment with different varieties. Perhaps you’d like to try growing some super-hot habaneros alongside some milder jalapeños. Or maybe you’re interested in exploring the unique flavors of Thai chillies or Scotch bonnets. The possibilities are endless!
Consider adding companion plants to your pots. Basil, for example, is said to deter pests and improve the flavor of your chillies. Marigolds are another excellent choice, adding a splash of color and attracting beneficial insects.
Another variation to consider is the type of pot you use. While terracotta pots are classic and allow for good drainage, plastic pots are lighter and retain moisture better. Self-watering pots can also be a great option for busy gardeners. Just remember to adjust your watering schedule accordingly.
Don’t be afraid to get creative with your chilli growing setup. You can train your plants to climb a trellis, creating a stunning vertical display. Or you can group several pots together to create a mini chilli garden.
Ultimately, the best way to learn is by doing. So, grab a pot, some seeds, and get started! We’re confident that you’ll be amazed by the results. Growing chillies in pots is a surprisingly easy and enjoyable way to add some spice to your life.
We encourage you to try this DIY trick and share your experiences with us. What varieties did you choose? What challenges did you face? What tips and tricks did you discover along the way? Share your photos and stories on social media using [Your Hashtag Here] – we can’t wait to see your chilli growing success! Let’s build a community of chilli enthusiasts and learn from each other. Happy growing!
Frequently Asked Questions (FAQ)
What is the best time of year to start growing chillies in pots?
The ideal time to start growing chillies depends on your climate. In general, it’s best to start seeds indoors 6-8 weeks before the last expected frost. This allows the seedlings to develop a strong root system before being transplanted outdoors. If you live in a warmer climate with a longer growing season, you can start seeds directly in pots outdoors after the last frost. However, starting indoors provides a head start and increases your chances of success. Consider using a heat mat to speed up germination.
What type of soil is best for growing chillies in pots?
Chillies thrive in well-draining, nutrient-rich soil. A good potting mix specifically formulated for vegetables is ideal. Avoid using garden soil, as it can be too heavy and may contain pests or diseases. You can also amend your potting mix with compost or other organic matter to improve drainage and fertility. A slightly acidic to neutral pH (around 6.0-7.0) is optimal.
How often should I water my chilli plants in pots?
Watering frequency depends on several factors, including the size of the pot, the type of soil, the climate, and the stage of growth. In general, water your chilli plants when the top inch of soil feels dry to the touch. Avoid overwatering, as this can lead to root rot. During hot weather, you may need to water more frequently. Ensure that your pots have drainage holes to prevent water from accumulating at the bottom. A good rule of thumb is to water deeply and less frequently, rather than shallowly and often.
How much sunlight do chilli plants need?
Chilli plants need at least 6-8 hours of direct sunlight per day to thrive. Choose a sunny location for your pots, such as a south-facing balcony or patio. If you don’t have enough sunlight, you can supplement with grow lights. Rotate your pots regularly to ensure that all sides of the plant receive adequate sunlight. Insufficient sunlight can lead to leggy growth and reduced fruit production.
What kind of fertilizer should I use for my chilli plants?
Chillies are heavy feeders and benefit from regular fertilization. Use a balanced fertilizer with equal amounts of nitrogen, phosphorus, and potassium (e.g., 10-10-10) during the early stages of growth. Once the plants start to flower and produce fruit, switch to a fertilizer with a higher phosphorus content (e.g., 5-10-5) to promote fruit development. You can also use organic fertilizers, such as compost tea or fish emulsion. Fertilize every 2-4 weeks, following the instructions on the fertilizer package.
How do I protect my chilli plants from pests and diseases?
Regularly inspect your chilli plants for signs of pests or diseases. Common pests include aphids, spider mites, and whiteflies. You can control these pests with insecticidal soap, neem oil, or by handpicking them off the plants. Diseases such as powdery mildew and fungal infections can be prevented by providing good air circulation and avoiding overwatering. If you notice any signs of disease, remove the affected leaves or branches immediately. Consider using organic fungicides if necessary.
When should I harvest my chillies?
The time to harvest your chillies depends on the variety and your personal preference. In general, chillies are ready to harvest when they have reached their mature color and size. Some varieties turn red, while others turn yellow, orange, or even purple. You can also harvest green chillies, but they will be less spicy. Use scissors or pruning shears to cut the chillies from the plant, leaving a small stem attached.
Can I overwinter my chilli plants?
Yes, you can overwinter your chilli plants indoors to keep them alive for the next growing season. Before the first frost, prune back the plants and transplant them into smaller pots. Bring the pots indoors and place them in a sunny location. Water sparingly and avoid fertilizing during the winter months. In the spring, gradually acclimate the plants to outdoor conditions before transplanting them back into larger pots.
What are some common problems when growing chillies in pots and how can I fix them?
Some common problems include:
* **Yellowing leaves:** This can be caused by overwatering, underwatering, nutrient deficiencies, or pests. Adjust your watering schedule, fertilize regularly, and inspect for pests.
* **Blossom drop:** This is when the flowers fall off the plant without producing fruit. It can be caused by temperature stress, lack of pollination, or nutrient deficiencies. Ensure that your plants are getting enough sunlight and water, and consider hand-pollinating the flowers.
* **Stunted growth:** This can be caused by poor soil, lack of sunlight, or pests. Use a good quality potting mix, provide adequate sunlight, and inspect for pests.
Can I grow different varieties of chillies in the same pot?
While it’s technically possible to grow different varieties of chillies in the same pot, it’s generally not recommended. Different varieties may have different growth habits and nutrient requirements, which can make it difficult to provide optimal conditions for all plants. Additionally, cross-pollination can occur, resulting in unexpected flavors and characteristics in the fruit. It’s best to grow each variety in its own pot to ensure the best results.

Leave a Comment