
Backyard Grape Growing Hack: Imagine stepping into your backyard and plucking juicy, sun-ripened grapes straight from the vine. Sounds like a dream, right? Well, it doesn’t have to be! For centuries, grapevines have been cultivated, not just for winemaking, but also as a symbol of abundance and prosperity. From ancient Roman vineyards to the sprawling landscapes of Napa Valley, grapes have held a special place in our hearts and cultures.
But let’s be honest, the thought of growing grapes can seem intimidating. Visions of complicated trellises and endless pruning might flash before your eyes. That’s where this backyard grape growing hack comes in! I’m here to show you that growing grapes at home can be surprisingly simple and rewarding, even if you have limited space or experience.
In this article, I’ll share a game-changing DIY trick that will help you maximize your grape yield, minimize maintenance, and enjoy a bountiful harvest year after year. Forget the complicated methods – this is all about working smarter, not harder. So, grab your gardening gloves, and let’s unlock the secrets to successful backyard grape growing!
Backyard Grape Growing Hack: From Zero to Vineyard Hero!
Okay, so you’ve always dreamed of plucking juicy grapes straight from your own backyard vine, right? Me too! But the thought of complicated trellises and finicky plants can be a little intimidating. That’s why I’m sharing my super simple, surprisingly effective backyard grape growing hack. It’s all about maximizing space, minimizing effort, and getting those delicious grapes sooner than you think!
Choosing the Right Grape Variety
Before we even think about digging, let’s talk grapes. Not all grapes are created equal, especially when it comes to backyard growing. You need to consider your climate, the amount of sunlight your yard gets, and what you plan to do with your grapes (eating, juicing, winemaking?).
Here’s a quick rundown to get you started:
* **Climate is Key:**
* Cold Climates (Zones 3-6): Look for varieties like ‘Marquette,’ ‘Frontenac,’ ‘Reliance’ (seedless!), and ‘Concord.’ These are hardy and can withstand harsh winters.
* Temperate Climates (Zones 7-8): ‘Thompson Seedless,’ ‘Niagara,’ ‘Muscadine’ (if you’re further south) are great choices.
* Warm Climates (Zones 9-10): ‘Flame Seedless,’ ‘Perlette,’ and many Muscadine varieties thrive in warmer temperatures.
* Sunlight Matters:** Grapes need at least 6-8 hours of direct sunlight per day to produce a good crop. Choose a location in your yard that gets plenty of sun.
* Purpose Driven:**
* Table Grapes (Eating): ‘Thompson Seedless,’ ‘Reliance,’ ‘Flame Seedless’ are popular choices for their sweetness and ease of eating.
* Juice Grapes: ‘Concord’ is the classic juice grape, known for its intense flavor.
* Wine Grapes: This is a whole other world! Research varieties specific to your region and the type of wine you want to make. ‘Marquette,’ ‘Cabernet Sauvignon,’ and ‘Chardonnay’ are just a few examples.
Pro Tip: Check with your local nursery or agricultural extension office for recommendations on the best grape varieties for your specific area. They’ll have the inside scoop on what grows well locally.
The Space-Saving Trellis Hack: Repurposed Pallet Power!
Forget fancy, expensive trellises! My secret weapon is a repurposed wooden pallet. It’s cheap (often free!), readily available, and provides the perfect support for your growing grape vine. Plus, it adds a rustic, charming touch to your backyard.
Here’s what you’ll need:
* A sturdy wooden pallet (look for heat-treated pallets marked “HT” to avoid chemically treated ones)
* Gardening gloves
* Shovel
* Post hole digger or auger (optional, but helpful)
* Two 4×4 wooden posts (8 feet long)
* Concrete mix
* Level
* Drill with screws
* Heavy-duty landscape fabric or weed barrier
* Grape vine of your chosen variety
* Gardening soil or compost
Building Your Pallet Trellis: Step-by-Step
Okay, let’s get our hands dirty!
1. Prepare the Pallet: Inspect your pallet for any loose nails, splinters, or broken boards. Remove or repair any issues to ensure it’s safe and sturdy. You can also sand it down a bit if you want a smoother finish. I usually leave mine as is for that rustic look.
2. Choose Your Location: Select a sunny spot in your yard with well-draining soil. Remember, 6-8 hours of sunlight is crucial! Consider the mature size of your grape vine when choosing the location. You don’t want it to overshadow other plants or block walkways.
3. Dig Post Holes: Using a post hole digger or auger, dig two holes approximately 2-3 feet deep and wide enough to accommodate your 4×4 posts. The holes should be spaced slightly wider than the width of your pallet. This will allow you to slide the pallet between the posts.
4. Set the Posts: Place a 4×4 post into each hole. Use a level to ensure the posts are perfectly vertical. Pour concrete mix into the holes around the posts, following the instructions on the concrete bag. Add water gradually and mix thoroughly. Let the concrete set completely according to the manufacturer’s instructions (usually 24-48 hours).
5. Attach the Pallet: Once the concrete is fully cured, carefully slide the pallet between the two posts. Use a drill and screws to securely attach the pallet to the posts. Make sure the pallet is level and stable.
6. Prepare the Planting Area: Clear the area around the base of the trellis of any grass or weeds. Lay down a layer of heavy-duty landscape fabric or weed barrier to prevent weeds from growing around your grape vine. This will also help retain moisture in the soil.
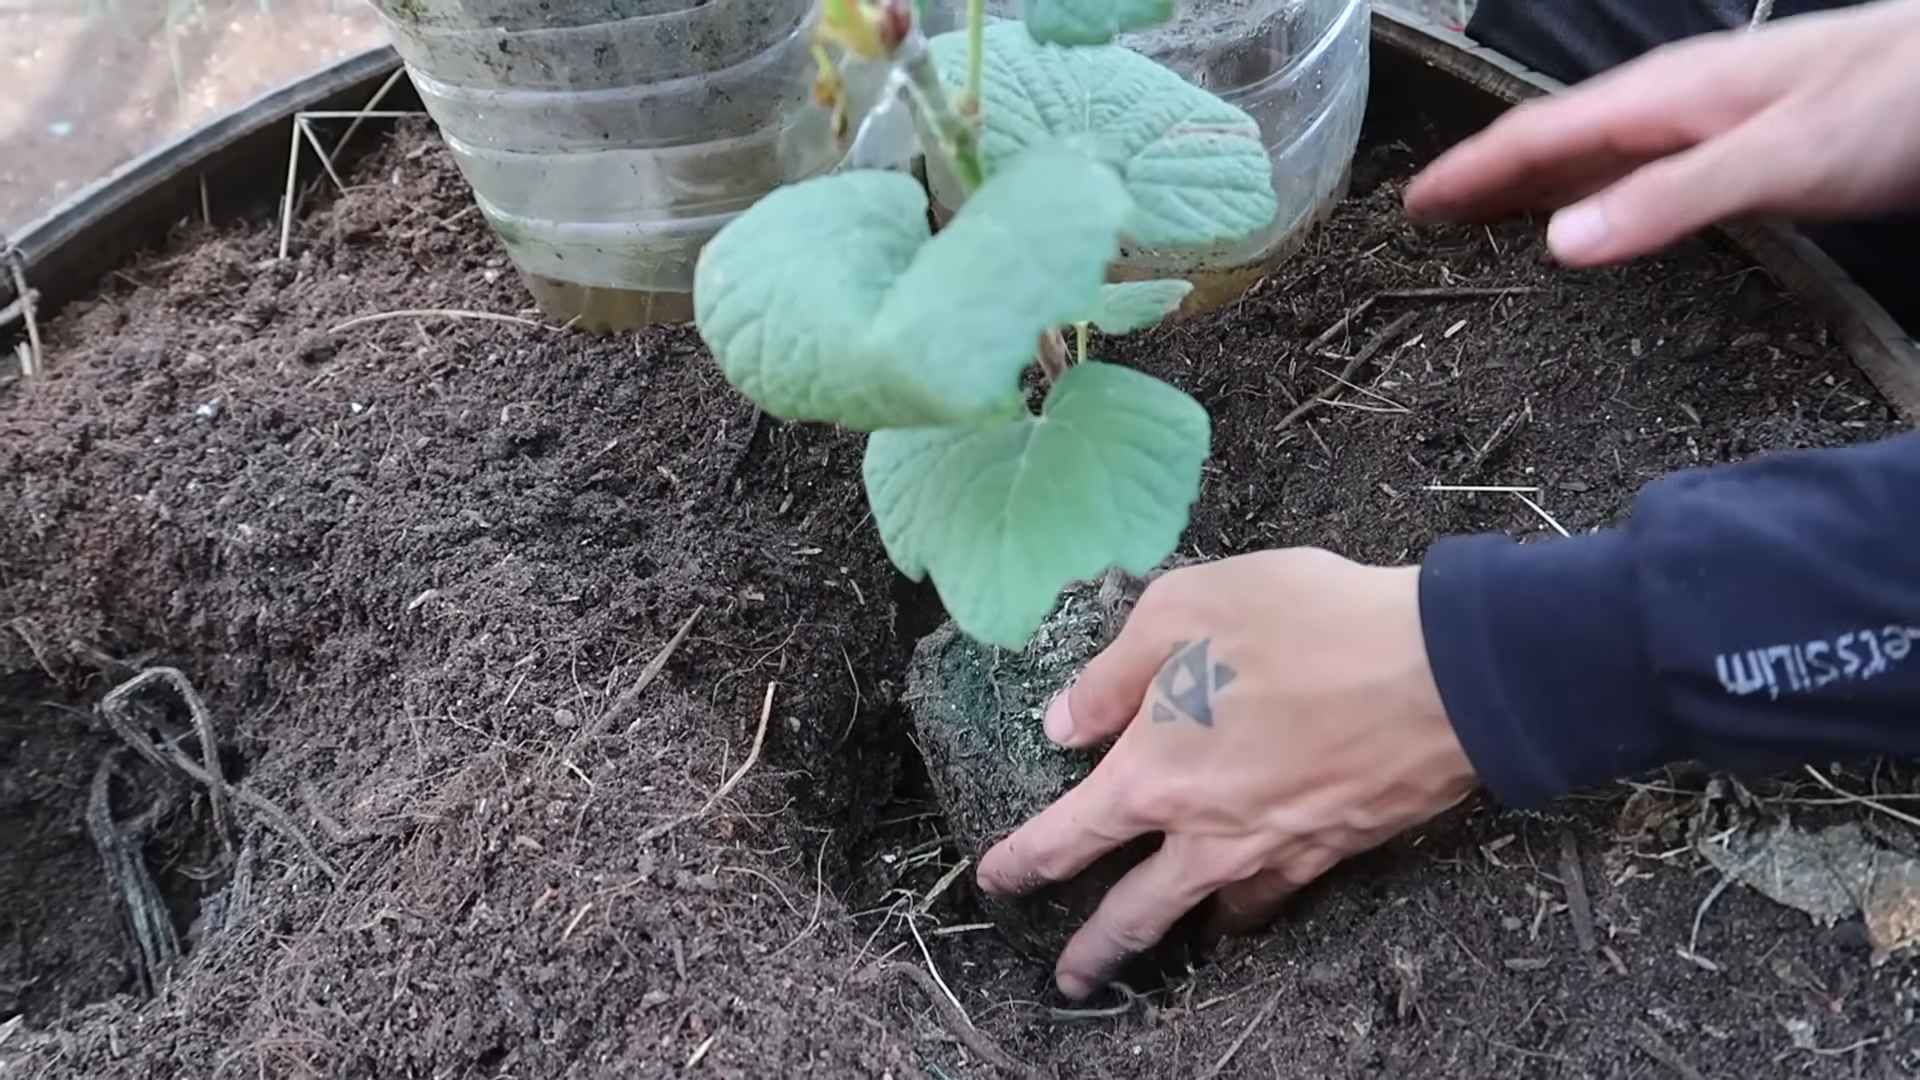
7. Plant Your Grape Vine: Dig a hole at the base of the trellis, large enough to accommodate the root ball of your grape vine. Gently remove the grape vine from its container and loosen the roots. Place the grape vine in the hole and backfill with gardening soil or compost. Water thoroughly.
Training Your Grape Vine: Guiding Growth
Grape vines don’t just magically climb a trellis. You need to train them to grow in the direction you want. This is actually pretty easy, and it’s kind of fun to watch them grow!
1. Initial Training: In the first year, focus on establishing a strong trunk. Choose the strongest shoot and tie it loosely to the trellis using soft twine or plant ties. Remove any other shoots that emerge from the base of the plant.
2. Vertical Growth: As the main shoot grows, continue to tie it to the trellis, encouraging it to grow vertically. You can gently weave it through the openings in the pallet.
3. Lateral Growth: Once the main shoot reaches the top of the trellis, you can start training lateral shoots (side branches) to grow horizontally along the top of the pallet. This will create a “fruiting zone” where your grapes will develop.
4. Pruning is Paramount: Pruning is essential for grape production. In late winter or early spring, before new growth begins, prune away any dead, damaged, or crossing branches. Also, prune back the lateral shoots to encourage fruit production. Don’t be afraid to prune! It might seem counterintuitive, but pruning actually promotes healthier growth and more grapes. I usually aim to remove about 90% of the previous year’s growth.
5. Ongoing Maintenance: Throughout the growing season, continue to monitor your grape vine and tie up any new shoots as needed. Remove any suckers (shoots that grow from the base of the plant) to prevent them from competing with the main vine.
Caring for Your Grape Vine: Water, Nutrients, and Protection
Now that your grape vine is planted and trained, it’s time to provide it with the care it needs to thrive.
* Watering: Water your grape vine regularly, especially during dry periods. Young vines need more frequent watering than established vines. Aim for deep, infrequent watering rather than shallow, frequent watering. This encourages the roots to grow deeper and stronger.
* Fertilizing: Grape vines need nutrients to grow and produce fruit. Fertilize your grape vine in early spring with a balanced fertilizer. Follow the instructions on the fertilizer bag. You can also amend the soil with compost or aged manure to provide additional nutrients.
* Pest and Disease Control: Grape vines can be susceptible to various pests and diseases. Monitor your grape vine regularly for any signs of problems. Common pests include aphids, Japanese beetles, and grape phylloxera. Common diseases include powdery mildew, downy mildew, and black rot. Treat any problems promptly with appropriate organic or chemical controls. I prefer to use organic methods whenever possible. Neem oil is a great all-purpose organic insecticide and fungicide.
* Protecting Your Grapes: Birds and other animals love grapes just as much as we do! To protect your grapes from being eaten, you can cover your grape vine with netting. This will prevent birds and other animals from reaching the grapes.
Harvesting Your Grapes: The Sweet Reward
After all your hard work, it’s finally time to harvest your grapes! The timing of the harvest will depend on the variety of grape you’re growing and your local climate.
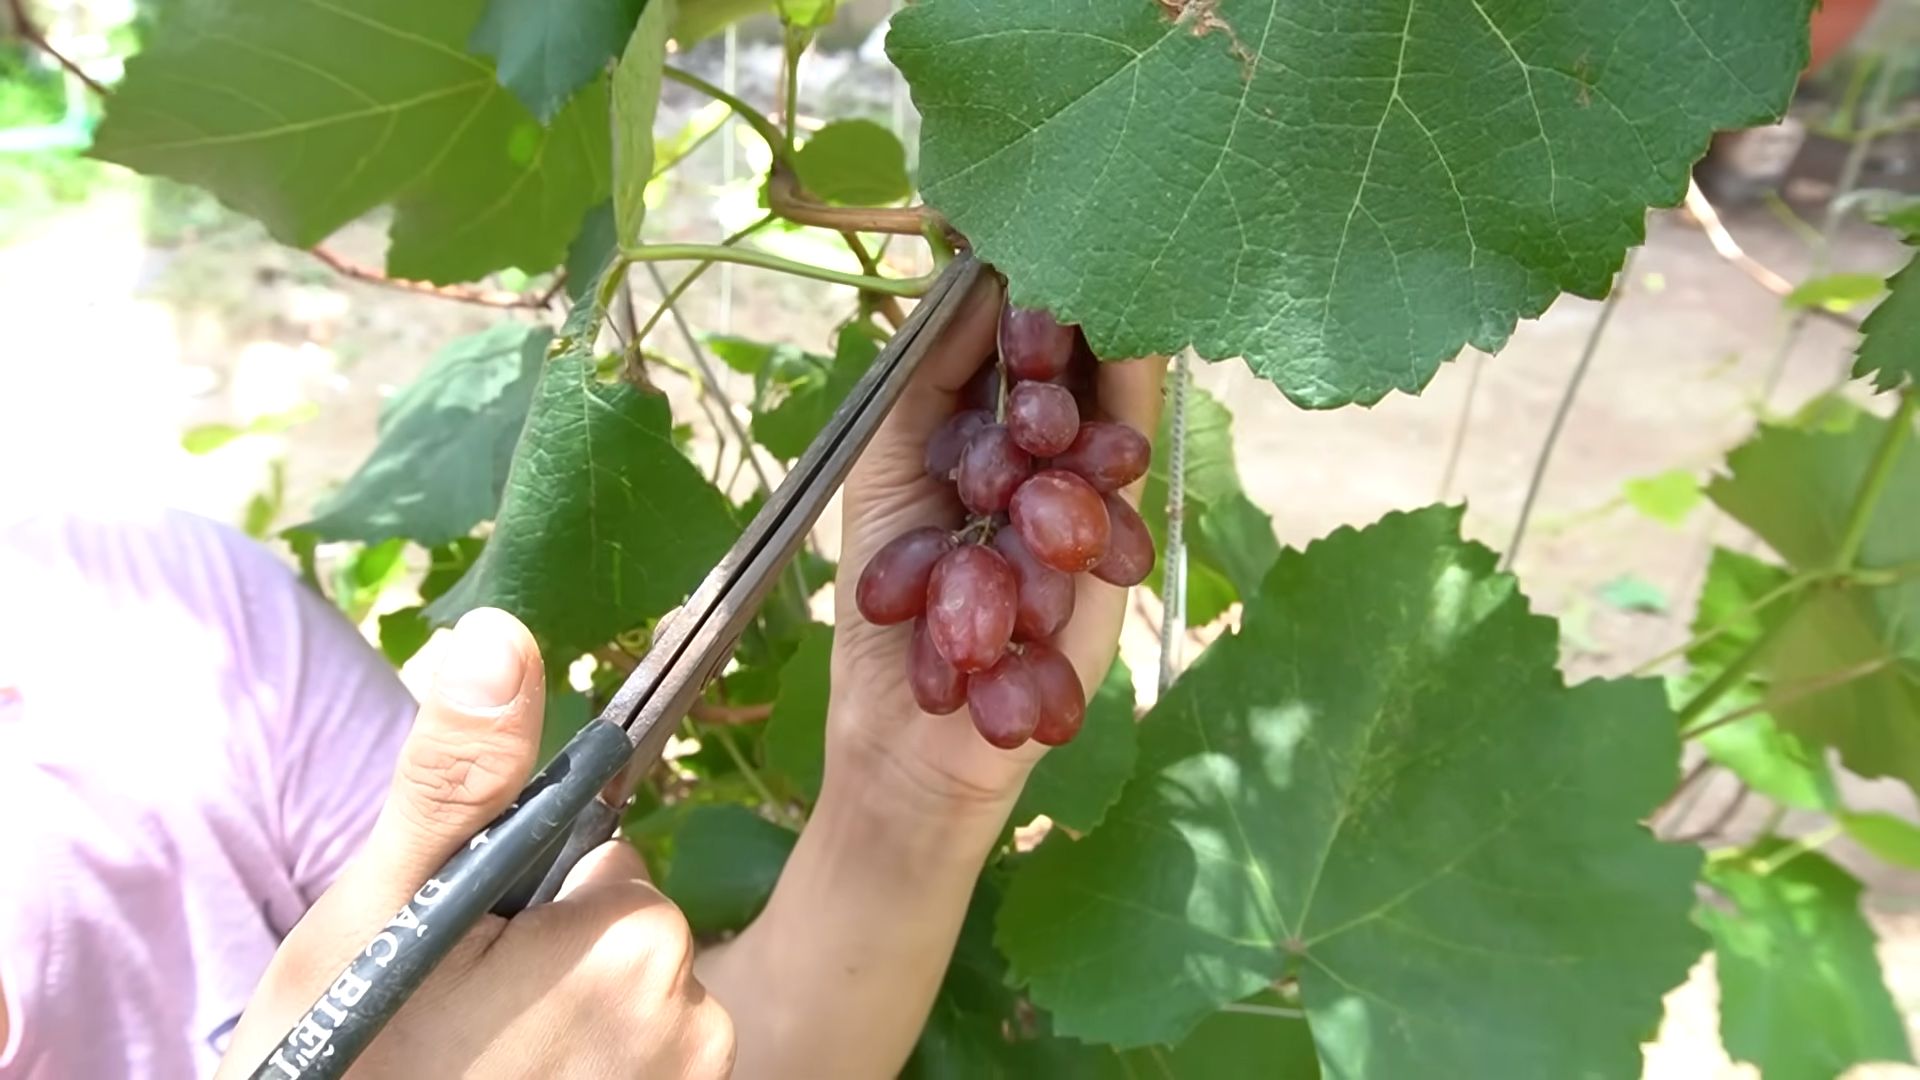
* Signs of Ripeness: Grapes are typically ready to harvest when they are fully colored, plump, and easy to pull from the vine. The taste should be sweet and juicy. You can also use a refractometer to measure the sugar content of the grapes.
* Harvesting Technique: Use pruning shears or scissors to cut the grape clusters from the vine. Handle the grapes gently to avoid bruising them.
* Enjoy Your Harvest: Eat your grapes fresh, make juice, or try
Conclusion
So, there you have it! This simple, yet incredibly effective, backyard grape growing hack is more than just a gardening tip; it’s a game-changer for anyone dreaming of harvesting their own juicy grapes. We’ve shown you how to maximize your yield, protect your precious fruit, and simplify the entire growing process. The beauty of this method lies in its accessibility. You don’t need to be a seasoned horticulturalist or invest in expensive equipment to see remarkable results.
Why is this a must-try? Because it addresses some of the most common challenges faced by home grape growers. Bird damage, fungal diseases, and inefficient sunlight exposure can all significantly impact your harvest. This hack tackles all three head-on, providing a protective barrier, promoting better air circulation, and ensuring that your grapes receive the optimal amount of sunlight for ripening. Imagine the satisfaction of plucking plump, perfectly ripe grapes from your own vines, knowing that you played a direct role in their success.
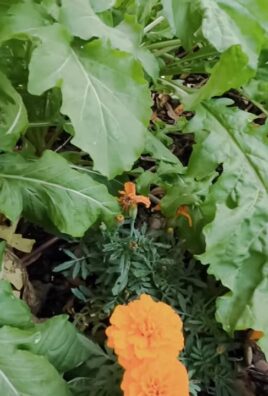
But the possibilities don’t stop there! Feel free to experiment with variations to suit your specific needs and preferences. For example, if you live in an area with particularly harsh winters, consider using a heavier-duty netting or even wrapping the entire structure in burlap for added insulation. You could also incorporate companion planting around the base of your grapevines to attract beneficial insects and further deter pests. Marigolds, basil, and lavender are all excellent choices.
Another variation involves the type of support structure you use. While we’ve focused on a simple trellis system, you could adapt this hack to work with an existing arbor or pergola. The key is to ensure that the netting is securely attached and that your grapes have ample room to grow and ripen. Think about the aesthetic appeal as well! You can train your grapevines to create a beautiful and functional living wall, adding both beauty and bounty to your backyard.
Don’t be afraid to get creative and personalize this backyard grape growing hack to fit your unique gardening style. The most important thing is to give it a try and see the amazing results for yourself. We are confident that you will be amazed at the difference it makes.
We are incredibly excited to hear about your experiences with this backyard grape growing hack! Did you notice a significant increase in your grape yield? Did it help protect your grapes from pests and diseases? What variations did you try, and how did they work out? Share your stories, photos, and tips in the comments below. Let’s build a community of passionate grape growers and learn from each other’s successes and challenges. Together, we can unlock the full potential of our backyard vineyards and enjoy the sweet rewards of our labor. So, grab your netting, get your gloves on, and get ready to experience the joy of growing your own delicious grapes! We can’t wait to hear from you!
Frequently Asked Questions (FAQ)
What type of netting should I use?
The best type of netting for this backyard grape growing hack is a lightweight, durable netting specifically designed for garden use. Look for netting with a small mesh size (around 1/4 inch) to effectively keep out birds and other pests. Bird netting made from polyethylene or nylon is a good choice, as it is resistant to UV damage and can withstand the elements. Avoid using netting with large holes, as birds can become entangled in it. You can find suitable netting at most garden centers or online retailers. Consider the size of your grapevines when purchasing netting to ensure you have enough to cover them completely.
How do I attach the netting to the trellis?
There are several ways to attach the netting to the trellis. The easiest method is to use plastic zip ties or garden staples. Simply wrap the zip ties around the netting and the trellis wires, securing them tightly. For a more permanent solution, you can use galvanized staples and a staple gun. Be careful not to damage the grapevines when attaching the netting. Ensure that the netting is taut and secure to prevent it from sagging or tearing in the wind. Regularly inspect the netting and re-secure any loose areas as needed.
Will the netting affect pollination?
While the netting can slightly reduce the access of pollinators to your grapevines, it generally does not have a significant impact on pollination. Grapes are primarily self-pollinating, meaning they can pollinate themselves without the need for insects. However, if you are concerned about pollination, you can temporarily remove the netting during the flowering period to allow bees and other pollinators to access the blossoms. Alternatively, you can choose a netting with a slightly larger mesh size to allow pollinators to pass through while still providing protection from birds and pests.
How often should I prune my grapevines?
Pruning is essential for maintaining the health and productivity of your grapevines. The best time to prune is during the dormant season, typically in late winter or early spring before new growth begins. Remove any dead, damaged, or diseased wood. Also, prune back the previous year’s growth to encourage new fruit-bearing shoots. The specific pruning technique will depend on the type of grape you are growing and the training system you are using. Consult a local gardening expert or refer to a grape-growing guide for detailed pruning instructions.
What are some common grape diseases and how can I prevent them?
Grapes are susceptible to several fungal diseases, including powdery mildew, downy mildew, and black rot. These diseases can cause leaf spots, fruit rot, and reduced yields. To prevent these diseases, ensure good air circulation around your grapevines by pruning them regularly and spacing them adequately. Avoid overhead watering, as this can create a humid environment that favors fungal growth. Apply a fungicide specifically formulated for grapes according to the manufacturer’s instructions. Choose disease-resistant grape varieties whenever possible.
How do I fertilize my grapevines?
Grapevines benefit from regular fertilization to ensure healthy growth and abundant fruit production. Apply a balanced fertilizer in early spring before new growth begins. Look for a fertilizer with a ratio of 10-10-10 or 12-12-12. Avoid over-fertilizing, as this can lead to excessive vegetative growth at the expense of fruit production. You can also amend the soil with compost or other organic matter to improve its fertility and drainage. Perform a soil test to determine the specific nutrient needs of your grapevines.
How long does it take for grapevines to produce fruit?
Grapevines typically take 2-3 years to begin producing fruit after planting. The first year is focused on establishing a strong root system. In the second year, the vines will start to grow more vigorously. By the third year, you should see some fruit production. However, it may take 4-5 years for the vines to reach their full production potential. Be patient and provide your grapevines with proper care, and you will be rewarded with a bountiful harvest in the years to come.
Can I use this hack for other types of fruit trees or plants?
Yes, this backyard grape growing hack can be adapted for use with other types of fruit trees and plants that are susceptible to bird damage or require protection from the elements. For example, you can use netting to protect blueberries, raspberries, and strawberries from birds. You can also use it to create a mini-greenhouse for tender plants that need protection from frost or cold weather. The key is to adapt the support structure and netting to fit the specific needs of the plant you are trying to protect.
What if the netting gets damaged?
If the netting gets damaged, it is important to repair it as soon as possible to maintain its effectiveness. Small tears can be patched with duct tape or by sewing them together with strong thread. For larger tears, you may need to replace the entire section of netting. Regularly inspect the netting for damage and make repairs as needed. Proper maintenance will help extend the life of your netting and ensure that your grapes are protected from pests and diseases.
Leave a Comment