
Melon harvest tips are essential for any home gardener dreaming of juicy, sun-ripened goodness straight from their backyard! Imagine biting into a perfectly sweet melon, the result of your own hard work and dedication. But let’s be honest, knowing when to pick that prize-winning melon can feel like a guessing game. I’ve been there, trust me! I’ve prematurely plucked melons only to be met with a bland, disappointing flavor.
Melons have a rich history, cultivated for centuries across various cultures. From ancient Egypt, where watermelons were found in tombs, to the cantaloupes enjoyed by Roman emperors, these fruits have always been prized. Today, the joy of growing your own melons connects us to that long tradition.
Why do you need these melon harvest tips? Because harvesting at the right time is the key to unlocking the full potential of your homegrown melons. Picking too early means missing out on peak sweetness and flavor. Waiting too long can lead to overripe, mushy fruit. This DIY guide will provide you with simple, actionable tips and tricks to ensure you harvest your melons at the perfect moment, maximizing your yield and enjoying the most delicious melons imaginable. Let’s get started and turn your garden into a melon paradise!
DIY: Turning Melon Rinds into Delicious Candied Treats
Okay, so you’ve just devoured a juicy watermelon or cantaloupe, and you’re staring at those leftover rinds, feeling a pang of guilt about tossing them. Don’t! I’m going to show you how to transform those seemingly useless rinds into a surprisingly delicious and delightful candied treat. It’s a bit of a process, but trust me, the end result is worth it. Plus, you’ll be reducing food waste and impressing your friends with your culinary ingenuity!
What You’ll Need:
Before we dive in, let’s gather our supplies. This is crucial for a smooth and enjoyable candy-making experience.
* **Melon Rinds:** Watermelon, cantaloupe, or honeydew rinds work best. You’ll want about 4 cups of cubed rinds. Make sure to remove as much of the pink or orange flesh as possible, leaving mostly the white part and the green skin.
* **Sugar:** Granulated sugar is the star of the show. You’ll need about 4 cups, but this can be adjusted slightly depending on the sweetness of your melon.
* **Water:** About 4 cups, used for boiling and candying.
* **Lemon Juice:** A tablespoon or two of lemon juice adds a nice tang and helps prevent crystallization.
* **Optional Flavorings:** This is where you can get creative! Consider adding:
* Vanilla extract (1 teaspoon)
* Ground ginger (1/2 teaspoon)
* Cinnamon sticks (1-2)
* Star anise (1-2)
* Citrus zest (lemon, orange, or lime)
* Food coloring (if you want vibrant candies)
* **Equipment:**
* Large pot or Dutch oven
* Vegetable peeler or paring knife
* Cutting board
* Measuring cups and spoons
* Slotted spoon or spider strainer
* Wire rack
* Parchment paper
Preparing the Melon Rinds: The Foundation for Success
This is a crucial step, so don’t skip it! Properly preparing the rinds ensures they’ll be tender and translucent after candying.
1. **Remove the Flesh:** Using a sharp knife, carefully remove all the pink or orange flesh from the melon rinds. You want to be left with mostly the white part and the green skin. Don’t worry about getting every single bit, but the cleaner you get it, the better the final texture will be.
2. **Peel the Green Skin:** Using a vegetable peeler or paring knife, peel away the tough green outer skin. This can be a bit tedious, but it’s important for a more tender candy. You can leave a *very* thin layer of green if you like, for a bit of visual interest, but be aware it will be slightly tougher.
3. **Cut into Cubes or Strips:** Cut the prepared rinds into bite-sized pieces. I prefer cubes about 1 inch in size, but you can also cut them into strips. Uniformity in size will ensure even cooking.
4. **Blanch the Rinds:** Place the cubed rinds in a large pot and cover them with cold water. Bring the water to a boil and then reduce the heat and simmer for about 10-15 minutes, or until the rinds are slightly translucent around the edges. This helps to soften them and remove some of the bitterness.
5. **Drain and Rinse:** Drain the rinds in a colander and rinse them thoroughly with cold water. This stops the cooking process and helps to remove any remaining bitterness.
The Candying Process: Sweetening the Deal
Now for the fun part! This is where the magic happens, and those humble rinds transform into glistening, sweet treats.
1. **Make the Syrup:** In the same pot you used for blanching, combine the sugar and water. Add the lemon juice and any optional flavorings you’ve chosen (vanilla extract, cinnamon sticks, ginger, etc.).
2. **Dissolve the Sugar:** Heat the mixture over medium heat, stirring constantly, until the sugar is completely dissolved. Make sure there are no sugar crystals clinging to the bottom of the pot.
3. **Add the Rinds:** Gently add the blanched and rinsed melon rinds to the sugar syrup.
4. **Simmer Slowly:** Bring the syrup back to a gentle simmer. Reduce the heat to low and let the rinds simmer slowly in the syrup for about 1-2 hours, or until they become translucent and the syrup has thickened considerably. The exact time will depend on the thickness of your rinds and the heat of your stove. Stir occasionally to prevent sticking and ensure even cooking. Be patient! This is a slow process, but it’s worth it.
5. **Monitor the Syrup:** As the rinds simmer, the syrup will gradually thicken. You want it to reach a consistency where it coats the back of a spoon. Be careful not to overcook the syrup, as it can become too thick and hard.
6. **Remove from Heat:** Once the rinds are translucent and the syrup has thickened, remove the pot from the heat.
7. **Let Cool Slightly:** Allow the rinds to cool slightly in the syrup for about 15-20 minutes. This will make them easier to handle.
Drying and Finishing: The Final Touches
Almost there! This final stage ensures your candied rinds are perfectly dried and ready to enjoy.
1. **Separate the Rinds:** Using a slotted spoon or spider strainer, carefully remove the candied rinds from the syrup and place them on a wire rack lined with parchment paper. Make sure the rinds are not touching each other, as this will prevent them from drying properly.
2. **Dry the Rinds:** Allow the candied rinds to dry at room temperature for 24-48 hours, or until they are no longer sticky to the touch. The drying time will depend on the humidity in your environment. You can speed up the drying process by placing the wire rack in a low oven (170°F or 77°C) for a few hours. Keep a close eye on them to prevent burning!
3. **Optional: Sugar Coating:** If you want to add an extra touch of sweetness and sparkle, you can toss the dried candied rinds in granulated sugar. Place the rinds in a bowl with a generous amount of sugar and toss gently until they are evenly coated.
4. **Store Properly:** Store the candied melon rinds in an airtight container at room temperature. They should last for several weeks, if not longer.
What to Do with the Leftover Syrup: Don’t Waste a Drop!
That delicious, flavorful syrup left over from candying the rinds is liquid gold! Don’t throw it away! Here are a few ideas for using it:
* **Flavoring for Drinks:** Add a spoonful or two to sparkling water, lemonade, or iced tea for a refreshing and flavorful twist.
* **Pancake or Waffle Syrup:** Drizzle it over pancakes, waffles, or French toast for a decadent breakfast treat.
* **Ice Cream Topping:** Use it as a topping for ice cream or yogurt.
* **Baking Ingredient:** Add it to cakes, cookies, or muffins for a hint of melon flavor.
* **Glaze for Meats:** Use it as a glaze for grilled chicken or pork.
* **Cocktail Ingredient:** Get creative and use it in cocktails! It would be delicious in a melon-themed martini or margarita.
Troubleshooting Tips: Addressing Common Issues
Even with the best instructions, things can sometimes go awry. Here are a few common issues you might encounter and how to fix them:
* **Rinds are too tough:** Make sure you’ve removed all the green skin and simmered the rinds long enough. If they’re still tough, try simmering them for a longer period of time.
* **Syrup is too thick:** If the syrup becomes too thick, add a little water and stir until it thins out.
* **Syrup is too thin:** If the syrup is too thin, continue simmering it until it thickens.
* **Rinds are sticky after drying:** If the rinds are still sticky after drying, try drying them for a longer period of time or placing them in a low oven to speed up the process.
* **Candies are crystallizing:** Adding lemon juice helps prevent crystallization. If you notice crystals forming, add a little more lemon juice and stir.
Flavor Variations: Spice Things Up!
Don’t be afraid to experiment with different flavors! Here are a few ideas to get you started:
* **Spicy Candied Melon Rinds:** Add a pinch of cayenne pepper or a few slices of fresh ginger to the syrup for a spicy kick.
* **Citrus Candied Melon Rinds:** Add the zest of a lemon, orange, or lime to the syrup for a bright and citrusy flavor.
* **Herbal Candied Melon Rinds:** Add a sprig of rosemary or thyme
Conclusion
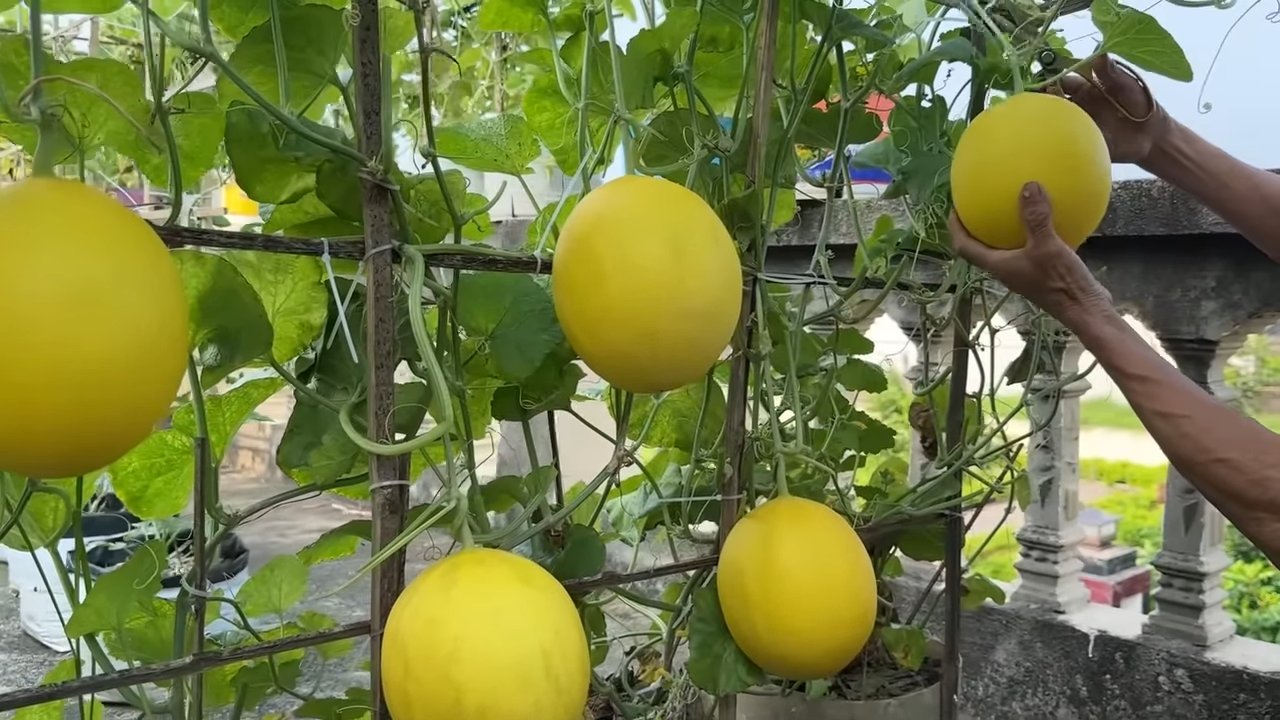
So, there you have it! Mastering these melon harvest tips isn’t just about picking a ripe melon; it’s about unlocking a world of flavor and freshness that you simply can’t replicate with store-bought fruit. Imagine biting into a perfectly ripe watermelon, its sweetness intensified by the knowledge that you nurtured it from seed to table. Or savoring the delicate aroma of a cantaloupe, harvested at its peak and bursting with juicy goodness. These are the rewards that await you when you embrace these simple yet effective techniques.
This isn’t just a recipe for success; it’s a recipe for a more connected and rewarding gardening experience. By paying attention to the subtle cues your melons provide – the color change, the thumping sound, the withering tendril – you’ll develop a deeper understanding of the natural world and a greater appreciation for the fruits of your labor.
Don’t be afraid to experiment! While these melon harvest tips provide a solid foundation, every garden is unique, and every melon variety has its own quirks. Try different harvesting times to see how it affects the flavor and texture. Consider leaving a few melons on the vine a little longer to see if they develop even more intense sweetness.
For example, with watermelons, some gardeners swear by the “ground spot” test – the area where the melon rests on the ground should turn from white to a creamy yellow. Others focus on the sound the melon makes when thumped – a deep, hollow sound indicates ripeness. With cantaloupes, the stem should easily slip from the vine when the melon is ripe. Honeydew melons are a bit trickier, but look for a slight softening at the blossom end and a change in color from green to a pale yellow.
And remember, gardening is a journey, not a destination. There will be successes and failures along the way, but each experience will teach you something new. The most important thing is to get out there, get your hands dirty, and enjoy the process.
We encourage you to try these melon harvest tips in your own garden this season. Share your experiences with us! Let us know what worked for you, what didn’t, and any tips or tricks you’ve discovered along the way. Together, we can create a community of melon-loving gardeners who are passionate about growing and sharing the best-tasting fruit imaginable. Post your photos and stories on our social media pages using #MelonHarvestSuccess. We can’t wait to see what you grow!
Frequently Asked Questions (FAQ)
Q: How do I know when a watermelon is ripe?
A: Determining watermelon ripeness can be tricky, but here are a few key indicators:
* **The Ground Spot:** Look for the ground spot, the area where the watermelon rests on the ground. It should be creamy yellow or even orange, not white. A white ground spot indicates the melon is not yet ripe.
* **The Thump Test:** Give the watermelon a gentle thump. A ripe watermelon will sound deep and hollow. An unripe watermelon will sound dull and solid. This takes practice, so don’t be discouraged if you don’t get it right away.
* **The Tendril Test:** The tendril closest to the watermelon stem should be brown and dried. This indicates that the watermelon has stopped growing and is likely ripe.
* **Skin Appearance:** The skin should be dull rather than shiny. A shiny watermelon is often underripe.
Q: What about cantaloupes? How do I know when they are ready to pick?
A: Cantaloupes are generally easier to determine ripeness than watermelons. The most reliable indicator is the “slip test.”
* **The Slip Test:** Gently try to detach the cantaloupe from the vine. If it slips easily from the vine with a gentle tug, leaving a smooth, clean scar, it’s ripe. If you have to force it, it’s not ready.
* **Aroma:** A ripe cantaloupe will have a sweet, musky aroma, especially near the stem end.
* **Color:** The skin color should change from green to a tan or yellowish color, depending on the variety.
* **Softness:** The blossom end (opposite the stem) should be slightly soft to the touch.
Q: My honeydew melon is still green. Is it ripe?
A: Honeydew melons are a bit more challenging to judge than cantaloupes or watermelons.
* **Color Change:** Look for a change in color from a bright green to a pale yellow or creamy white.
* **Softness:** The blossom end should be slightly soft and yielding to gentle pressure.
* **Aroma:** A ripe honeydew melon will have a subtle, sweet aroma.
* **Weight:** A ripe honeydew melon will feel heavy for its size.
Q: What if I pick a melon and it’s not quite ripe? Can I ripen it off the vine?
A: Unfortunately, melons don’t ripen much after being picked. Watermelons, in particular, will not get any sweeter. Cantaloupes and honeydews may soften slightly, but their flavor won’t improve significantly. It’s always best to leave melons on the vine until they are fully ripe.
Q: How long can I store melons after harvesting them?
A: The storage life of melons depends on the type and ripeness.
* **Watermelons:** Whole watermelons can be stored at room temperature for about a week or two. Once cut, wrap tightly in plastic wrap and refrigerate for up to 3-5 days.
* **Cantaloupes:** Whole cantaloupes can be stored at room temperature for a few days until ripe. Once ripe, refrigerate for up to a week. Cut cantaloupe should be refrigerated and consumed within 3-5 days.
* **Honeydew Melons:** Whole honeydew melons can be stored at room temperature for up to a week. Once cut, refrigerate for up to 5 days.
Q: What are some common mistakes people make when harvesting melons?
A: Some common mistakes include:
* **Picking too early:** This is the most common mistake. Be patient and wait until the melon is fully ripe.
* **Relying on just one indicator:** Use a combination of indicators to determine ripeness.
* **Damaging the melon during harvest:** Be careful not to bruise or cut the melon when harvesting.
* **Storing melons improperly:** Store melons properly to prolong their shelf life.
Q: Can I use these melon harvest tips for other types of melons, like crenshaws or casabas?
A: Yes, while the specific indicators may vary slightly depending on the melon variety, the general principles of observing color changes, aroma, and stem detachment can be applied to most types of melons. Research the specific characteristics of the melon variety you are growing for the most accurate harvesting information.
Q: What if pests are eating my melons before they ripen?
A: Protecting your melons from pests is crucial for a successful harvest. Consider using row covers or netting to protect the melons from insects. You can also use organic pest control methods, such as insecticidal soap or neem oil. Regularly inspect your melon plants for signs of pests and take action promptly.
Q: How does weather affect melon ripening?
A: Weather plays a significant role in melon ripening. Warm, sunny weather promotes rapid growth and sugar development. Cool, cloudy weather can slow down the ripening process. Be patient and adjust your harvesting schedule accordingly. If you experience a period of cool weather, it may take longer for your melons to ripen.


Leave a Comment