
Growing Artichokes at Home might seem like a culinary dream reserved for seasoned gardeners, but I’m here to tell you it’s totally achievable, even if you’re a beginner! Have you ever imagined strolling through your backyard, plucking a fresh, plump artichoke straight from the plant, and transforming it into a gourmet meal? Well, stop dreaming and start doing! This DIY guide will unlock the secrets to successfully cultivating these architectural beauties right in your own garden.
Artichokes, with their thistle-like appearance and unique flavor, have a rich history dating back to ancient times. The Romans considered them a delicacy, and they’ve been a staple in Mediterranean cuisine for centuries. Beyond their culinary appeal, artichokes are packed with nutrients and antioxidants, making them a healthy and delicious addition to your diet.
But why should you bother with the effort of growing your own? Simple: freshness and flavor! Store-bought artichokes often lack the vibrant taste of homegrown ones. Plus, growing artichokes at home is incredibly rewarding. There’s nothing quite like the satisfaction of nurturing a plant from seedling to harvest, knowing you’ve created something delicious and healthy with your own two hands. This DIY guide will provide you with simple tricks and hacks to make the process easier and more enjoyable, ensuring you have a bountiful harvest of these delectable thistles. Let’s get started!

Growing Artichokes Yourself: A Comprehensive DIY Guide
Hello garden friends! I love artichokes, and there’s nothing better than harvesting them fresh from your own garden. It might seem a bit intimidating at first, but with a few tips and tricks, you too can successfully grow these delicious thistles. In this article, I’ll show you how to do it step by step. Let’s get started!
What You Need for Growing Artichokes
Before we begin, here is a list of the things you’ll need:
- Artichoke seeds or young plants (I recommend young plants for quicker results)
- Seedling pots (if you’re starting with seeds)
- Seed starting mix
- Garden soil (well-draining and nutrient-rich)
- Compost or well-rotted manure
- Garden shovel or spade
- Watering can or garden hose
- Mulch (e.g., straw or wood chips)
- Plant stakes (optional, for support)
- Pruning shears
Growing Artichokes from Seed (Optional)
If you decide to grow from seed, be aware that it will take longer to harvest. But it’s a great way to try out different varieties!
- Prepare the seeds: Artichoke seeds have a hard shell. To speed up germination, you can soak them in lukewarm water for 24 hours.
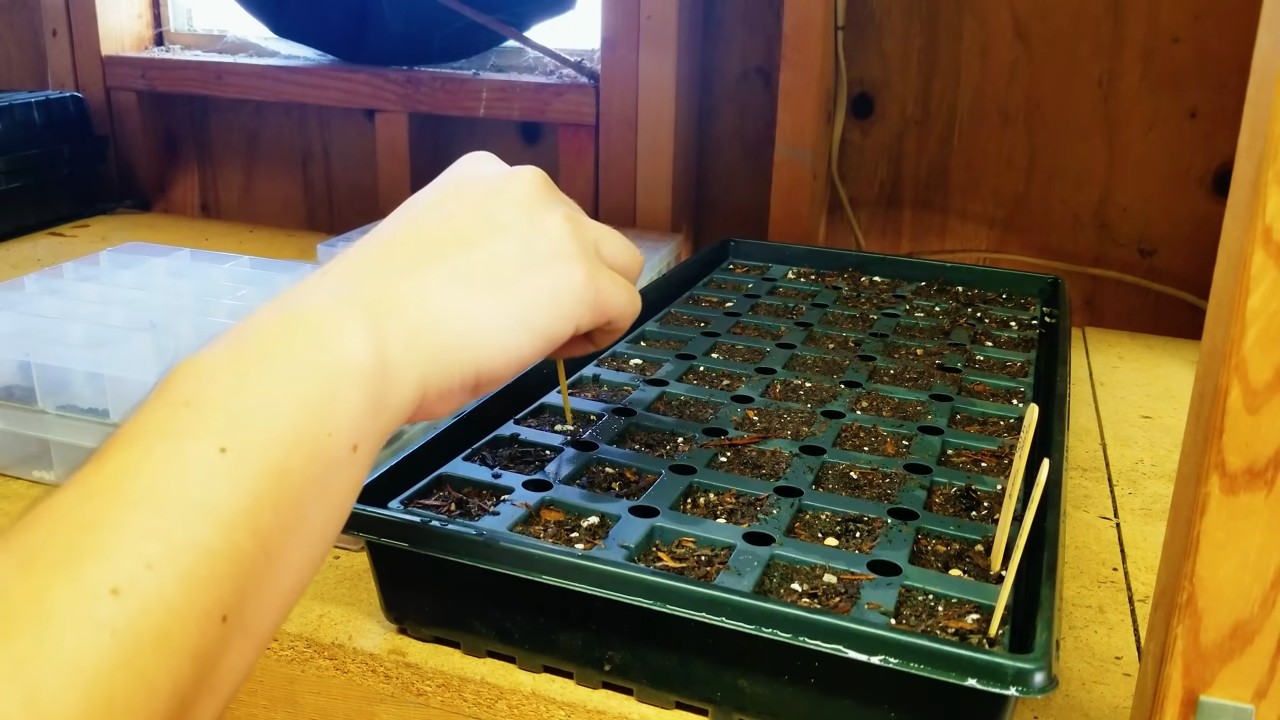
- Sowing: Fill the seedling pots with seed starting mix. Sow the seeds about 1 cm deep into the soil.
- Moisture: Keep the soil moist, but not wet. It’s best to spray the soil regularly with a spray bottle.
- Warmth: Artichoke seeds germinate best at a temperature of 20-25°C. Place the pots in a warm, bright place, e.g., on a windowsill or in a greenhouse.
- Pricking out: Once the seedlings have developed a few leaves (approx. 4-6 weeks after sowing), you can prick them out into larger pots. Use regular garden soil enriched with some compost for this.
- Hardening off: Before you plant the young plants outdoors, you should harden them off. To do this, place them outside for a few hours during the day and bring them back in at night. Gradually increase the time outdoors over a week.
Choosing the Right Location
Artichokes are sun-worshippers! They need at least 6-8 hours of direct sunlight per day. The soil should be well-draining and nutrient-rich. They do not tolerate waterlogging at all.
- Sunlight: Choose a location that gets sun all day long.
- Soil: The soil should be loose and well-draining. You should improve heavy clay soils with sand and compost.
- Wind protection: Artichokes can get quite large and are susceptible to wind damage. Choose a location that is somewhat protected from the wind.
Planting Artichokes (Young Plants or Pre-grown Seedlings)
Now comes the exciting part: planting!
- Prepare the soil: Dig a hole that is twice the size of the plant’s root ball. Mix the excavated soil with compost or well-rotted manure.
- Insert the plant: Carefully remove the plant from the pot and place it in the hole. Make sure the root ball is not damaged.
- Fill the hole: Fill the hole with the prepared soil and press it down lightly.
- Water: Water the plant thoroughly.
- Mulch: Apply a layer of mulch around the plant. This helps to retain moisture in the soil and suppress weeds.
- Planting distance: If you are planting several artichokes, ensure a distance of at least 90 cm between the plants. They need space to grow!
Caring for Artichokes: Watering, Fertilizing, and Pruning
Proper care is crucial for a bountiful harvest.
- Watering: Artichokes need regular water, especially during the growing season. Water them when the top layer of soil is dry. Avoid waterlogging!
- Fertilizing: Fertilize the artichokes regularly with an organic fertilizer. I like to use compost tea or horn shavings. Fertilize in the spring and again in the summer.
- Pruning:
- Spent flower heads: Regularly cut off spent flower heads to encourage the formation of new buds.
- Dry leaves: Remove dry or damaged leaves.
- Cutting back in autumn: In the autumn, after the harvest is finished, cut the plant back to about 15 cm above the ground. This helps it to survive the winter better.
- Protection from frost: In regions with harsh winters, you should protect the artichokes from frost. Cover them with straw or fleece.
Pests and Diseases
Artichokes are relatively robust, but they too can be affected by pests and diseases.
- Aphids: Aphids can infest the leaves and impair growth. You can spray them off with a jet of water or combat them with a biological insecticide.
- Slugs: Slugs love artichoke leaves. Collect them by hand or use slug pellets.
- Powdery mildew: Powdery mildew is a fungal disease that appears as a white coating on the leaves. Ensure good air circulation and remove affected leaves.
- Root rot: Root rot occurs when the artichokes are too wet. Ensure good drainage and avoid waterlogging.
Harvesting Artichokes
The harvest is the reward for your effort!
- Harvest time: Artichokes are ready to harvest when the buds are firm and closed, but the outer bracts are opening slightly.
- Harvesting technique: Cut the buds with a sharp knife. Leave about 5-8 cm of stem on the bud.
- Regular harvesting: Harvest the artichokes regularly to encourage the formation of new buds.
Overwintering Artichokes
In regions with mild winters, artichokes can overwinter outdoors. In colder regions, you should protect them.
- Cutting back: In autumn, cut the plant back to about 15 cm above the ground.
- Covering: Cover the plant with a thick layer of straw or fleece.
- Potted plants: If you have grown the artichokes in pots, you can move them to a cool, frost-free place, e.g., a garage or a cellar. Water them only occasionally to prevent the soil from drying out.
Enjoying Artichokes
After all the work, you can finally enjoy your homegrown artichokes! There are many ways to prepare them:
- Boiled: The classic method. Boil the artichokes in salted water until the leaves can be easily plucked off.
- Grilled: A delicious alternative. Halve the artichokes and grill them with some olive oil and herbs.
- Stuffed: Fill the artichokes with ground meat, rice, or vegetables.
- Pickled: A great way to preserve artichokes.
I hope this guide has…
Conclusion
So, there you have it! Growing artichokes at home might seem daunting at first, but with a little patience, the right conditions, and these simple DIY tricks, you can cultivate your own supply of these delicious and nutritious thistles. Forget those expensive grocery store artichokes; imagine the satisfaction of harvesting your own, knowing exactly where they came from and how they were grown.
This isn’t just about saving money, though that’s certainly a perk. It’s about connecting with nature, learning a new skill, and enjoying the unparalleled flavor of freshly grown produce. The taste difference between a store-bought artichoke and one you’ve nurtured yourself is truly remarkable. The homegrown version boasts a more delicate, nuanced flavor, a tender texture, and a vibrant freshness that you just can’t replicate.
But the benefits extend beyond the culinary realm. Artichoke plants are stunning additions to any garden, adding a touch of Mediterranean elegance with their silvery-green foliage and striking purple flower buds. They attract beneficial pollinators like bees and butterflies, contributing to a healthier and more vibrant ecosystem in your backyard. Plus, the process of tending to your artichoke plants can be incredibly therapeutic, providing a welcome escape from the stresses of daily life.
Don’t be afraid to experiment! Try different varieties of artichokes to find your favorite. ‘Green Globe’ is a classic choice, but ‘Violetta’ offers a beautiful purple hue, and ‘Imperial Star’ is known for its early and abundant yields. You can also play around with companion planting, pairing your artichokes with herbs like rosemary and thyme, which can help deter pests and enhance their flavor. Consider adding marigolds to your garden as well; they are known to repel nematodes, which can damage artichoke roots.
For those in colder climates, consider growing your artichokes in large containers that can be moved indoors during the winter months. This allows you to enjoy the beauty and bounty of artichokes even if you don’t have a year-round growing season. You can also try overwintering your artichoke plants by cutting them back to the ground and covering them with a thick layer of mulch.
The key to success with growing artichokes at home is consistency and attention to detail. Regularly check your plants for pests and diseases, and provide them with the water and nutrients they need to thrive. Don’t be discouraged if you encounter challenges along the way; gardening is a learning process, and every mistake is an opportunity to grow (pun intended!).
We are confident that with these tips, you’ll be enjoying homegrown artichokes in no time. So, grab your gardening gloves, order some seeds or starts, and get ready to embark on this rewarding culinary adventure. We encourage you to share your experiences with us! Post photos of your artichoke plants, share your tips and tricks, and let us know what varieties you’re growing. Let’s create a community of artichoke enthusiasts and inspire others to discover the joys of growing their own food. Happy gardening!
Frequently Asked Questions (FAQ)
What is the best time of year to plant artichokes?
The ideal time to plant artichokes depends on your climate. In warmer regions with mild winters (zones 7-10), you can plant artichokes in the fall for a spring harvest. In colder regions (zones 6 and below), it’s best to start artichokes indoors in late winter or early spring and transplant them outdoors after the last frost. Starting them indoors gives them a head start and allows them to establish themselves before the colder weather arrives. Remember, artichokes need a period of cool temperatures (chilling) to induce bud formation, so timing is crucial.
How much space do artichoke plants need?
Artichoke plants are quite large and require ample space to thrive. Each plant needs at least 3 to 4 feet of space in all directions. This allows for proper air circulation, which helps prevent fungal diseases, and ensures that the plants have enough room to spread their roots and foliage. If you’re planting multiple artichokes, space the rows at least 4 to 6 feet apart. Consider the mature size of the variety you’re growing when determining spacing.
What kind of soil is best for growing artichokes?
Artichokes prefer well-drained, fertile soil that is rich in organic matter. The ideal soil pH is between 6.0 and 7.0. Before planting, amend your soil with compost, aged manure, or other organic materials to improve its drainage and fertility. Artichokes are heavy feeders, so providing them with a nutrient-rich soil is essential for healthy growth and abundant yields. If your soil is heavy clay, consider adding sand or perlite to improve drainage.
How often should I water my artichoke plants?
Artichokes need consistent moisture, especially during hot, dry weather. Water deeply and regularly, aiming to keep the soil consistently moist but not waterlogged. Avoid overhead watering, as this can promote fungal diseases. A good rule of thumb is to water when the top inch of soil feels dry to the touch. Mulching around your artichoke plants can help retain moisture and suppress weeds. During the winter months, reduce watering frequency, but don’t allow the soil to dry out completely.
How do I fertilize my artichoke plants?
Artichokes are heavy feeders and benefit from regular fertilization. Apply a balanced fertilizer (e.g., 10-10-10) at planting time and then every 4 to 6 weeks during the growing season. You can also side-dress your plants with compost or aged manure. Avoid over-fertilizing, as this can lead to excessive foliage growth at the expense of bud production. Consider using a fertilizer specifically formulated for vegetables or herbs.
How do I protect my artichoke plants from pests and diseases?
Artichokes can be susceptible to various pests and diseases, including aphids, snails, slugs, and powdery mildew. Regularly inspect your plants for signs of infestation or disease. Handpick pests or use organic pest control methods such as insecticidal soap or neem oil. To prevent fungal diseases, ensure good air circulation around your plants and avoid overhead watering. Remove any infected leaves or stems promptly. Consider using copper-based fungicides as a preventative measure.
When are artichokes ready to harvest?
Artichokes are typically ready to harvest when the buds are plump and firm, and the outer bracts (leaves) are just beginning to open. The size of the bud will vary depending on the variety. To harvest, cut the stem about 2 to 3 inches below the base of the bud. Wear gloves to protect your hands from the prickly leaves. Harvest artichokes before the bracts open fully, as this indicates that the bud is starting to flower and will become tough and less flavorful.
Can I grow artichokes in containers?
Yes, you can grow artichokes in containers, especially if you live in a colder climate. Choose a large container (at least 24 inches in diameter) with good drainage. Use a high-quality potting mix that is rich in organic matter. Container-grown artichokes will need more frequent watering and fertilization than those grown in the ground. Be sure to provide them with plenty of sunlight. In colder climates, you can move the containers indoors during the winter months.
How do I overwinter artichoke plants in cold climates?
In cold climates, artichokes need protection from freezing temperatures. After the first frost, cut back the foliage to about 6 inches above the ground. Cover the plants with a thick layer of mulch, such as straw, leaves, or wood chips. You can also wrap the plants with burlap or horticultural fleece for added protection. In very cold regions, consider digging up the plants and storing them in a cool, dark place until spring. Alternatively, grow them in containers that can be moved indoors.
Are artichokes perennial or annual?
Artichokes are technically perennials, but they are often grown as annuals in colder climates because they are not reliably hardy. In warmer regions (zones 7-10), artichokes can live for several years and produce multiple harvests. In colder regions, you can try to overwinter your artichoke plants, but they may not survive. Even if they do survive, they may not produce as many buds as they would in a warmer climate.

Leave a Comment