
Grow Dragon Beans at Home and unlock a world of vibrant color and delicious flavor right in your backyard! Have you ever dreamed of cultivating something truly unique, something that sparks conversation and adds a touch of magic to your garden? Well, get ready, because growing Dragon Beans is easier than you think, and I’m here to show you how with some simple DIY tricks!
Dragon Beans, also known as Yardlong Beans or Asparagus Beans, aren’t just a pretty face; they boast a rich history, particularly in Asian cuisines where they’ve been enjoyed for centuries. Imagine serving up a stir-fry featuring beans you grew yourself – a true farm-to-table experience! But beyond their culinary appeal, these beans are incredibly rewarding to grow. They’re vigorous climbers, adding vertical interest to your garden, and their long, slender pods are a sight to behold.
So, why should you try this DIY project? Because everyone deserves the joy of fresh, homegrown produce, and grow Dragon Beans at home offers a unique and satisfying gardening experience. Plus, with rising grocery costs and concerns about food miles, cultivating your own food is becoming increasingly important. This article will provide you with easy-to-follow steps and clever hacks to ensure your Dragon Bean plants thrive, even if you’re a complete beginner. Let’s get started and transform your garden into a vibrant, edible oasis!
Grow Your Own Magical Dragon Beans: A DIY Guide
Hey there, fellow plant enthusiasts! Ever dreamt of growing something truly extraordinary? Well, get ready to embark on a fantastic journey because today, I’m going to show you how to cultivate your very own Dragon Beans at home! These aren’t your average garden variety beans; they’re visually stunning, incredibly rewarding to grow, and a total conversation starter.
What are Dragon Beans?
Dragon Beans, also known as Dragon Tongue Beans or Borlotti Beans, are heirloom beans prized for their beautiful, vibrant purple streaks on a creamy background. They’re not just pretty; they’re also delicious! You can eat them fresh as snap beans when young, or let them mature and dry for use in soups, stews, and other hearty dishes.
Why Grow Dragon Beans?
* Visual Appeal: Those striking purple streaks make them a standout in any garden.
* Delicious Flavor: They offer a slightly nutty and sweet taste.
* Easy to Grow: Dragon Beans are relatively low-maintenance, making them perfect for beginner gardeners.
* Nutritious: They’re packed with protein, fiber, and essential vitamins.
* Versatile: Enjoy them fresh, frozen, or dried.
What You’ll Need:
Before we dive in, let’s gather our supplies. Here’s a checklist of everything you’ll need to successfully grow your Dragon Beans:
* Dragon Bean Seeds: You can find these online or at your local garden center. Make sure to choose a reputable supplier for the best germination rates.
* Well-Draining Soil: Dragon Beans thrive in soil that drains well. You can use a potting mix specifically designed for vegetables or amend your garden soil with compost and perlite.
* Sunny Location: These beans need at least 6-8 hours of direct sunlight per day.
* Trellis or Support Structure: Dragon Beans are climbing beans, so they’ll need something to climb on. A trellis, fence, or even sturdy stakes will work.
* Watering Can or Hose: For regular watering.
* Gardening Gloves: To protect your hands.
* Optional: Compost or aged manure to enrich the soil.
* Optional: Seed starting trays and potting mix (if starting indoors).
Step-by-Step Guide to Growing Dragon Beans
Alright, let’s get our hands dirty! Here’s a detailed, step-by-step guide to growing your own Dragon Beans:
1. Starting Your Seeds (Optional)
While you can directly sow Dragon Bean seeds into the ground, starting them indoors gives them a head start, especially in areas with shorter growing seasons.
1. Prepare Your Seed Starting Trays: Fill your seed starting trays with a good quality seed starting mix.
2. Sow the Seeds: Plant the seeds about 1 inch deep in the soil.
3. Water Gently: Water the soil gently until it’s moist but not soggy.
4. Provide Warmth and Light: Place the trays in a warm location (around 70-75°F) and provide them with plenty of light. A sunny windowsill or a grow light will work.
5. Keep the Soil Moist: Water regularly to keep the soil consistently moist.
6. Transplant Seedlings: Once the seedlings have developed a few sets of true leaves (usually after 2-3 weeks) and the weather outside has warmed up, they’re ready to be transplanted into the garden.
2. Preparing the Garden Bed
Whether you’re starting seeds indoors or directly sowing them, preparing the garden bed is crucial for success.
1. Choose a Sunny Location: Select a spot in your garden that receives at least 6-8 hours of direct sunlight per day.
2. Prepare the Soil: Loosen the soil to a depth of at least 12 inches. Remove any rocks, weeds, or debris.
3. Amend the Soil: Incorporate compost or aged manure into the soil to improve its fertility and drainage. This will provide your Dragon Beans with the nutrients they need to thrive.
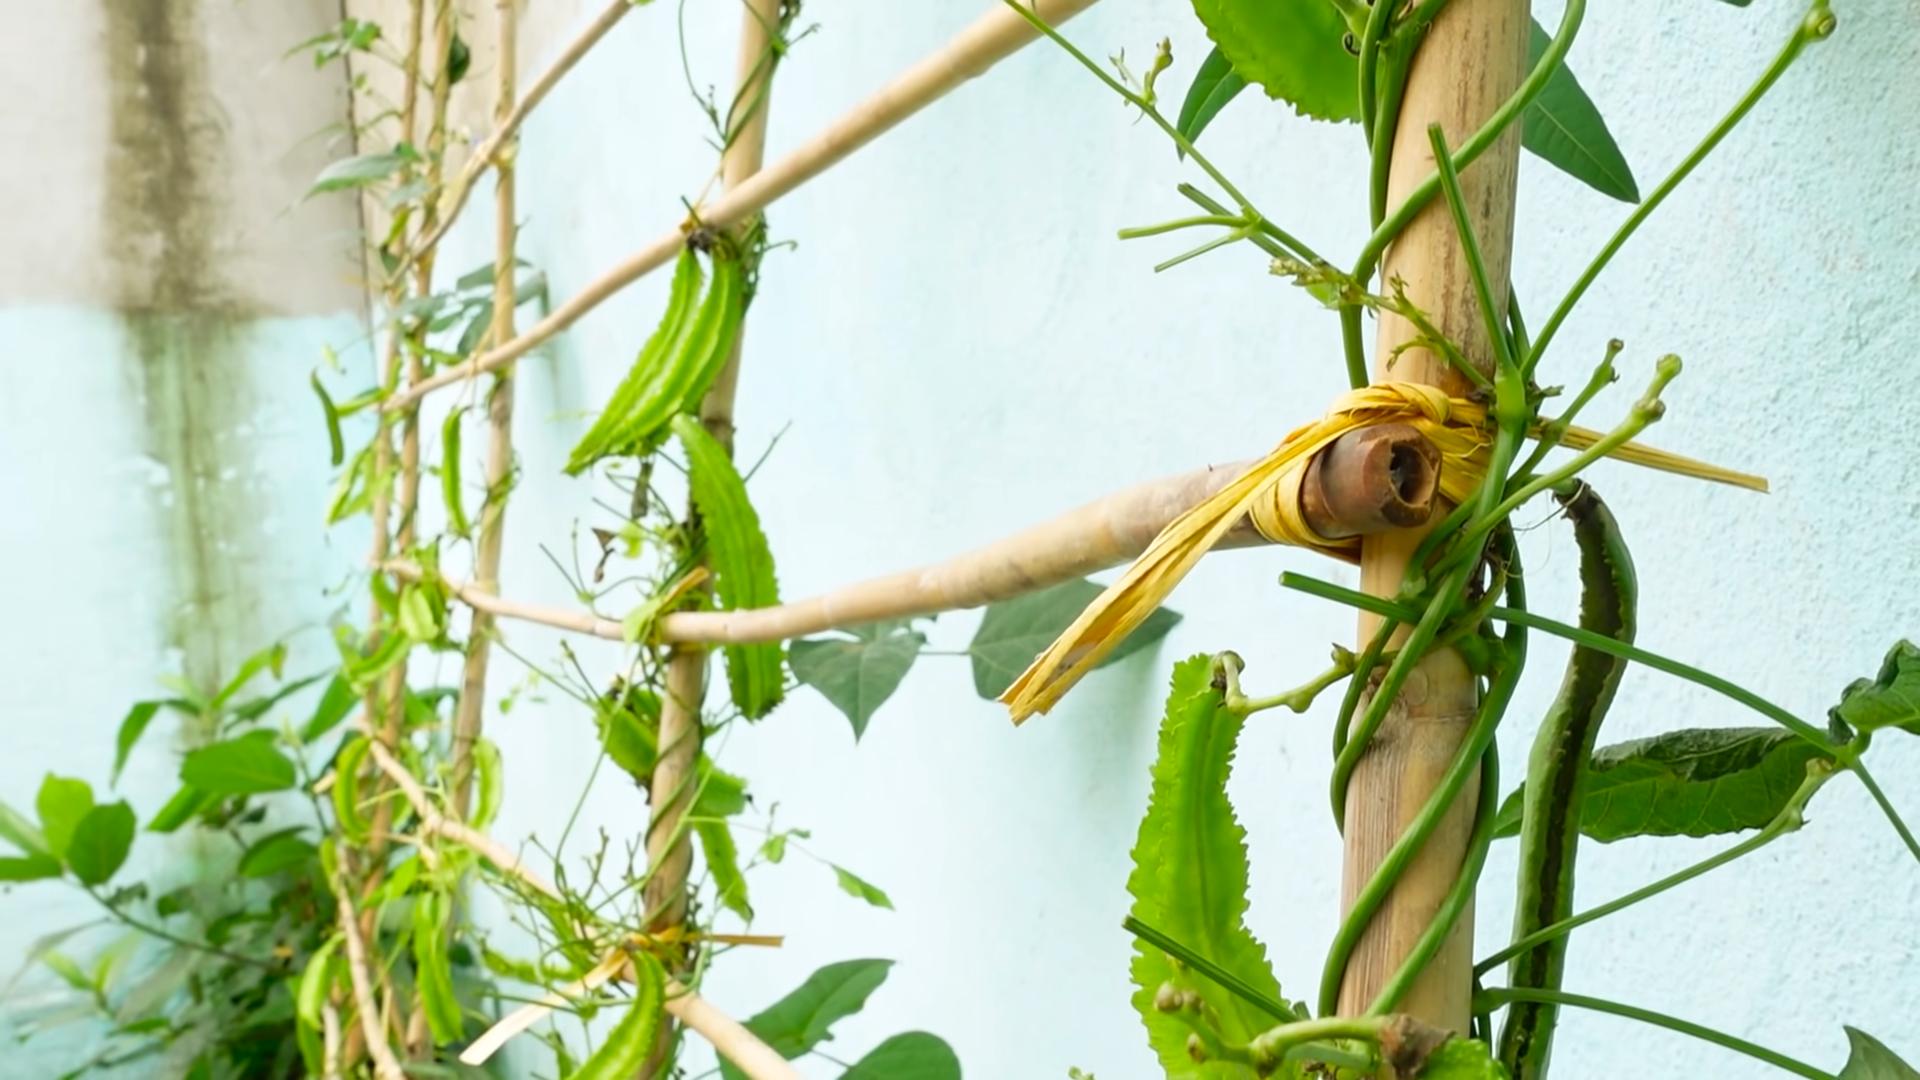
4. Install a Trellis or Support Structure: Before planting, install a trellis, fence, or other support structure for the beans to climb on. Make sure it’s sturdy enough to support the weight of the mature plants.
3. Planting Dragon Bean Seeds
Now for the exciting part – planting those beautiful Dragon Bean seeds!
1. Direct Sowing: If you’re directly sowing the seeds, wait until the soil has warmed up to at least 60°F (around 15°C). This is usually a couple of weeks after the last expected frost.
2. Planting Depth: Sow the seeds about 1 inch deep and 2-3 inches apart.
3. Row Spacing: If planting in rows, space the rows about 2-3 feet apart.
4. Water Thoroughly: After planting, water the soil thoroughly to help the seeds germinate.
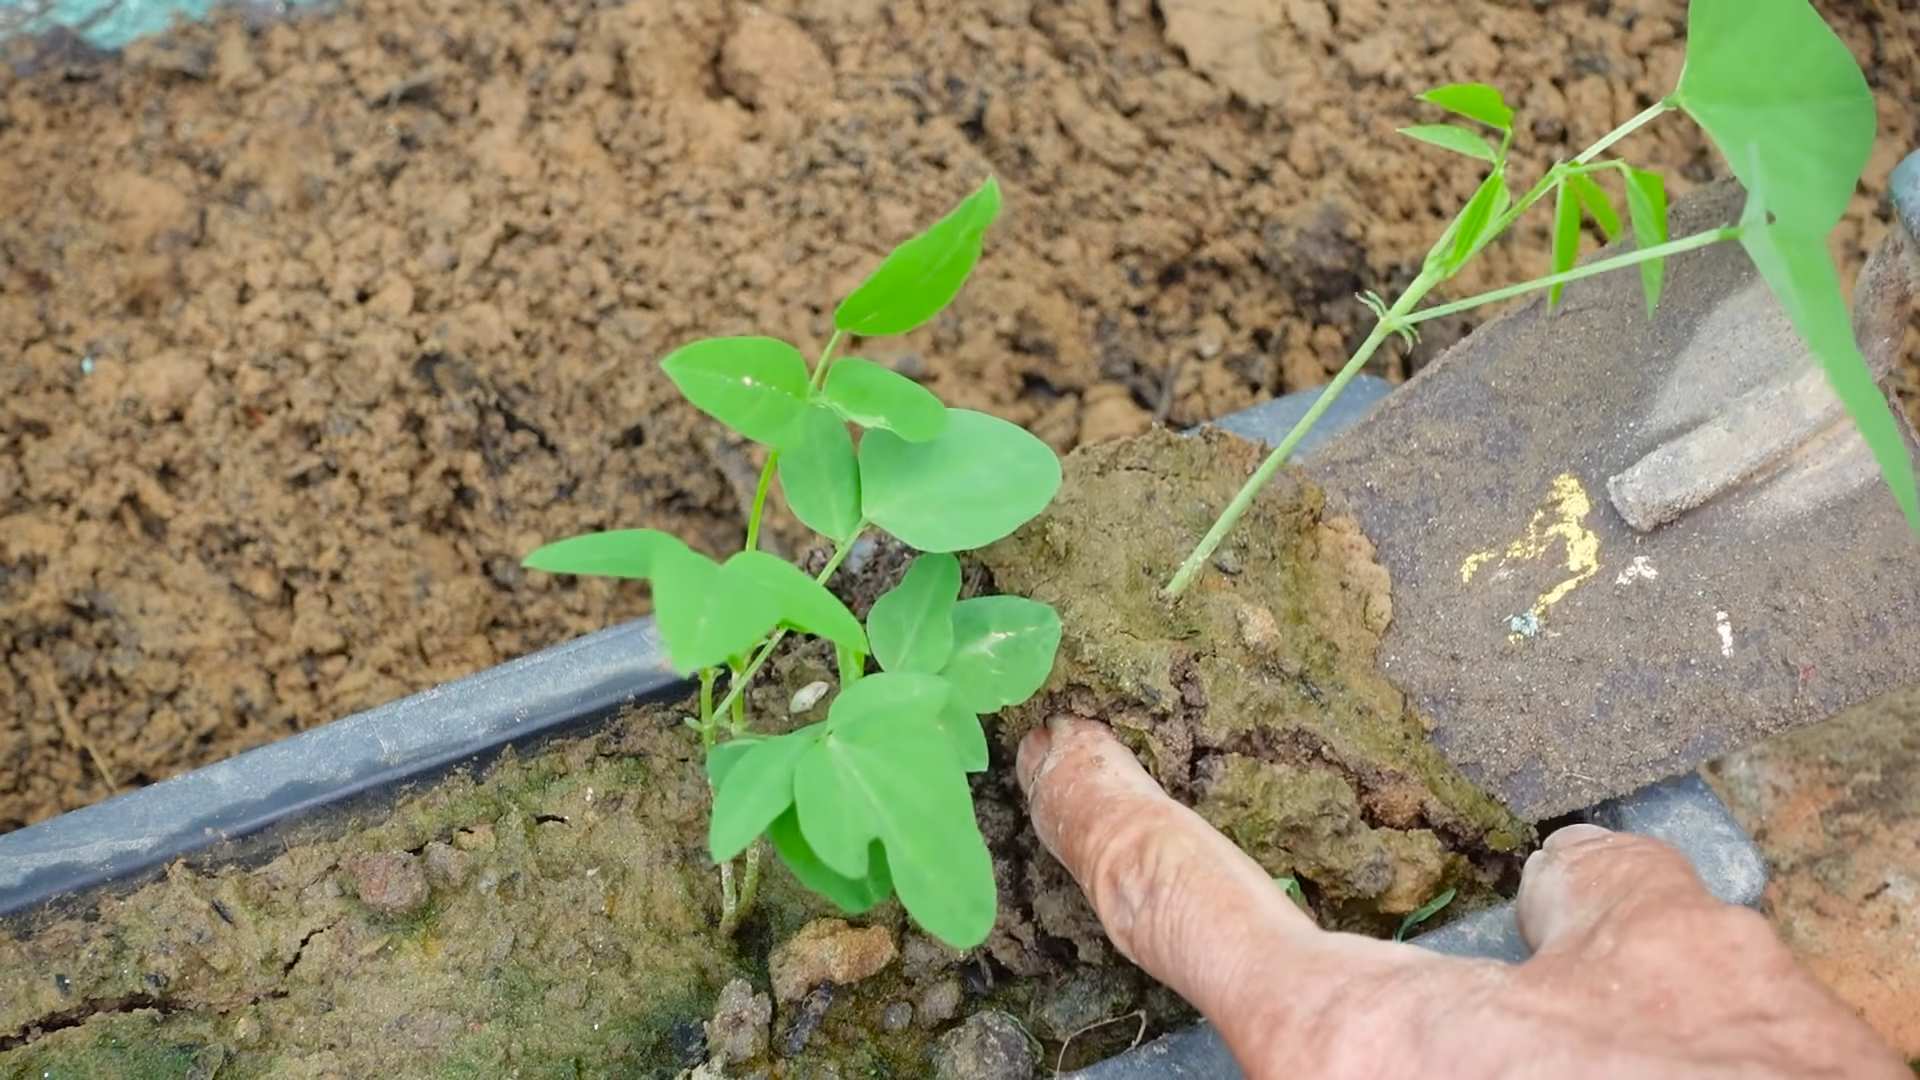
5. Transplanting Seedlings: If you started your seeds indoors, gently remove the seedlings from the trays and plant them in the garden, spacing them about 2-3 inches apart. Water them well after transplanting.
4. Caring for Your Dragon Bean Plants
Once your Dragon Bean plants are in the ground, it’s time to provide them with the care they need to flourish.
1. Watering: Water your Dragon Bean plants regularly, especially during dry periods. Aim to keep the soil consistently moist but not waterlogged. Water deeply at the base of the plants to avoid wetting the foliage, which can lead to fungal diseases.
2. Fertilizing: Dragon Beans don’t require a lot of fertilizer, but you can give them a boost by side-dressing them with a balanced fertilizer a few weeks after planting. Follow the instructions on the fertilizer package. Avoid over-fertilizing, as this can lead to excessive foliage growth and fewer beans.
3. Weeding: Keep the garden bed free of weeds, as they can compete with your Dragon Bean plants for nutrients and water. Hand-pull weeds regularly or use a hoe to cultivate the soil.
4. Training the Vines: As your Dragon Bean plants grow, gently train the vines to climb up the trellis or support structure. You may need to tie them to the support with twine or plant clips.
5. Pest and Disease Control: Keep an eye out for common bean pests such as aphids, bean beetles, and spider mites. You can control these pests with insecticidal soap or neem oil. Prevent fungal diseases by providing good air circulation and avoiding overhead watering.
5. Harvesting Your Dragon Beans
The moment you’ve been waiting for – harvesting your beautiful Dragon Beans!
1. Snap Beans: You can harvest Dragon Beans as snap beans when the pods are young and tender, usually about 50-60 days after planting. The pods should be firm and plump, with well-developed beans inside.
2. Dry Beans: If you want to harvest dry beans, allow the pods to mature on the vine until they are dry and brittle. This usually takes about 80-90 days after planting.
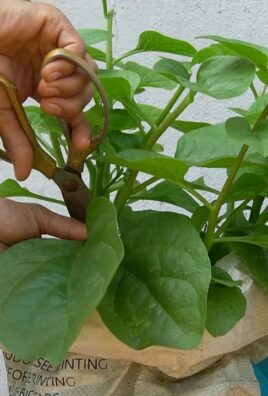
3. Harvesting Technique: To harvest the beans, gently snap the pods off the vine. Be careful not to damage the plants.
4. Drying Dry Beans: If you’re harvesting dry beans, spread the pods out on a screen or tray in a well-ventilated area to dry completely. This may take several weeks. Once the pods are dry, shell the beans and store them in an airtight container in a cool, dry place.
Troubleshooting Common Problems
Even with the best care, you might encounter some challenges along the way. Here are some common problems and how to address them:
* Poor Germination: If your seeds aren’t germinating, make sure the soil is warm enough and consistently moist. You can also try soaking the seeds in water for 24 hours before planting to improve germination rates.
* Yellowing Leaves: Yellowing leaves can indicate a nutrient deficiency. Try side-dressing your plants with a balanced fertilizer.
* Pest Infestations: Regularly inspect your plants for pests and take action promptly. Insecticidal soap and neem oil are effective organic solutions.
* Fungal Diseases: Prevent fungal diseases by providing good air circulation and avoiding overhead watering. If you notice signs of fungal disease, such as powdery mildew or leaf spot, treat the plants with a fungicide.
Enjoying Your Harvest
Now that you’ve successfully grown your own Dragon Beans, it’s time to enjoy the fruits (or rather, beans!) of your labor.
* Snap Beans: Enjoy fresh snap beans in salads, stir-fries, or as a simple side dish.
* Dry Beans: Use dry beans in soups, stews, chili, and other hearty dishes.
* Freezing: You can also
Conclusion
So, there you have it! Growing dragon beans at home is not only achievable, but it’s also a deeply rewarding experience. Forget those bland, store-bought beans that lack the vibrant flavor and satisfying crunch of freshly harvested produce. This DIY trick empowers you to cultivate your own supply of these culinary gems, ensuring you always have access to the freshest, most flavorful dragon beans imaginable.
But why is this a must-try? Beyond the superior taste, growing your own dragon beans connects you to the natural world in a tangible way. You’ll witness the miracle of growth firsthand, from the tiny seed sprouting to the flourishing vine laden with beautiful, elongated pods. It’s a therapeutic activity that can reduce stress and boost your overall well-being. Plus, you’ll have the satisfaction of knowing exactly where your food comes from and how it was grown, free from harmful pesticides and chemicals.
And the possibilities don’t stop there! Feel free to experiment with different varieties of dragon beans. Some boast a more intense flavor, while others offer a unique color or texture. You can also explore different trellising methods to create a stunning vertical garden that adds beauty and functionality to your outdoor space. Consider companion planting with herbs like basil or rosemary to deter pests and enhance the flavor of your beans.
Don’t be afraid to get creative in the kitchen, too! Dragon beans are incredibly versatile and can be used in a wide range of dishes. Sauté them with garlic and olive oil for a simple yet elegant side dish. Add them to stir-fries for a satisfying crunch. Or, blanch them and toss them in a refreshing summer salad. The possibilities are endless!
We wholeheartedly encourage you to embark on this exciting gardening adventure. Growing dragon beans at home is easier than you might think, and the rewards are well worth the effort. So, grab your seeds, prepare your soil, and get ready to experience the joy of harvesting your own delicious dragon beans.
Once you’ve tried this DIY trick, we’d love to hear about your experience! Share your tips, tricks, and photos in the comments below. Let’s create a community of dragon bean enthusiasts and inspire others to grow their own food. Happy gardening!
Frequently Asked Questions (FAQ)
What exactly are dragon beans, and why should I grow them?
Dragon beans, also known as yardlong beans or asparagus beans, are a type of legume characterized by their exceptionally long, slender pods. They’re not only visually striking but also boast a delicious, slightly sweet flavor and a satisfyingly crisp texture. Growing them yourself ensures you have access to the freshest, most flavorful beans, free from the chemicals and pesticides often found in commercially grown produce. Plus, it’s a fun and rewarding gardening experience!
How much space do I need to grow dragon beans?
Dragon beans are climbing plants, so they require vertical support such as a trellis, fence, or even a sturdy teepee structure. The amount of space you need depends on how many plants you want to grow. A good rule of thumb is to provide at least 6-8 inches of space between plants along the trellis. This allows for adequate air circulation and prevents overcrowding. Remember, they can grow quite tall, so ensure your support structure is at least 6-8 feet high.
What kind of soil is best for growing dragon beans?
Dragon beans thrive in well-draining soil that is rich in organic matter. Before planting, amend your soil with compost or well-rotted manure to improve its fertility and drainage. A slightly acidic to neutral soil pH (around 6.0 to 7.0) is ideal. If your soil is heavy clay, consider adding sand or perlite to improve drainage.
How often should I water my dragon bean plants?
Dragon beans need consistent moisture, especially during hot, dry weather. Water deeply and regularly, aiming to keep the soil consistently moist but not waterlogged. A good rule of thumb is to water when the top inch of soil feels dry to the touch. Mulching around the base of the plants can help retain moisture and suppress weeds.
Do dragon beans need fertilizer?
While dragon beans don’t require heavy fertilization, a balanced fertilizer can help promote healthy growth and abundant yields. Apply a slow-release fertilizer at planting time, following the manufacturer’s instructions. You can also side-dress your plants with compost tea or liquid seaweed fertilizer every few weeks during the growing season. Avoid over-fertilizing, as this can lead to excessive foliage growth at the expense of bean production.
What are some common pests and diseases that affect dragon beans, and how can I prevent them?
Common pests that can affect dragon beans include aphids, bean beetles, and spider mites. To prevent infestations, inspect your plants regularly and remove any pests you find by hand. You can also use insecticidal soap or neem oil to control infestations. Diseases such as powdery mildew and bean rust can also affect dragon beans. To prevent these diseases, ensure good air circulation around your plants, avoid overhead watering, and remove any infected leaves promptly. Consider using disease-resistant varieties of dragon beans.
When is the best time to harvest dragon beans?
Dragon beans are typically ready to harvest about 60-70 days after planting. Harvest the beans when they are young and tender, about 12-18 inches long. The pods should be firm and snap easily when bent. Regular harvesting encourages continued production.
Can I save seeds from my dragon bean plants for next year?
Yes, you can save seeds from your dragon bean plants. Allow a few pods to mature fully on the vine, turning brown and dry. Once the pods are completely dry, shell the beans and store them in an airtight container in a cool, dry place. Be aware that if you grew different varieties of dragon beans near each other, there is a chance of cross-pollination, which could result in variations in the next generation of plants.
Are there any companion plants that are beneficial for dragon beans?
Yes, several companion plants can benefit dragon beans. Good choices include basil, rosemary, marigolds, and nasturtiums. Basil and rosemary can help deter pests, while marigolds can repel nematodes. Nasturtiums attract aphids away from the bean plants. Avoid planting dragon beans near onions or garlic, as these can inhibit their growth.
What are some creative ways to use dragon beans in cooking?
Dragon beans are incredibly versatile and can be used in a wide range of dishes. Try them sautéed with garlic and olive oil, added to stir-fries, blanched and tossed in salads, or used in soups and stews. They can also be pickled or fermented for a unique flavor. Experiment with different seasonings and sauces to find your favorite ways to enjoy these delicious beans.


Leave a Comment