
Grow Water Spinach Containers: Unlock the secrets to a thriving, delicious, and space-saving garden right on your patio! Have you ever dreamed of harvesting fresh, vibrant greens just steps from your kitchen? I’m here to tell you, it’s easier than you think, especially with water spinach!
Water spinach, also known as Ong Choy or Kang Kong, isn’t just another leafy green; it’s a culinary staple in many Asian cuisines, boasting a rich history and cultural significance. From stir-fries to soups, its mild, slightly sweet flavor and crisp texture make it incredibly versatile. But beyond its deliciousness, water spinach is packed with nutrients, offering a healthy boost to your diet.
But why grow water spinach containers, you might ask? Well, for starters, it’s incredibly fast-growing, meaning you’ll be enjoying your first harvest in just a few weeks! Plus, container gardening allows you to control the growing environment, protecting your precious plants from pests and diseases. And let’s be honest, who doesn’t love the satisfaction of nurturing something from seed to table? In this article, I’ll share my tried-and-true DIY tricks and hacks to help you cultivate a bountiful water spinach harvest, even if you’re a complete beginner. Get ready to transform your balcony, patio, or even a sunny windowsill into a lush, edible oasis!

Grow Your Own Water Spinach in Containers: A Beginner’s Guide
Hey there, fellow gardening enthusiasts! Ever wanted to grow your own fresh, leafy greens but thought you didn’t have the space? Well, I’m here to tell you that you absolutely can, even if you only have a balcony or a small patio. Today, I’m going to walk you through how to grow water spinach (also known as Ong Choy or Kang Kong) in containers. It’s surprisingly easy, incredibly rewarding, and you’ll have a delicious and nutritious vegetable right at your fingertips.
Why Water Spinach?
Water spinach is a fantastic choice for container gardening for several reasons:
* Fast Growth: This veggie is a rapid grower, meaning you’ll be harvesting in just a few weeks.
* Easy to Propagate: You can start it from seeds or even cuttings.
* Adaptable: It thrives in both water and soil, making it perfect for various container setups.
* Nutritious: Water spinach is packed with vitamins and minerals.
* Delicious: It has a mild, slightly sweet flavor that’s great in stir-fries, soups, and salads.
What You’ll Need
Before we dive in, let’s gather our supplies. Here’s what you’ll need to get started:
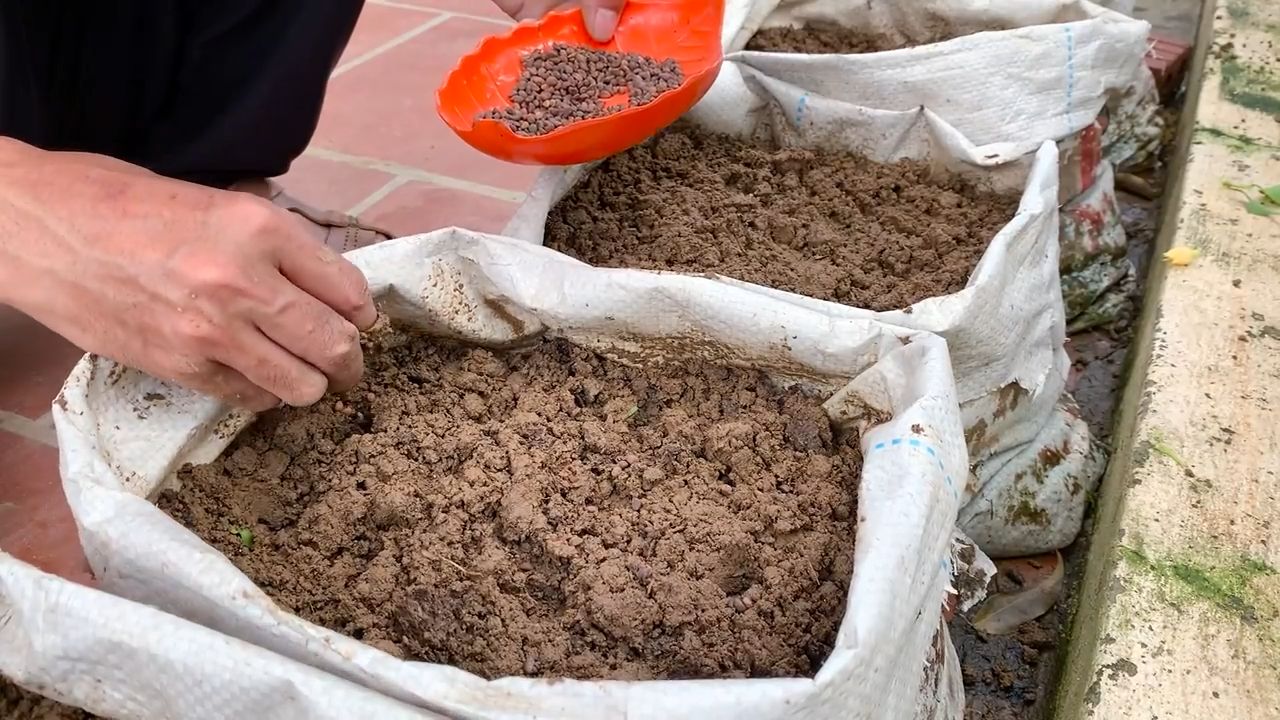
* Container: Choose a container that’s at least 12 inches deep and wide. A plastic tub, a large pot, or even a repurposed storage container will work. Make sure it has drainage holes if you’re planting directly in soil. If you’re going for a hydroponic setup, you’ll need a container that can hold water without leaking.
* Water Spinach Seeds or Cuttings: You can find seeds online or at your local garden center. Alternatively, you can use cuttings from a friend’s plant or even from store-bought water spinach (more on that later!).
* Potting Mix (if planting in soil): Use a well-draining potting mix. Avoid using garden soil, as it can become compacted in containers.
* Water: Obviously! You’ll need plenty of water to keep your water spinach happy.
* Fertilizer (optional): A balanced liquid fertilizer can help boost growth, but it’s not essential.
* Sunlight: Water spinach needs at least 4-6 hours of sunlight per day.
* Scissors or Pruning Shears: For harvesting.
Getting Started: Two Methods
There are two main ways to grow water spinach in containers: in soil or hydroponically (in water). I’ll cover both methods, so you can choose the one that best suits your preferences and resources.
Method 1: Growing Water Spinach in Soil
This is the more traditional method, and it’s a great option if you’re already familiar with container gardening.
1. Prepare Your Container: If your container doesn’t have drainage holes, drill a few in the bottom. This is crucial to prevent waterlogging, which can lead to root rot.
2. Fill with Potting Mix: Fill the container with your chosen potting mix, leaving about an inch or two of space at the top.
3. Sow the Seeds: Sprinkle the water spinach seeds evenly over the surface of the soil. Then, gently press them into the soil and cover them with a thin layer of potting mix (about ¼ inch).
4. Water Thoroughly: Water the soil gently but thoroughly until it’s evenly moist. Avoid overwatering, which can cause the seeds to rot.
5. Find a Sunny Spot: Place the container in a location that receives at least 4-6 hours of direct sunlight per day.
6. Keep the Soil Moist: Water regularly to keep the soil consistently moist, but not soggy. Water spinach loves moisture, so don’t let the soil dry out completely.
7. Fertilize (Optional): If you want to give your water spinach a boost, you can fertilize it every 2-3 weeks with a balanced liquid fertilizer. Follow the instructions on the fertilizer label.
Method 2: Growing Water Spinach Hydroponically
This method is a bit more unconventional, but it’s surprisingly easy and can be very rewarding. It’s also a great option if you want to minimize soil use.
1. Prepare Your Container: Choose a container that can hold water without leaking. A plastic tub or a large bucket works well.
2. Add Water: Fill the container with water, leaving about an inch or two of space at the top.
3. Start with Cuttings (Recommended): While you can technically start water spinach from seeds hydroponically, it’s much easier and faster to start with cuttings. Take cuttings that are about 4-6 inches long from a mature water spinach plant. Remove the leaves from the bottom inch or two of the cutting.
4. Rooting the Cuttings: Place the cuttings in the water, making sure that the bottom inch or two (where you removed the leaves) is submerged. You can use a piece of Styrofoam or a net pot to hold the cuttings upright.
5. Find a Sunny Spot: Place the container in a location that receives at least 4-6 hours of direct sunlight per day.
6. Change the Water Regularly: Change the water every 2-3 days to prevent algae growth and keep the water fresh.
7. Fertilize (Optional): You can add a hydroponic fertilizer to the water every week or two to provide the plants with essential nutrients. Follow the instructions on the fertilizer label.
Propagating from Cuttings: A Closer Look
Whether you’re growing in soil or hydroponically, starting from cuttings is a quick and easy way to get your water spinach garden going. Here’s a more detailed look at how to do it:
1. Source Your Cuttings: You can get cuttings from a friend’s plant, a local farmer’s market, or even from store-bought water spinach. Just make sure the stems are healthy and firm.
2. Prepare the Cuttings: Using clean scissors or pruning shears, cut the stems into 4-6 inch sections. Remove the leaves from the bottom inch or two of each cutting. This is where the roots will emerge.
3. Rooting in Water: Place the cuttings in a glass or jar of water, making sure that the bottom inch or two is submerged. Place the jar in a bright, indirect light location.
4. Wait for Roots: Change the water every 1-2 days. You should start to see roots emerging from the cuttings within a few days to a week.
5. Planting (for Soil Method): Once the roots are about an inch long, you can plant the cuttings in your prepared container filled with potting mix. Water thoroughly after planting.
6. Transferring (for Hydroponic Method): Once the roots are about an inch long, you can transfer the cuttings to your hydroponic container. Make sure the roots are submerged in the water.
Caring for Your Water Spinach
Once your water spinach is established, it’s relatively low-maintenance. Here are a few key things to keep in mind:
* Watering: Water spinach loves moisture, so keep the soil consistently moist (for soil method) or the water level topped up (for hydroponic method).
* Sunlight: Ensure your plants get at least 4-6 hours of direct sunlight per day.
* Fertilizing: Fertilize every 2-3 weeks (for soil method) or every week or two (for hydroponic method) with a balanced liquid fertilizer.
* Pest Control: Water spinach is generally pest-resistant, but keep an eye out for aphids or other common garden pests. If you spot any, you can usually wash them off with a strong stream of water or use an insecticidal soap.
* Pruning: Regular pruning encourages bushier growth and prevents the plants from becoming leggy. Simply pinch off the tips of the stems.
Harvesting Your Water Spinach
The best part of growing your own water spinach is, of course, the harvest! You can start harvesting when the plants are about 6-8 inches tall, which is usually around 4-6 weeks after planting.
1. Harvesting Technique: Use scissors or pruning shears to cut the stems about 2-3 inches above the soil line (for soil method) or above the water line (for hydroponic method).
2. Encouraging Regrowth: After harvesting, the plants will continue to grow and produce more leaves. Just keep watering and fertilizing as needed.
3. Harvesting Frequency: You can harvest water spinach every week or two, depending on how quickly it grows.
4. Enjoy Your Harvest: Water spinach is delicious in stir-fries, soups, salads, and more!
Troubleshooting
Even with the best care, you might encounter a few challenges along the way
Conclusion
So, there you have it! Growing water spinach in containers is not just a possibility; it’s a rewarding and surprisingly simple endeavor that brings fresh, nutritious greens right to your doorstep. We’ve walked through the entire process, from selecting the right container and preparing the soil to nurturing your plants and harvesting your bountiful crop. But why is this DIY trick a must-try?
Firstly, it’s about accessibility. Even if you lack a sprawling garden, you can still enjoy the unique flavor and health benefits of water spinach. A sunny balcony, a patio, or even a well-lit indoor space can become your personal water spinach farm. This is particularly appealing for urban dwellers or anyone with limited outdoor space.
Secondly, it’s about control. Growing your own water spinach allows you to dictate the growing conditions, ensuring that your plants are free from harmful pesticides and herbicides. You know exactly what’s going into your food, giving you peace of mind and a healthier harvest.
Thirdly, it’s about the sheer satisfaction of nurturing something from seed to table. There’s a unique joy in watching your water spinach thrive, knowing that you played a direct role in its growth. It’s a connection to nature that can be incredibly grounding and fulfilling.
But the beauty of growing water spinach in containers lies in its adaptability. Feel free to experiment with different container sizes and materials. Try using repurposed containers like old buckets or tubs for an eco-friendly approach. You can also explore different soil mixes to find what works best for your local climate and water quality.
Consider companion planting to enhance your water spinach’s growth and deter pests. Basil, mint, and marigolds are all excellent choices that can thrive alongside your water spinach in the same container or nearby.
For those looking to add a touch of visual appeal, try growing water spinach in hanging baskets. The cascading vines create a beautiful display, adding a touch of greenery to your outdoor space. Just be sure to provide adequate support for the vines as they grow.
And don’t be afraid to experiment with different varieties of water spinach. Some varieties are more heat-tolerant than others, while others may have slightly different flavors or textures. Research different options and choose the ones that best suit your preferences and growing conditions.
Ultimately, growing water spinach in containers is a journey of discovery. It’s about learning, experimenting, and adapting to create the perfect growing environment for your plants. So, we wholeheartedly encourage you to give this DIY trick a try. It’s easier than you might think, and the rewards are well worth the effort.
Once you’ve harvested your first crop, we’d love to hear about your experience! Share your tips, tricks, and photos with us in the comments below. Let’s build a community of water spinach enthusiasts and learn from each other’s successes and challenges. Together, we can unlock the full potential of this amazing vegetable and enjoy fresh, homegrown water spinach all season long. Embrace the joy of DIY gardening and discover the deliciousness of homegrown water spinach!
Frequently Asked Questions (FAQ)
What is the best type of container to use for growing water spinach?
The best type of container for growing water spinach is one that is at least 12 inches deep and wide to provide ample space for the roots to grow. Plastic containers, ceramic pots, and even repurposed buckets or tubs can be used, as long as they have drainage holes to prevent waterlogging. Dark-colored containers tend to absorb more heat, which can be beneficial in cooler climates but may overheat the soil in hotter regions. Consider using lighter-colored containers or providing shade during the hottest part of the day in warmer climates. The size of the container will also influence how many plants you can grow. A larger container allows for more plants and a bigger harvest.
How often should I water my water spinach plants in containers?
Water spinach thrives in moist conditions, so it’s crucial to keep the soil consistently damp. Water your plants deeply whenever the top inch of soil feels dry to the touch. This may mean watering daily, especially during hot and dry weather. Check the soil moisture levels regularly, and adjust your watering schedule accordingly. Avoid letting the soil dry out completely, as this can stress the plants and reduce their growth. Also, avoid overwatering, which can lead to root rot. Ensure that your containers have adequate drainage to prevent water from pooling at the bottom.
What kind of soil is best for growing water spinach in containers?
Water spinach prefers a rich, well-draining soil that is high in organic matter. A good potting mix for water spinach should consist of equal parts of compost, peat moss (or coco coir), and perlite or vermiculite. Compost provides essential nutrients and improves soil structure, while peat moss or coco coir helps retain moisture. Perlite or vermiculite improves drainage and aeration. You can also add a slow-release fertilizer to the soil mix to provide a steady supply of nutrients throughout the growing season. Avoid using heavy clay soils, as they can become waterlogged and inhibit root growth.
How much sunlight does water spinach need to grow well in containers?
Water spinach needs at least 6 hours of direct sunlight per day to thrive. Choose a location for your containers that receives plenty of sunlight throughout the day. If you live in a particularly hot climate, providing some afternoon shade can help prevent the plants from overheating. If you don’t have access to a sunny outdoor space, you can also grow water spinach indoors under grow lights. Use full-spectrum grow lights and position them close to the plants to provide adequate light intensity. Rotate the plants regularly to ensure that all sides receive equal exposure to the light.
How do I fertilize my water spinach plants in containers?
Water spinach is a heavy feeder and requires regular fertilization to maintain healthy growth. Start by incorporating a slow-release fertilizer into the soil mix at planting time. Then, supplement with a liquid fertilizer every 2-3 weeks throughout the growing season. Use a balanced fertilizer with equal amounts of nitrogen, phosphorus, and potassium (e.g., 10-10-10). You can also use organic fertilizers such as compost tea or fish emulsion. Dilute the fertilizer according to the package instructions and apply it to the soil around the base of the plants. Avoid getting fertilizer on the leaves, as this can cause burns.
When and how should I harvest my water spinach?
You can start harvesting water spinach about 4-6 weeks after planting, when the stems are about 8-12 inches long. To harvest, simply cut the stems about 2 inches above the soil line. The plants will regrow from the cut stems, allowing you to harvest multiple times throughout the growing season. Harvest regularly to encourage new growth and prevent the plants from becoming leggy. The younger leaves and stems are the most tender and flavorful. You can harvest water spinach until the first frost in the fall.
What are some common pests and diseases that affect water spinach, and how can I control them?
Water spinach is generally resistant to pests and diseases, but it can be susceptible to aphids, spider mites, and whiteflies. These pests can be controlled with insecticidal soap or neem oil. Apply the insecticide according to the package instructions, and be sure to spray both the tops and undersides of the leaves. Water spinach can also be affected by fungal diseases such as powdery mildew and leaf spot. These diseases can be prevented by providing good air circulation and avoiding overhead watering. If you notice signs of fungal disease, remove the affected leaves and spray the plants with a fungicide.
Can I grow water spinach indoors in containers?
Yes, you can grow water spinach indoors in containers, provided you can provide adequate light and moisture. Place the containers in a sunny window that receives at least 6 hours of direct sunlight per day. If you don’t have access to a sunny window, you can use grow lights to supplement the natural light. Keep the soil consistently moist, and fertilize regularly. Indoor-grown water spinach may not grow as quickly or as vigorously as outdoor-grown plants, but you can still harvest a decent crop.
How do I save seeds from my water spinach plants?
Saving seeds from water spinach can be a bit challenging, as the plants need to flower and produce seeds. Allow some of your plants to flower and develop seed pods. Once the seed pods are dry and brown, harvest them and extract the seeds. Dry the seeds thoroughly before storing them in an airtight container in a cool, dark place. Keep in mind that water spinach seeds may not always come true to type, meaning that the offspring may not be identical to the parent plants. However, saving seeds is a fun way to experiment and potentially develop your own unique varieties of water spinach.


Leave a Comment