
Home wheatgrass juice recipe: Ever dreamt of sipping on a vibrant, emerald elixir, bursting with vitality, all from the comfort of your own home? Forget expensive juice bars and questionable ingredients! I’m about to unlock a simple, yet incredibly rewarding, DIY project that will transform your health and bring a touch of green magic into your life.
Wheatgrass, often hailed as a superfood, has a fascinating history. Its use dates back to ancient Egypt and Mesopotamia, where it was revered for its rejuvenating properties. Today, it’s celebrated worldwide for its dense nutrient profile, packed with vitamins, minerals, and antioxidants. But let’s be honest, buying pre-made wheatgrass juice can be pricey and sometimes, the quality isn’t guaranteed. That’s where this DIY guide comes in!
Why should you learn this home wheatgrass juice recipe? Because you deserve to know exactly what you’re putting into your body. Growing and juicing your own wheatgrass allows you to control the entire process, ensuring freshness, purity, and maximum nutritional benefit. Plus, it’s surprisingly easy and incredibly satisfying to nurture your own little patch of green goodness. So, ditch the store-bought stuff and let’s embark on this exciting journey together! I promise, you’ll be amazed at how simple and rewarding it is to create your own potent, health-boosting wheatgrass juice at home.
Grow Your Own Wheatgrass and Juice It at Home: A Complete DIY Guide
Hey there, fellow health enthusiasts! I’m so excited to share my tried-and-true method for growing and juicing wheatgrass right in your own home. It’s easier than you think, and the fresh, vibrant juice is packed with nutrients that will leave you feeling amazing. Forget those expensive juice bar trips – let’s get growing!
What You’ll Need
Before we dive in, let’s gather our supplies. This is what I’ve found works best:
* Wheatgrass Seeds: Look for organic, hard red winter wheat seeds specifically for sprouting. You can find these online or at your local health food store. I usually buy a pound at a time.
* Growing Trays: You’ll need at least two shallow trays with drainage holes. One tray will act as the growing tray, and the other as a drip tray. I prefer plastic trays for easy cleaning.
* Potting Mix: Use a good quality, organic potting mix. Avoid mixes with added fertilizers, as we want a clean, natural product.
* Spray Bottle: A simple spray bottle filled with water is essential for keeping the seeds and grass moist.
* Scissors or Wheatgrass Juicer: For harvesting, you’ll need sharp scissors or, ideally, a wheatgrass juicer. A dedicated wheatgrass juicer is the most efficient way to extract the juice.
* Water: Filtered water is best for soaking and watering your wheatgrass.
* Dark Towel or Cloth: This will help with the initial germination process.
* Measuring Cup: To measure the seeds and water.
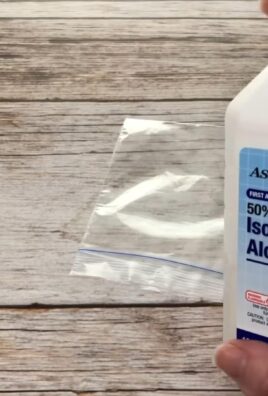
* Optional: Hydrogen peroxide (3%) – to prevent mold.
Phase 1: Soaking and Sprouting the Seeds
This is where the magic begins! Getting the seeds properly soaked and sprouted is crucial for a successful wheatgrass crop.
1. Measure the Seeds: Start with about 1 cup of wheatgrass seeds per tray. This amount usually gives me a nice, dense growth.
2. Rinse the Seeds: Place the seeds in a bowl and rinse them thoroughly with cool water. This removes any debris and helps to activate the germination process.
3. Soak the Seeds: Cover the seeds with plenty of fresh, filtered water. I usually use about 3 cups of water for every cup of seeds.
4. Add Hydrogen Peroxide (Optional): Add 1 tablespoon of 3% hydrogen peroxide to the soaking water. This helps prevent mold growth, which can be a common issue with wheatgrass.
5. Soak for 8-12 Hours: Let the seeds soak for 8-12 hours, or even overnight. You’ll notice they start to swell as they absorb water.
6. Drain and Rinse Again: After soaking, drain the water and rinse the seeds thoroughly.
7. Sprout the Seeds: Place the rinsed seeds in a sprouting jar or back in the bowl. Cover the jar with a sprouting lid or cheesecloth secured with a rubber band. If using a bowl, cover it with a dark towel.
8. Rinse and Drain Twice Daily: For the next 1-2 days, rinse and drain the seeds twice a day. This keeps them moist and prevents mold growth. Make sure to invert the jar or bowl to drain as much water as possible.
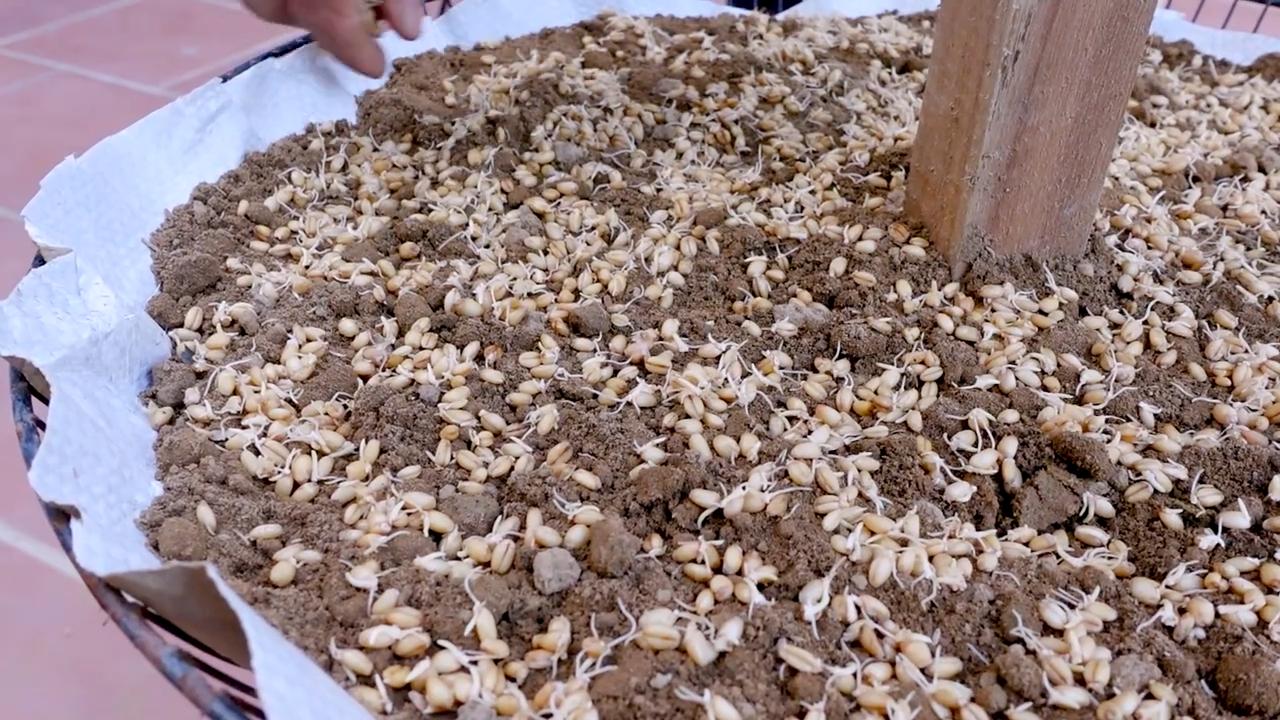
9. Observe Sprouting: You’ll start to see tiny white sprouts emerging from the seeds. This is a sign that they’re ready to be planted.
Phase 2: Planting and Growing the Wheatgrass
Now that our seeds are sprouted, it’s time to plant them in the growing trays.
1. Prepare the Growing Tray: Fill the growing tray with about 1-2 inches of potting mix. Gently level the soil surface.
2. Moisten the Soil: Lightly moisten the potting mix with your spray bottle. The soil should be damp but not soggy.
3. Spread the Sprouted Seeds: Evenly distribute the sprouted seeds over the surface of the potting mix. Try to avoid overcrowding, but a dense layer is fine.
4. Gently Press the Seeds: Gently press the seeds into the soil with your hand. This helps them make good contact with the soil.
5. Cover with a Dark Towel: Cover the tray with a dark towel or cloth. This creates a dark, humid environment that encourages the seeds to root.
6. Water Lightly: Mist the surface of the seeds with your spray bottle.
7. Maintain Darkness for 2-3 Days: Keep the tray covered in a dark, cool place for 2-3 days. During this time, mist the seeds with water once or twice a day to keep them moist.
8. Introduce Light Gradually: After 2-3 days, remove the towel and expose the wheatgrass to indirect sunlight. Avoid direct sunlight, which can scorch the young grass.
9. Water Regularly: Water the wheatgrass regularly, keeping the soil moist but not waterlogged. I usually water every day or two, depending on the humidity. You can water from the top with a gentle spray or from the bottom by adding water to the drip tray.
10. Rotate the Trays: Rotate the trays every day or two to ensure even growth. This prevents the grass from leaning towards the light.
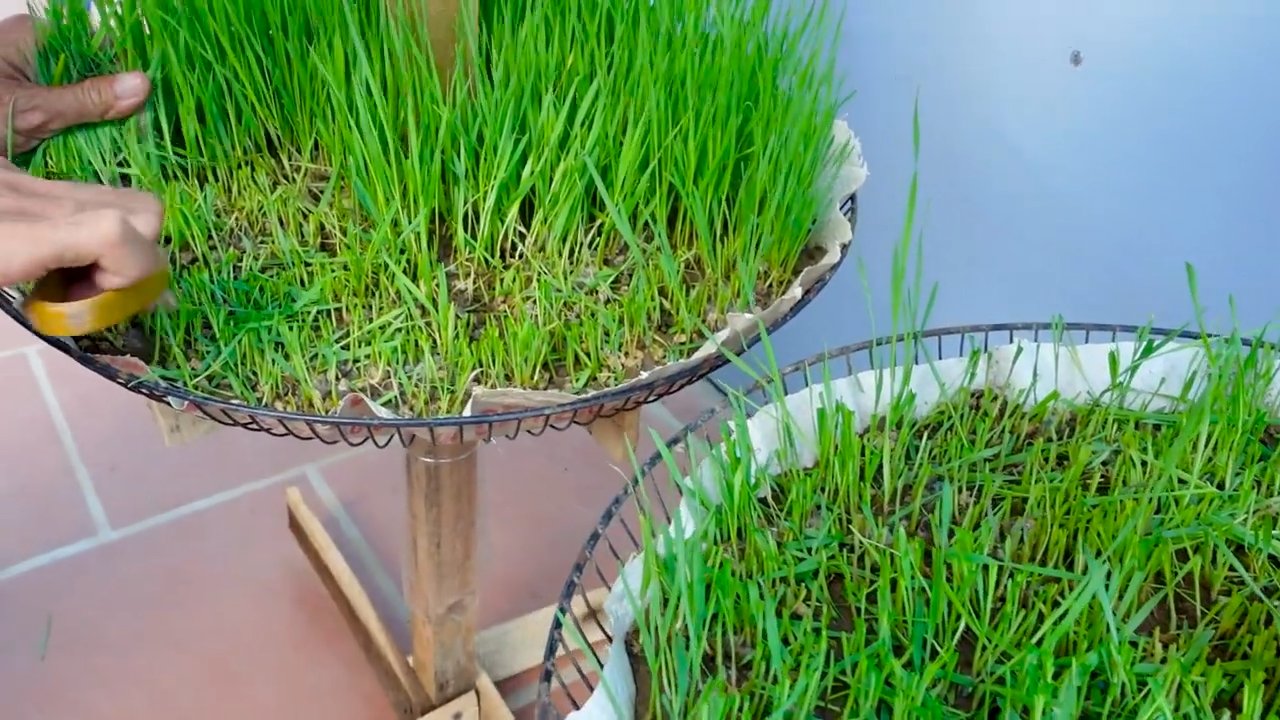
11. Watch it Grow: Over the next 7-10 days, your wheatgrass will grow rapidly. It should reach a height of about 4-6 inches.
Phase 3: Harvesting and Juicing the Wheatgrass
The moment we’ve been waiting for! Harvesting and juicing your homegrown wheatgrass is the most rewarding part of the process.
1. Harvest at the Right Time: The best time to harvest wheatgrass is when it’s about 4-6 inches tall and has developed a vibrant green color. You might even see a “split” in the blade, which indicates peak nutrient content.
2. Prepare Your Juicer or Scissors: If you’re using a wheatgrass juicer, make sure it’s clean and ready to go. If you’re using scissors, make sure they’re sharp.
3. Harvest the Grass: Using your scissors or juicer, cut the wheatgrass close to the soil surface. I usually harvest about half of the tray at a time, leaving the rest to continue growing for another day or two.
4. Rinse the Harvested Grass: Rinse the harvested wheatgrass thoroughly with cool water to remove any dirt or debris.
5. Juice the Wheatgrass: If you’re using a wheatgrass juicer, follow the manufacturer’s instructions to juice the grass. If you’re using a regular juicer, you may need to cut the grass into smaller pieces and feed it through slowly.
6. Drink Immediately: Wheatgrass juice is best consumed immediately after juicing. It starts to lose its nutrients quickly.
7. Start with a Small Amount: If you’re new to wheatgrass juice, start with a small amount (about 1-2 ounces) and gradually increase the amount as your body adjusts.
8. Enjoy the Benefits: Savor the fresh, vibrant taste and enjoy the numerous health benefits of your homegrown wheatgrass juice!
Tips and Troubleshooting
Growing wheatgrass can be a bit of a learning curve, so here are a few tips and solutions to common problems I’ve encountered:
* Mold: Mold is a common issue with wheatgrass. To prevent mold, make sure to use clean water, rinse the seeds thoroughly, and provide good air circulation. You can also add a small amount of hydrogen peroxide to the soaking water. If you see mold, remove the affected areas immediately.
* Slow Growth: Slow growth can be caused by a number of factors, including insufficient light, water, or nutrients. Make sure your wheatgrass is getting enough indirect sunlight and that the soil is consistently moist.
* Yellowing Grass: Yellowing grass can be a sign of overwatering or underwatering. Adjust your watering schedule accordingly. It can also be caused by nutrient deficiencies, but this is less common with wheatgrass grown in potting mix.
* Uneven Growth: Uneven growth can be caused by uneven lighting. Rotate the trays regularly to ensure that all parts of the grass are getting enough light.
* Pests: Pests are rare with indoor wheatgrass, but if you do encounter them, try spraying the grass with a mixture of water and neem oil.
Cleaning Up
After harvesting, it’s important to clean your trays and juicer thoroughly to prevent the growth of mold and bacteria.
1. Remove the Soil: Discard the used potting mix. You can compost it or dispose of it in your garden.
2. Wash the Trays: Wash the trays with warm, soapy water. Rinse them thoroughly and allow them to air dry.
3. Clean the
Conclusion
So, there you have it! Making your own wheatgrass juice at home isn’t just a trendy health kick; it’s a genuinely empowering way to take control of your well-being and access a powerhouse of nutrients without breaking the bank. We’ve demystified the process, showing you that with a few simple tools and a little patience, you can cultivate your own vibrant, green elixir.
Why is this DIY wheatgrass juice trick a must-try? Because it’s about more than just saving money (though that’s a definite perk!). It’s about freshness. Store-bought wheatgrass juice, even the organic kind, often sits on shelves, losing potency and flavor with each passing day. When you grow and juice your own, you’re getting the absolute peak of nutritional value, a concentrated dose of vitamins, minerals, and enzymes that your body will thank you for.
Beyond the freshness factor, there’s the satisfaction of knowing exactly what you’re putting into your body. No hidden additives, no preservatives, just pure, unadulterated wheatgrass goodness. You control the entire process, from the quality of the seeds to the cleanliness of your juicer.
But the benefits don’t stop there. Growing wheatgrass is surprisingly therapeutic. The act of nurturing these tiny sprouts, watching them transform into lush, green blades, can be incredibly grounding and rewarding. It’s a mini-garden right in your kitchen, a constant reminder of the power of nature and the potential for growth.
Now, let’s talk variations. While the basic recipe is straightforward, there’s plenty of room for experimentation. Try adding a squeeze of lemon or lime to your wheatgrass juice for a brighter, more palatable flavor. Some people enjoy blending it with a small piece of ginger for an extra boost of antioxidants and a touch of spice. You can even incorporate it into smoothies, masking the intense flavor with fruits and vegetables like apples, bananas, or spinach.
If you’re feeling adventurous, consider experimenting with different types of wheatgrass seeds. While common wheatgrass is the most readily available, there are other varieties that may offer slightly different flavor profiles or nutritional benefits. Do your research and see what works best for you.
And speaking of experimentation, don’t be afraid to adjust the growing conditions to suit your environment. If you live in a particularly dry climate, you may need to water your wheatgrass more frequently. If you’re in a colder region, you may need to provide a warmer location for optimal growth.
Ultimately, the best way to discover the magic of homemade wheatgrass juice is to simply dive in and try it. Don’t be intimidated by the process. Start small, be patient, and learn as you go. You might be surprised at how easy and rewarding it is.
So, what are you waiting for? Grab some wheatgrass seeds, gather your supplies, and embark on your own wheatgrass-growing adventure. We’re confident that you’ll be amazed by the results. And once you’ve experienced the benefits of fresh, homemade wheatgrass juice, we encourage you to share your experience with us. Tell us about your successes, your challenges, and your favorite ways to enjoy this incredible green elixir. Let’s build a community of wheatgrass enthusiasts, sharing tips and inspiration to help each other thrive. We are eager to hear how you are enjoying your **home wheatgrass juice recipe**.
Frequently Asked Questions (FAQ)
What exactly is wheatgrass juice, and why is it so good for me?
Wheatgrass juice is the liquid extracted from the freshly sprouted leaves of the common wheat plant. It’s considered a superfood because it’s packed with vitamins (A, C, E, K, and B vitamins), minerals (iron, calcium, magnesium, potassium), antioxidants, and enzymes. Proponents claim it boosts immunity, detoxifies the body, improves digestion, and increases energy levels. While more research is always beneficial, the high concentration of nutrients makes it a worthwhile addition to a healthy diet.
How long does it take to grow wheatgrass?
Generally, it takes about 7-10 days to grow wheatgrass to a harvestable height. The sprouting phase usually takes 2-3 days, followed by a period of rapid growth. The ideal height for juicing is around 4-6 inches.
What kind of juicer do I need for wheatgrass?
Wheatgrass requires a masticating juicer (also known as a slow juicer or cold-press juicer). These juicers use a slow-turning auger to crush and squeeze the juice from the wheatgrass, preserving more of the nutrients and enzymes compared to centrifugal juicers, which use high-speed spinning blades. While masticating juicers can be more expensive, they are a worthwhile investment if you plan to juice wheatgrass regularly.
Can I use regular soil to grow wheatgrass?
While you can use regular soil, it’s generally recommended to use a soilless growing medium like coco coir, peat moss, or a specialized wheatgrass growing mix. These mediums provide good drainage and aeration, which are essential for healthy wheatgrass growth. Soil can sometimes harbor mold or bacteria, which can contaminate your wheatgrass.
How often should I water my wheatgrass?
Water your wheatgrass regularly, keeping the growing medium consistently moist but not waterlogged. The frequency will depend on the humidity and temperature of your environment. Generally, watering once or twice a day is sufficient. Use a spray bottle to mist the wheatgrass evenly.
How do I prevent mold from growing on my wheatgrass?
Mold is a common problem when growing wheatgrass, but there are several things you can do to prevent it. First, ensure good air circulation around your wheatgrass trays. Second, avoid overwatering, as this creates a damp environment that encourages mold growth. Third, use a clean growing medium and sanitize your trays before planting. Finally, if you do see any mold, remove the affected areas immediately.
How long does wheatgrass juice last?
Wheatgrass juice is best consumed immediately after juicing, as it begins to lose its nutritional value and flavor quickly. If you must store it, keep it in an airtight container in the refrigerator for no more than 24 hours. However, fresh is always best!
What if I don’t like the taste of wheatgrass juice?
Wheatgrass juice has a strong, earthy flavor that some people find unpleasant. If you’re new to wheatgrass juice, start with a small amount (1-2 ounces) and gradually increase the amount as you get used to the taste. You can also mix it with other juices, such as apple juice, carrot juice, or pineapple juice, to make it more palatable. Adding a squeeze of lemon or lime can also help to brighten the flavor.
Can I grow wheatgrass indoors without sunlight?
While wheatgrass thrives in sunlight, it can also be grown indoors with artificial light. Use a grow light or fluorescent light to provide adequate illumination. Position the light about 6-12 inches above the wheatgrass trays and keep it on for 12-16 hours per day.
Is it safe for everyone to drink wheatgrass juice?
While wheatgrass juice is generally safe for most people, some individuals may experience side effects such as nausea, headaches, or diarrhea, especially when they first start drinking it. If you have any underlying health conditions or are taking medications, consult with your doctor before adding wheatgrass juice to your diet. Pregnant or breastfeeding women should also consult with their doctor before consuming wheatgrass juice.


Leave a Comment