
Starting chili plants indoors can feel like unlocking a secret level in the gardening game, and trust me, it’s a rewarding one! Have you ever dreamt of harvesting a fiery bounty of chilies, ready to spice up your meals all season long? Well, this DIY guide is your key to making that dream a reality, even if you’re a complete beginner.
The practice of nurturing chili plants isn’t new. For centuries, cultures around the globe, from the Americas to Asia, have treasured chilies not only for their culinary kick but also for their medicinal properties and even ceremonial uses. Think of the ancient Aztecs, who revered chilies as symbols of vitality and strength! Today, we might not be performing rituals with our peppers, but the satisfaction of growing them ourselves remains deeply rooted in that connection to nature and self-sufficiency.
So, why bother starting chili plants indoors? Simple: it gives you a head start! Many chili varieties, especially the hotter ones, have a long growing season. By starting them indoors, you can bypass the unpredictable spring weather and ensure your plants are strong and healthy when you finally transplant them outside. Plus, it’s incredibly satisfying to watch those tiny seeds sprout and transform into vibrant, pepper-producing powerhouses. Let’s dive into the simple steps that will have you harvesting your own homegrown heat in no time!
Starting Chili Plants Indoors: A Beginner’s Guide to Fiery Success
Okay, chiliheads, let’s get down to business! Starting your own chili plants indoors is a fantastic way to get a head start on the growing season, especially if you live in a region with a shorter summer. Trust me, there’s nothing quite like harvesting your own homegrown peppers, knowing you nurtured them from tiny seeds. This guide will walk you through everything you need to know, from choosing the right seeds to transplanting your seedlings outdoors.
Choosing Your Chili Seeds
Before we even think about soil, let’s talk seeds. The world of chili peppers is vast and exciting, so take some time to explore your options.
* Consider your heat tolerance: Are you a mild-mannered jalapeño lover or a fiery ghost pepper fanatic? Choose varieties that match your taste buds.
* Think about your growing space: Some chili plants can get quite large, so if you’re limited on space, opt for compact varieties.
* Check the seed viability: Buy seeds from a reputable source to ensure a good germination rate. Look for “packed for” or “sell by” dates on the seed packet. Fresh seeds are always best!
* Experiment! Don’t be afraid to try a few different varieties. It’s all part of the fun.
Gathering Your Supplies
Now that you’ve chosen your seeds, it’s time to gather your supplies. Here’s what you’ll need:
* Chili seeds: Obviously!
* Seed starting trays or small pots: I prefer seed starting trays with a clear plastic dome to help retain moisture. Small pots work too, but trays are more efficient.
* Seed starting mix: This is crucial. Don’t use regular potting soil, as it’s too heavy for delicate seedlings. Seed starting mix is light and airy, allowing for good drainage and root development.
* Watering can or spray bottle: Gentle watering is key to avoid disturbing the seeds.
* Heat mat (optional but recommended): Chili seeds germinate best in warm temperatures (around 80-85°F). A heat mat will significantly improve your germination rate.
* Grow lights (essential): Once your seedlings emerge, they’ll need plenty of light to prevent them from becoming leggy. A good set of grow lights is a must.
* Small fan (optional but helpful): A gentle breeze from a fan will help strengthen the stems of your seedlings and prevent fungal diseases.
* Labels: Don’t forget to label your trays or pots with the variety of chili you’re planting. Trust me, you’ll thank yourself later!
* Spray bottle with diluted fertilizer: Once the seedlings have their first true leaves, you can start feeding them with a very diluted liquid fertilizer.
Sowing Your Chili Seeds
Alright, let’s get those seeds in the ground!
1. Moisten the seed starting mix: Before filling your trays or pots, thoroughly moisten the seed starting mix. It should be damp but not soggy. I like to do this in a large bowl or bucket.
2. Fill the trays or pots: Fill your seed starting trays or pots with the moistened seed starting mix, leaving about half an inch of space at the top.
3. Sow the seeds: Place 2-3 seeds in each cell or pot, about ¼ inch deep. This increases your chances of at least one seed germinating.
4. Cover the seeds: Gently cover the seeds with a thin layer of seed starting mix.
5. Water gently: Use a spray bottle or watering can with a gentle nozzle to water the seeds. Be careful not to wash the seeds away.
6. Cover with a dome or plastic wrap: If you’re using a seed starting tray with a dome, place the dome on top. If you’re using pots, cover them with plastic wrap to help retain moisture.
7. Place on a heat mat (optional): If you’re using a heat mat, place the trays or pots on the mat.
8. Label everything! Use your labels to clearly mark each tray or pot with the chili variety.
Germination and Early Care
Now comes the waiting game. Germination can take anywhere from 7 to 21 days, depending on the variety of chili and the temperature.
1. Monitor moisture levels: Check the moisture levels daily. The seed starting mix should be consistently damp but not soggy. Mist with water as needed.
2. Maintain warmth: Keep the temperature around 80-85°F for optimal germination.
3. Remove the dome or plastic wrap: Once the seedlings start to emerge, remove the dome or plastic wrap to allow for air circulation.
4. Introduce light: As soon as the seedlings emerge, place them under grow lights. Position the lights a few inches above the seedlings and adjust as they grow. I usually keep my grow lights on for 14-16 hours a day.
5. Provide ventilation: A gentle breeze from a small fan will help strengthen the stems of your seedlings and prevent fungal diseases. Run the fan for a few hours each day.
Thinning and Transplanting
Once your seedlings have developed their first true leaves (the second set of leaves that appear after the initial seed leaves), it’s time to thin them out and eventually transplant them into larger pots.
Thinning Seedlings
1. Identify the strongest seedling: In each cell or pot, identify the strongest seedling. This is usually the tallest and healthiest-looking one.
2. Snip off the weaker seedlings: Use a pair of small scissors or nail clippers to snip off the weaker seedlings at the soil line. Don’t try to pull them out, as this can damage the roots of the remaining seedling.
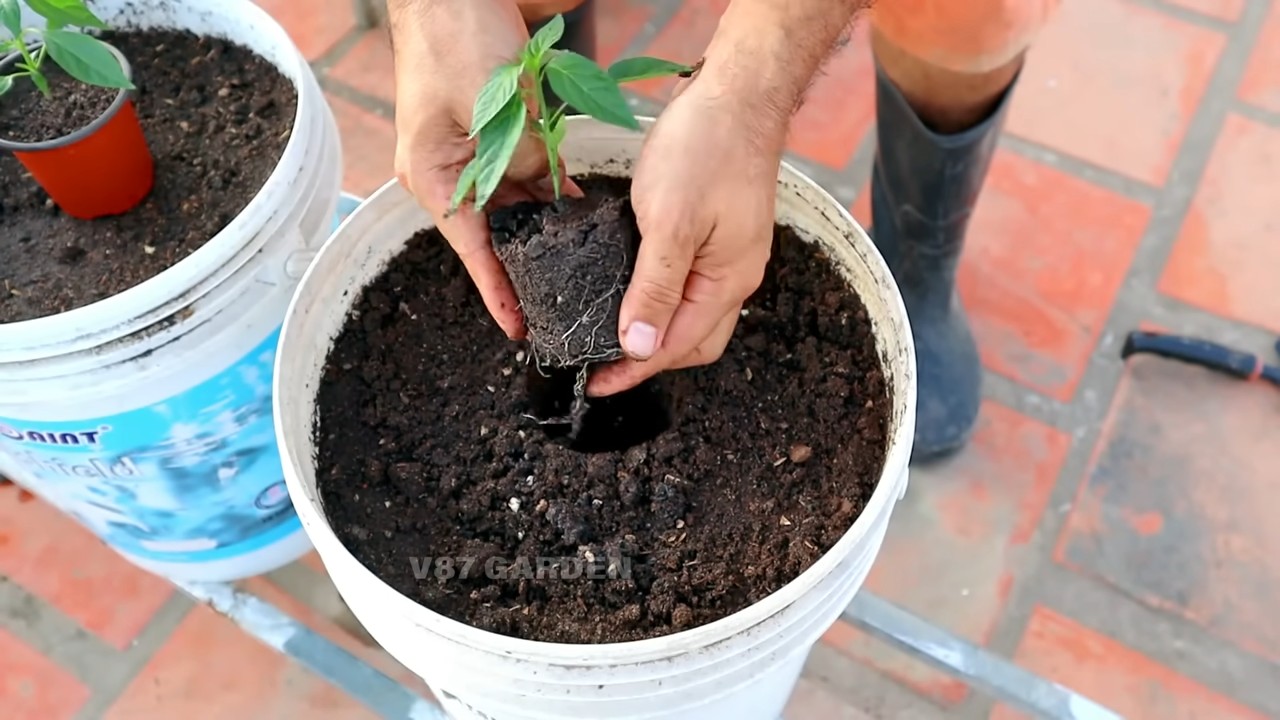
Transplanting Seedlings
1. Prepare larger pots: Choose pots that are at least 3-4 inches in diameter. Fill them with a good quality potting mix. This time, you can use regular potting mix, as the seedlings are more established.
2. Gently remove the seedlings: Carefully remove the seedlings from their seed starting trays or pots. Use a small spoon or fork to gently loosen the soil around the roots.
3. Transplant into larger pots: Make a hole in the center of the potting mix in the larger pot. Gently place the seedling in the hole and cover the roots with soil.
4. Water thoroughly: Water the seedlings thoroughly after transplanting.
5. Fertilize lightly: Start feeding the seedlings with a very diluted liquid fertilizer every 1-2 weeks.
Hardening Off Your Seedlings
Before you can transplant your chili plants outdoors, you need to “harden them off.” This process gradually acclimates them to the outdoor environment, preventing shock and ensuring a successful transition.
1. Start slowly: Begin by placing your seedlings outdoors in a sheltered location for just an hour or two each day.
2. Gradually increase exposure: Over the course of a week or two, gradually increase the amount of time your seedlings spend outdoors.
3. Protect from harsh conditions: Protect your seedlings from strong winds, direct sunlight, and frost.
4. Monitor for signs of stress: Watch for signs of stress, such as wilting or leaf burn. If you notice any of these signs, bring your seedlings back indoors and reduce their outdoor exposure.
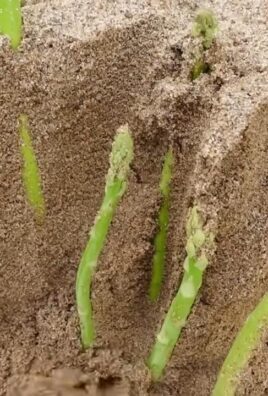
Transplanting Outdoors
Once your seedlings are hardened off and the weather is warm enough (nighttime temperatures consistently above 50°F), it’s time to transplant them into your garden or containers.
1. Choose a sunny location: Chili plants need at least 6-8 hours of sunlight per day.
2. Prepare the soil: Amend the soil with compost or other organic matter to improve drainage and fertility.
3. Dig a hole: Dig a hole that is slightly larger than the root ball of your seedling.
4. Gently remove the seedling: Carefully remove the seedling from its pot.
5. Transplant into the hole: Place the seedling in the hole and cover the roots with soil.
6. Water thoroughly: Water the seedling thoroughly after transplanting.
7. Mulch around the plant: Mulch around the plant with straw or wood chips to help retain moisture and suppress weeds.
8. Provide support (optional): Some chili plants, especially those with heavy fruit, may need support. Use stakes or cages to prevent them from falling over.
Ongoing Care
Congratulations, you’ve successfully transplanted your chili plants outdoors! Now, it’s time to provide them with the ongoing care they need to thrive.
* Water regularly: Water your chili plants regularly, especially during hot, dry weather.
* Fertilize regularly: Fertilize your chili plants every 2-3 weeks with a balanced fertilizer.
* Pest and disease control:
Conclusion
So, there you have it! Starting chili plants indoors might seem daunting at first, but with a little patience and these simple steps, you’ll be well on your way to a bountiful harvest of fiery peppers. This DIY trick is a must-try for any chili lover, offering a significant head start on the growing season, especially in regions with shorter summers. Imagine the satisfaction of harvesting your own homegrown chilies, knowing you nurtured them from tiny seeds to vibrant, fruit-bearing plants.
But why is this method so essential? It’s all about control. By starting indoors, you dictate the environment, ensuring optimal temperature, light, and moisture levels for germination and early growth. This dramatically increases your chances of success compared to directly sowing seeds outdoors, where they are vulnerable to unpredictable weather and pests. Plus, you get to choose the exact varieties you want to grow, opening up a world of chili possibilities beyond what’s typically available at your local garden center.
Don’t be afraid to experiment with variations! Try different types of seed starting mixes to see which works best for you. Some gardeners swear by coco coir, while others prefer a peat-based mix. You can also explore different lighting options. While a sunny windowsill can work, supplemental grow lights provide more consistent and intense illumination, leading to stronger, healthier seedlings. Consider using a heat mat to further accelerate germination, especially for hotter varieties like habaneros or ghost peppers.
Another exciting variation is to experiment with different chili varieties. From the mild poblano to the scorching Carolina Reaper, the world of chilies is vast and diverse. Starting your own plants indoors allows you to cultivate rare and unusual varieties that you might not otherwise have access to. Think about the unique flavors and heat levels you could add to your culinary creations!
Beyond the practical benefits, starting chili plants indoors is also a deeply rewarding experience. It’s a chance to connect with nature, learn about the life cycle of plants, and cultivate your own food. There’s something truly special about watching those tiny seeds sprout and grow into thriving plants, knowing that you played a part in their journey.
We wholeheartedly encourage you to give this DIY trick a try. It’s easier than you think, and the rewards are well worth the effort. Once you’ve experienced the joy of growing your own chilies, you’ll never want to go back to buying them at the store.
And most importantly, we want to hear about your experiences! Share your successes, your challenges, and your tips with us in the comments below. What varieties did you grow? What techniques did you find most effective? What delicious dishes did you create with your homegrown chilies? Your feedback will not only help us improve this guide but also inspire other gardeners to embark on their own chili-growing adventures. Let’s build a community of chili enthusiasts, sharing our knowledge and passion for these amazing plants. So, grab your seeds, your seed starting mix, and get ready to experience the thrill of starting chili plants indoors!
Frequently Asked Questions (FAQ)
What is the best time to start chili seeds indoors?
The ideal time to start your chili seeds indoors is typically 6-8 weeks before the last expected frost in your area. This gives the seedlings enough time to develop into strong, healthy plants before they are transplanted outdoors. To determine your last frost date, consult your local weather service or gardening resources. Starting too early can result in leggy, root-bound plants, while starting too late may delay your harvest.
What type of soil should I use for starting chili seeds?
A seed starting mix is crucial for successful germination. Avoid using garden soil, as it can be too heavy and may contain pathogens that can harm young seedlings. Look for a lightweight, well-draining mix specifically formulated for seed starting. These mixes typically contain ingredients like peat moss, vermiculite, and perlite, which provide the ideal balance of moisture retention and drainage. You can also make your own seed starting mix by combining equal parts peat moss, vermiculite, and perlite.
How often should I water my chili seedlings?
Water your chili seedlings regularly, keeping the soil consistently moist but not waterlogged. Overwatering can lead to root rot, while underwatering can cause the seedlings to dry out and die. A good rule of thumb is to water when the top inch of soil feels dry to the touch. Use a gentle watering can or spray bottle to avoid disturbing the delicate seedlings. Bottom watering, where you place the seed trays in a shallow tray of water and allow the soil to absorb moisture from below, is another effective method.
How much light do chili seedlings need?
Chili seedlings need plenty of light to grow strong and healthy. A sunny windowsill can work, but supplemental grow lights are often necessary, especially in areas with limited sunlight. Fluorescent or LED grow lights are excellent choices, providing the right spectrum of light for plant growth. Position the lights a few inches above the seedlings and adjust the height as they grow. Aim for 14-16 hours of light per day.
What is hardening off, and why is it important?
Hardening off is the process of gradually acclimating your chili seedlings to outdoor conditions before transplanting them into the garden. This is crucial because indoor-grown seedlings are accustomed to a sheltered environment and can be shocked by the sudden exposure to sunlight, wind, and temperature fluctuations. To harden off your seedlings, start by placing them outdoors in a sheltered location for a few hours each day, gradually increasing the amount of time they spend outside over a period of 1-2 weeks. Protect them from direct sunlight and strong winds during this process.
When can I transplant my chili seedlings outdoors?
Transplant your chili seedlings outdoors after the last expected frost and when the soil has warmed up to at least 60°F (15°C). Choose a sunny location with well-draining soil. Before transplanting, amend the soil with compost or other organic matter to improve its fertility and drainage. Space the plants according to the specific variety, typically 18-24 inches apart. Water the seedlings thoroughly after transplanting and protect them from pests and diseases.
What are some common problems when starting chili plants indoors, and how can I fix them?
Some common problems include damping off (a fungal disease that causes seedlings to collapse), leggy growth (caused by insufficient light), and pest infestations (such as aphids or spider mites). To prevent damping off, use a sterile seed starting mix and avoid overwatering. To prevent leggy growth, provide adequate light. To control pests, use insecticidal soap or neem oil.
Can I save seeds from my homegrown chilies to start plants next year?
Yes, you can save seeds from your homegrown chilies, but it’s important to note that hybrid varieties may not produce true-to-type offspring. Open-pollinated varieties are more likely to produce plants that are similar to the parent plant. To save seeds, allow the chilies to fully ripen on the plant. Then, carefully remove the seeds and dry them thoroughly before storing them in an airtight container in a cool, dark place.
What are some good chili varieties to start indoors?
The best chili varieties to start indoors depend on your personal preferences and growing conditions. Some popular choices include jalapeños, bell peppers, serranos, habaneros, and cayenne peppers. Consider the heat level, flavor, and size of the plant when choosing varieties. Also, research the specific requirements of each variety to ensure that you can provide the optimal growing conditions.
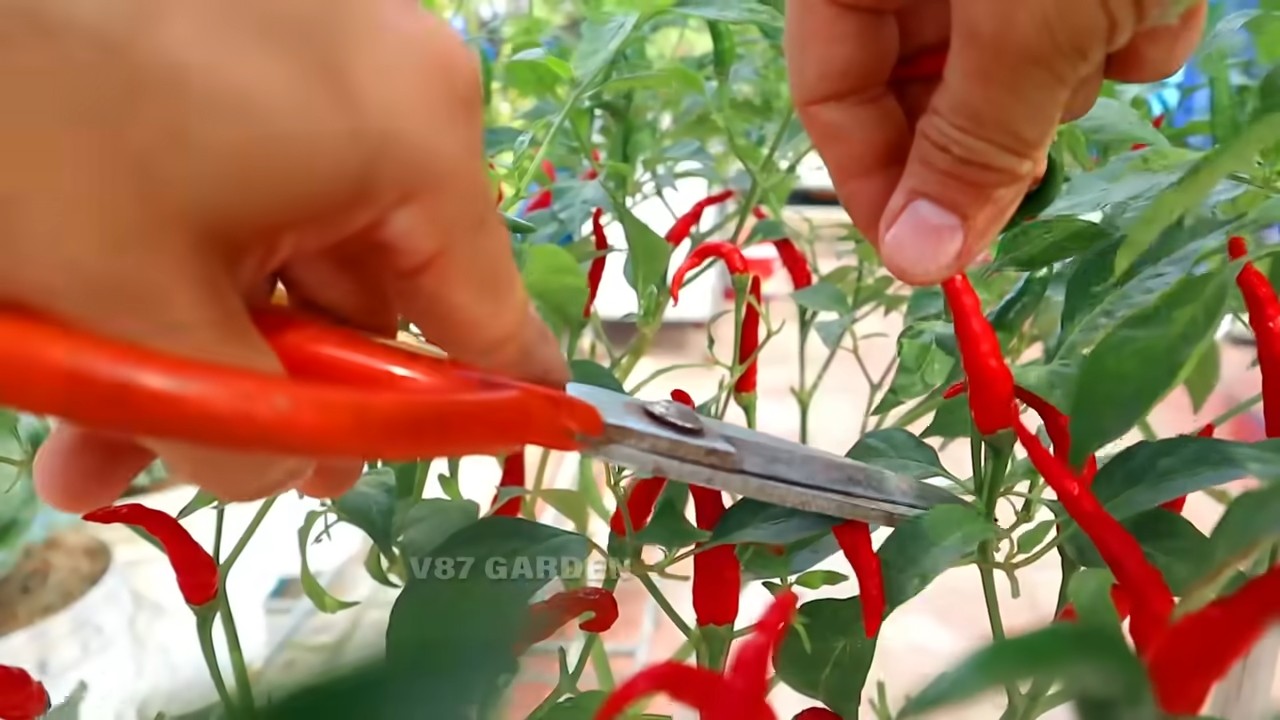
How do I know when my chili peppers are ready to harvest?
Chili peppers are typically ready to harvest when they have reached their mature color and size. The color will vary depending on the variety, but common colors include green, red, yellow, and orange. The peppers should also feel firm to the touch. Use pruning shears or scissors to cut the peppers from the plant, leaving a small stem attached.
Leave a Comment