
Windowsill Tomato Growing: Imagine plucking a sun-ripened, juicy tomato right from your kitchen windowsill, even in the dead of winter! Sounds like a dream, right? Well, it doesn’t have to be! For centuries, people have cultivated small gardens in their homes, from ancient Egyptians growing herbs in clay pots to Victorian-era parlors overflowing with ferns. This tradition of bringing nature indoors is not only beautiful but also incredibly rewarding.
In today’s fast-paced world, connecting with nature can feel like a luxury. But what if I told you that fresh, homegrown tomatoes are within easy reach, no matter how small your living space? That’s where windowsill tomato growing comes in! This DIY guide will equip you with simple, effective tricks and hacks to transform your sunny windowsill into a thriving mini-tomato farm.
Why should you try this? Because nothing beats the taste of a homegrown tomato, and the satisfaction of nurturing a plant from seed to fruit is simply unmatched. Plus, it’s a fantastic way to add a touch of green to your home, reduce your reliance on store-bought produce, and impress your friends with your green thumb. Let’s get started and unlock the secrets to successful windowsill tomato growing!
Grow Tomatoes Indoors: A Beginner’s Guide to Windowsill Gardening
Hey there, fellow plant enthusiasts! Ever dreamt of plucking a juicy, sun-ripened tomato right from your windowsill, even when it’s snowing outside? Well, dream no more! I’m here to guide you through the wonderful world of growing tomatoes indoors. It’s easier than you might think, and the satisfaction of nurturing your own food is truly rewarding. Let’s get our hands dirty!
Choosing the Right Tomato Variety
Not all tomatoes are created equal, especially when it comes to indoor growing. We need to pick varieties that are compact, early-maturing, and well-suited for container gardening. Here are a few of my favorites:
* Tiny Tim: As the name suggests, these are super compact and produce adorable, bite-sized tomatoes. They’re perfect for small spaces.
* Patio: Another great choice for containers, Patio tomatoes are known for their bushy growth and abundant yields.
* Roma: While typically grown outdoors, Roma tomatoes can thrive indoors with proper care and a larger container. They’re perfect for making sauces!
* Micro Tom: These are the smallest tomato plants you can find, reaching only about 6-8 inches tall. They’re ideal for even the tiniest windowsill.
* Balcony Tomato: Bred specifically for container growing, these produce sweet and flavorful tomatoes.
Gathering Your Supplies
Before we dive into planting, let’s make sure we have everything we need. Here’s a checklist:
* Tomato Seeds: Choose your desired variety from the list above.
* Seed Starting Tray or Small Pots: These will be used to germinate the seeds.
* Seed Starting Mix: This is a light and airy soil mix specifically designed for seedlings.
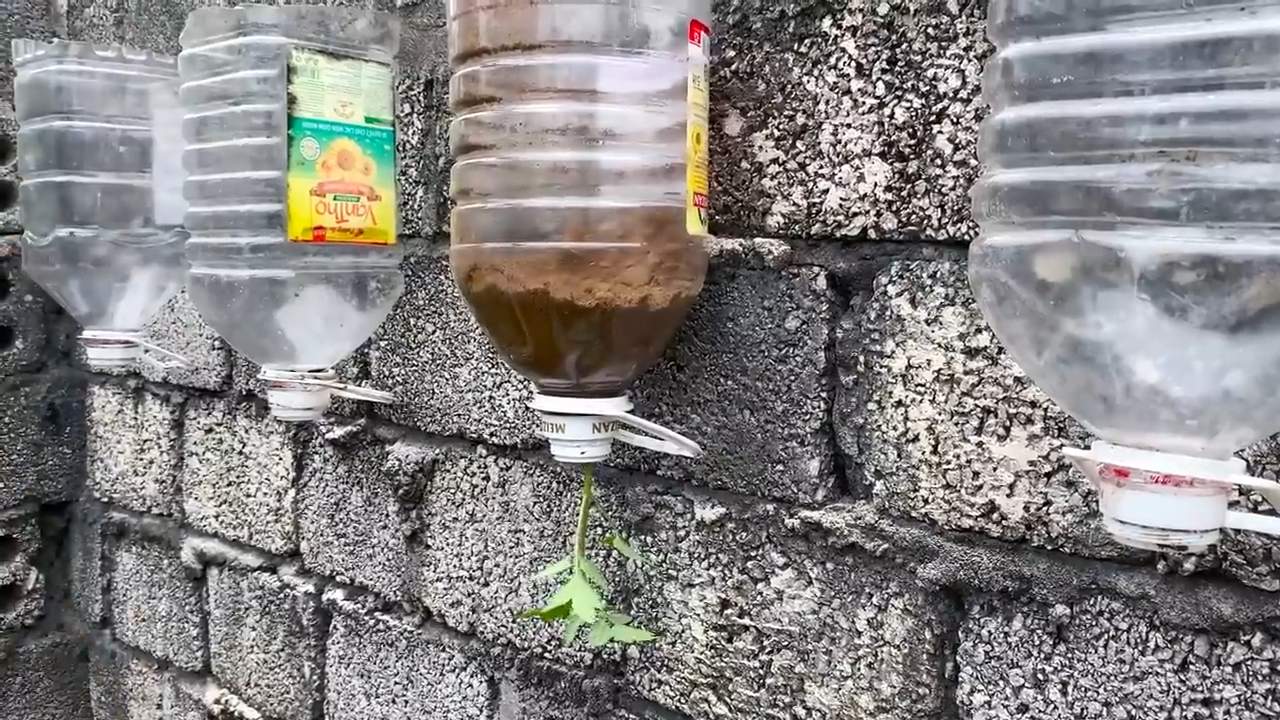
* Larger Pots (at least 5 gallons): These will be the permanent homes for your tomato plants.
* Potting Mix: A good quality potting mix is crucial for healthy growth. Avoid using garden soil, as it can be too heavy and compact.
* Grow Lights (optional but recommended): If your windowsill doesn’t get enough sunlight (at least 6-8 hours per day), grow lights will be your best friend.
* Fertilizer: A balanced liquid fertilizer formulated for tomatoes.
* Watering Can or Spray Bottle: For gentle watering.
* Small Stakes or Tomato Cages: To support the plants as they grow.
* Spray Bottle with Water: For misting the plants.
* Small Fan (optional): To improve air circulation and prevent fungal diseases.
Starting Your Tomato Seeds
This is where the magic begins! We’ll start by germinating our tomato seeds indoors.
1. Prepare the Seed Starting Tray: Fill your seed starting tray or small pots with seed starting mix. Moisten the mix thoroughly, but don’t let it get soggy.
2. Sow the Seeds: Make a small indentation (about 1/4 inch deep) in the soil. Place 2-3 tomato seeds in each indentation. Cover the seeds lightly with more seed starting mix.
3. Water Gently: Use a spray bottle to gently water the soil. Avoid overwatering, as this can lead to damping off (a fungal disease that kills seedlings).
4. Provide Warmth and Light: Cover the seed starting tray with a clear plastic lid or plastic wrap to create a humid environment. Place the tray in a warm location (around 70-75°F). A heat mat can be helpful if your home is cool. If you have grow lights, position them a few inches above the tray.
5. Wait for Germination: Tomato seeds typically germinate in 5-10 days. Once the seedlings emerge, remove the plastic lid or wrap and provide plenty of light.
6. Thin the Seedlings: Once the seedlings have their first true leaves (the second set of leaves that appear after the initial seed leaves), thin them out by snipping off the weaker seedlings at the soil line. Leave only one strong seedling per pot or cell.
Transplanting Your Seedlings
Once your seedlings are a few inches tall and have a strong root system, it’s time to transplant them into their permanent pots.
1. Prepare the Larger Pots: Fill your larger pots (at least 5 gallons) with potting mix. Make a hole in the center of each pot that is large enough to accommodate the root ball of the seedling.
2. Carefully Remove the Seedlings: Gently loosen the soil around the seedlings in the seed starting tray. Carefully lift the seedlings out of the tray, being careful not to damage the roots.
3. Transplant the Seedlings: Place the seedlings in the holes in the larger pots. Make sure the top of the root ball is level with the soil surface. Fill in the remaining space with potting mix and gently firm the soil around the seedlings.
4. Water Thoroughly: Water the newly transplanted seedlings thoroughly.
5. Provide Support: Insert a small stake or tomato cage into the pot to support the plant as it grows.
Caring for Your Indoor Tomato Plants
Now comes the ongoing care that will ensure
Hey there, fellow plant enthusiasts! Ever dreamt of plucking a juicy, sun-ripened tomato right from your windowsill, even when it’s snowing outside? Well, dream no more! I’m here to guide you through the wonderful world of growing tomatoes indoors. It’s easier than you might think, and the satisfaction of nurturing your own food is truly rewarding. Let’s get our hands dirty!
Choosing the Right Tomato Variety
Not all tomatoes are created equal, especially when it comes to indoor growing. We need to pick varieties that are compact, early-maturing, and well-suited for container gardening. Here are a few of my favorites:
* Tiny Tim: As the name suggests, these are super compact and produce adorable, bite-sized tomatoes. They’re perfect for small spaces.
* Patio: Another great choice for containers, Patio tomatoes are known for their bushy growth and abundant yields.
* Roma: While typically grown outdoors, Roma tomatoes can thrive indoors with proper care and a larger container. They’re perfect for making sauces!
* Micro Tom: These are the smallest tomato plants you can find, reaching only about 6-8 inches tall. They’re ideal for even the tiniest windowsill.
* Balcony Tomato: Bred specifically for container growing, these produce sweet and flavorful tomatoes.
Gathering Your Supplies
Before we dive into planting, let’s make sure we have everything we need. Here’s a checklist:
* Tomato Seeds: Choose your desired variety from the list above.
* Seed Starting Tray or Small Pots: These will be used to germinate the seeds.
* Seed Starting Mix: This is a light and airy soil mix specifically designed for seedlings.
* Larger Pots (at least 5 gallons): These will be the permanent homes for your tomato plants.
* Potting Mix: A good quality potting mix is crucial for healthy growth. Avoid using garden soil, as it can be too heavy and compact.
* Grow Lights (optional but recommended): If your windowsill doesn’t get enough sunlight (at least 6-8 hours per day), grow lights will be your best friend.
* Fertilizer: A balanced liquid fertilizer formulated for tomatoes.
* Watering Can or Spray Bottle: For gentle watering.
* Small Stakes or Tomato Cages: To support the plants as they grow.
* Spray Bottle with Water: For misting the plants.
* Small Fan (optional): To improve air circulation and prevent fungal diseases.
Starting Your Tomato Seeds
This is where the magic begins! We’ll start by germinating our tomato seeds indoors.
1. Prepare the Seed Starting Tray: Fill your seed starting tray or small pots with seed starting mix. Moisten the mix thoroughly, but don’t let it get soggy.
2. Sow the Seeds: Make a small indentation (about 1/4 inch deep) in the soil. Place 2-3 tomato seeds in each indentation. Cover the seeds lightly with more seed starting mix.
3. Water Gently: Use a spray bottle to gently water the soil. Avoid overwatering, as this can lead to damping off (a fungal disease that kills seedlings).
4. Provide Warmth and Light: Cover the seed starting tray with a clear plastic lid or plastic wrap to create a humid environment. Place the tray in a warm location (around 70-75°F). A heat mat can be helpful if your home is cool. If you have grow lights, position them a few inches above the tray.
5. Wait for Germination: Tomato seeds typically germinate in 5-10 days. Once the seedlings emerge, remove the plastic lid or wrap and provide plenty of light.
6. Thin the Seedlings: Once the seedlings have their first true leaves (the second set of leaves that appear after the initial seed leaves), thin them out by snipping off the weaker seedlings at the soil line. Leave only one strong seedling per pot or cell.
Transplanting Your Seedlings
Once your seedlings are a few inches tall and have a strong root system, it’s time to transplant them into their permanent pots.
1. Prepare the Larger Pots: Fill your larger pots (at least 5 gallons) with potting mix. Make a hole in the center of each pot that is large enough to accommodate the root ball of the seedling.
2. Carefully Remove the Seedlings: Gently loosen the soil around the seedlings in the seed starting tray. Carefully lift the seedlings out of the tray, being careful not to damage the roots.
3. Transplant the Seedlings: Place the seedlings in the holes in the larger pots. Make sure the top of the root ball is level with the soil surface. Fill in the remaining space with potting mix and gently firm the soil around the seedlings.
4. Water Thoroughly: Water the newly transplanted seedlings thoroughly.
5. Provide Support: Insert a small stake or tomato cage into the pot to support the plant as it grows.
Caring for Your Indoor Tomato Plants
Now comes the ongoing care that will ensure your tomato plants thrive indoors.
1. Light: Tomato plants need at least 6-8 hours of direct sunlight per day. If your windowsill doesn’t provide enough light, supplement with grow lights. Position the grow lights a few inches above the plants and adjust them as the plants grow.
2. Watering: Water your tomato plants regularly, but avoid overwatering. Allow the top inch of soil to dry out between waterings. Water deeply, until water drains out of the bottom of the pot.
3. Fertilizing: Feed your tomato plants with a balanced liquid fertilizer every 2-3 weeks. Follow the instructions on the fertilizer label.
4. Pollination: Indoor tomato plants may need help with pollination, as there are no bees or other insects to do the job. You can hand-pollinate your plants by gently shaking the flowers or using a small paintbrush to transfer pollen from one flower to another.
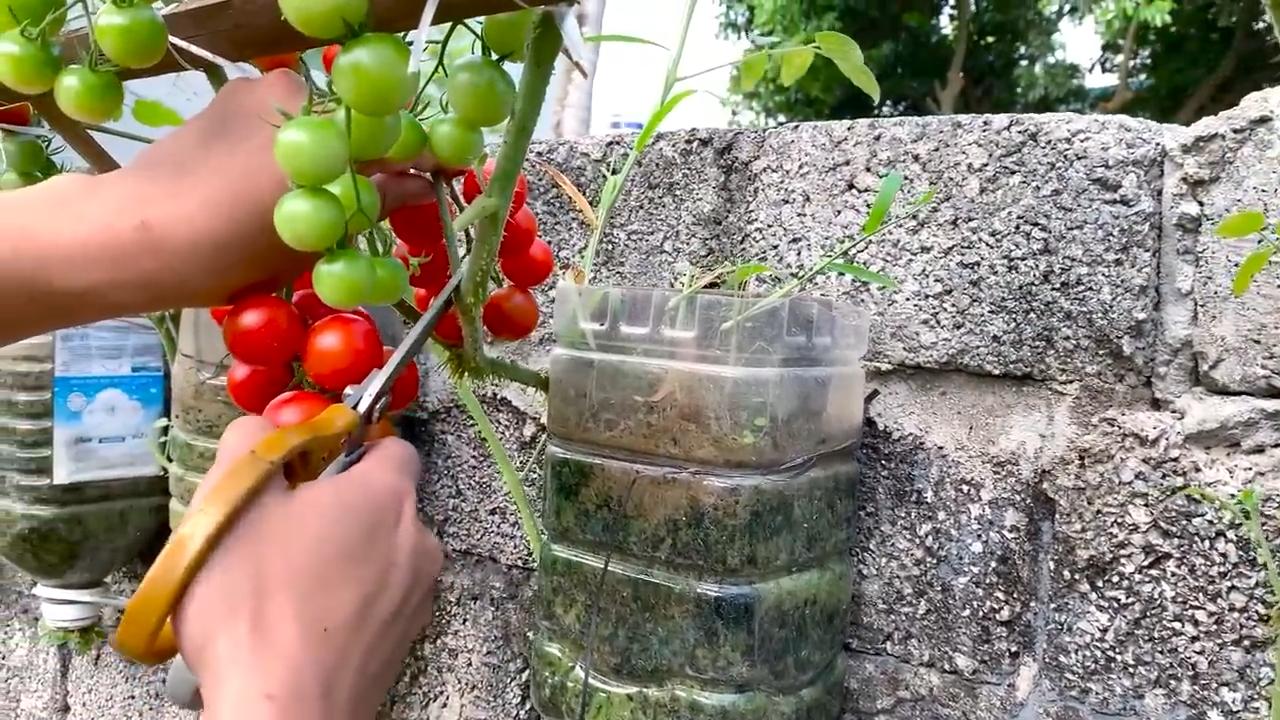
5. Pruning: Prune your tomato plants regularly to remove suckers (the small shoots that grow between the main stem and the branches). This will help to improve air circulation and encourage fruit production.
6. Air Circulation: Good air circulation is important for preventing fungal diseases. If your home is humid, consider using a small fan to improve air circulation around your tomato plants.
7. Temperature: Tomato plants thrive in temperatures between 65-85°F. Avoid exposing your plants to extreme temperatures.
8. Pest Control: Keep an eye out for pests such as aphids, whiteflies, and spider mites. If you find any pests, treat them with an insecticidal soap or neem oil.
Troubleshooting Common Problems
Even with the best care, you might encounter some challenges along the way. Here are a few common problems and how to address them:
* Yellowing Leaves: This can be caused by overwatering, underwatering, nutrient deficiencies, or pests. Check the soil moisture and adjust your watering accordingly. Fertilize your plants regularly. Inspect the plants for pests and treat them if necessary.
* Blossom End Rot: This is a condition where the bottom of the tomato turns black and leathery. It is caused by a calcium deficiency. To prevent blossom end rot, make sure your soil is well-drained and that you are providing your plants with enough calcium. You can add calcium to the soil by mixing in bone meal or crushed eggshells.
* Fungal Diseases: Fungal diseases such as powdery mildew and early blight can affect tomato plants. To prevent fungal diseases, provide good air circulation, avoid overwatering, and water at the base of the plant rather than overhead. If you see signs of fungal disease, treat your plants with a fungicide.
* Lack of Fruit: This can be caused by insufficient light, poor pollination, or nutrient deficiencies. Make sure your plants are getting enough light. Hand-pollinate your plants if necessary. Fertilize your plants regularly.
Harvesting Your Tomatoes
The moment we’ve all been waiting for! Your tomatoes are ready to harvest when they are fully colored and slightly soft to the touch. Gently twist the tomatoes off the vine. Enjoy your homegrown tomatoes in salads, sandwiches, sauces, or simply eat them fresh off the vine!
Growing tomatoes indoors is a rewarding experience that allows you to enjoy fresh, delicious tomatoes year-round. With a little bit of care and attention, you can have a thriving tomato garden right on your windowsill. Happy gardening!
Conclusion
So, there you have it! Transforming your windowsill into a miniature tomato garden is not only achievable but also incredibly rewarding. We’ve walked through the simple steps, highlighted the key considerations, and armed you with the knowledge to cultivate your own delicious, homegrown tomatoes, even without a traditional garden. This DIY trick is a must-try for several compelling reasons.
First and foremost, it democratizes access to fresh produce. No longer are you limited by the size of your yard or the availability of a community garden plot. With a sunny windowsill, a few basic supplies, and a little bit of patience, you can enjoy the unparalleled flavor of vine-ripened tomatoes right at your fingertips. Imagine the satisfaction of plucking a juicy, red tomato from your own plant and using it in your next salad or sandwich. The taste difference compared to store-bought varieties is truly remarkable.
Beyond the flavor, growing tomatoes on your windowsill offers a unique connection to nature. It’s a chance to witness the miracle of growth firsthand, from the tiny sprout emerging from the soil to the vibrant blossoms transforming into plump, ripe fruits. This process can be incredibly therapeutic and educational, especially for children. It teaches responsibility, patience, and an appreciation for the natural world.
Furthermore, this method is incredibly space-efficient. Perfect for apartment dwellers, urban gardeners, or anyone with limited outdoor space, windowsill tomato growing allows you to maximize your yield in a minimal footprint. You can even experiment with different varieties of tomatoes, from compact cherry tomatoes to bushier determinate types, to find the perfect fit for your windowsill environment.
Consider these variations to personalize your windowsill tomato garden:
* Herb Companions: Plant basil, oregano, or thyme alongside your tomatoes. These herbs not only enhance the flavor of your tomatoes but also act as natural pest repellents.
* Vertical Gardening: If you have a larger windowsill, consider using a vertical planter to maximize space and create a visually stunning display.
* Heirloom Varieties: Explore the world of heirloom tomatoes! These unique varieties offer a wide range of colors, shapes, and flavors, adding an element of excitement and discovery to your gardening experience.
* Hydroponic Systems: For a more advanced approach, investigate small-scale hydroponic systems designed for indoor tomato growing. These systems can provide optimal nutrient delivery and potentially increase yields.
We are confident that you will find this DIY trick to be a worthwhile and enjoyable endeavor. The benefits extend far beyond just having fresh tomatoes; it’s about connecting with nature, learning new skills, and experiencing the satisfaction of growing your own food.
So, what are you waiting for? Grab your seeds, potting mix, and a sunny windowsill, and embark on your tomato-growing adventure today! We encourage you to share your experiences with us. Post photos of your windowsill gardens, share your tips and tricks, and let us know what varieties you’re growing. Together, we can create a thriving community of windowsill tomato enthusiasts! Let’s all enjoy the fruits (or vegetables!) of our labor. Remember, successful **windowsill tomato growing** is within your reach!
Frequently Asked Questions (FAQ)
What type of tomatoes grow best on a windowsill?
Determinate or bush tomato varieties are generally the best choice for windowsill growing. These varieties are more compact and don’t require as much space as indeterminate (vining) types. Cherry tomatoes, Roma tomatoes, and dwarf varieties are excellent options. Look for seeds or seedlings specifically labeled as “patio” or “container” tomatoes. These are bred to thrive in smaller spaces. Indeterminate varieties can be grown, but they will require more pruning and support.
How much sunlight do windowsill tomatoes need?
Tomatoes need at least 6-8 hours of direct sunlight per day to thrive. A south-facing windowsill is ideal, but east- or west-facing windows can also work if they provide sufficient light. If your windowsill doesn’t receive enough natural light, you may need to supplement with grow lights. LED grow lights are energy-efficient and can provide the necessary spectrum of light for healthy tomato growth. Position the lights a few inches above the plants and adjust as they grow.
What kind of soil should I use for windowsill tomatoes?
Use a high-quality potting mix specifically formulated for containers. Avoid using garden soil, as it can be too heavy and compact, hindering drainage and root growth. A good potting mix will be lightweight, well-draining, and contain essential nutrients. You can also amend the potting mix with compost or other organic matter to improve its fertility.
How often should I water my windowsill tomatoes?
Water your tomatoes regularly, keeping the soil consistently moist but not waterlogged. The frequency of watering will depend on factors such as the size of the pot, the temperature, and the humidity. Check the soil moisture by sticking your finger about an inch into the soil. If it feels dry, it’s time to water. Water deeply, allowing the water to drain out of the bottom of the pot. Avoid overhead watering, as this can promote fungal diseases.
Do windowsill tomatoes need fertilizer?
Yes, tomatoes are heavy feeders and require regular fertilization. Use a balanced fertilizer specifically formulated for tomatoes, following the instructions on the package. Start fertilizing a few weeks after transplanting the seedlings and continue throughout the growing season. You can also use organic fertilizers such as compost tea or fish emulsion.
How do I pollinate my windowsill tomatoes?
Tomatoes are self-pollinating, but they may need a little help indoors, where there is no wind or insect activity. You can hand-pollinate your tomatoes by gently shaking the plants or using a small brush to transfer pollen from one flower to another. Do this in the morning when the pollen is dry and easily released. You can also use a small fan to create a gentle breeze around the plants.
How do I prevent pests and diseases on my windowsill tomatoes?
Inspect your plants regularly for signs of pests or diseases. Common pests include aphids, whiteflies, and spider mites. You can control these pests with insecticidal soap or neem oil. Prevent fungal diseases by providing good air circulation, avoiding overhead watering, and removing any diseased leaves.
When will my windowsill tomatoes be ready to harvest?
The time it takes for tomatoes to ripen will depend on the variety and the growing conditions. Generally, tomatoes are ready to harvest when they are fully colored, slightly soft to the touch, and easily detach from the vine. Harvest your tomatoes regularly to encourage further production.
Can I grow tomatoes on a windowsill year-round?
With the right conditions, you can grow tomatoes on a windowsill year-round. However, you may need to supplement with grow lights during the winter months when natural light is limited. You may also need to adjust your watering and fertilization schedule to account for the changing seasons.
What if my tomato plant is growing tall but not producing fruit?
This could be due to several factors, including insufficient light, over-fertilization with nitrogen, or improper pollination. Ensure your plant is receiving at least 6-8 hours of direct sunlight per day. Use a balanced fertilizer or one slightly lower in nitrogen. Hand-pollinate the flowers as described above. Also, make sure the temperature is within the optimal range for tomato growth (65-85°F).

Leave a Comment