
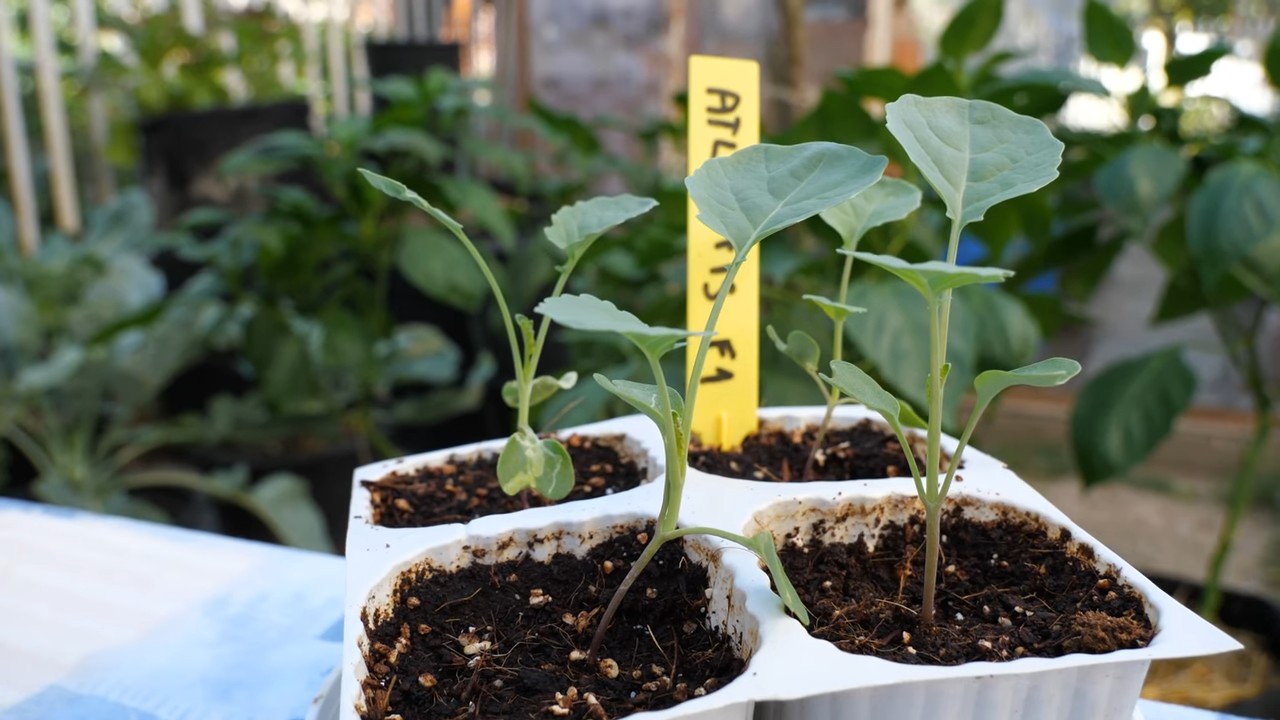
Broccoli Calabrese Harvest Routine: Your gateway to a bountiful and delicious homegrown harvest! Have you ever dreamt of strolling into your backyard and snipping off the perfect head of broccoli, knowing it’s fresher and tastier than anything you could find in the store? I know I have! There’s something incredibly satisfying about nurturing a plant from seed to table, and with the right knowledge, harvesting your own Broccoli Calabrese can be a truly rewarding experience.
Growing your own food connects you to a tradition that stretches back centuries. From ancient Roman gardens to the kitchen gardens of medieval Europe, people have always cultivated their own vegetables. This connection to the earth is not only fulfilling but also empowers us to take control of what we eat.
But let’s be honest, knowing when and how to harvest your Broccoli Calabrese can be a little tricky. Harvest too early, and you’ll miss out on its full potential. Wait too long, and you risk a tough, bitter head. That’s where this DIY guide comes in! I’m going to share my tried-and-true tips and tricks for mastering the Broccoli Calabrese harvest routine, ensuring you get the most delicious and nutritious broccoli possible. Get ready to enjoy the fruits (or rather, vegetables!) of your labor!
Harvesting Broccoli Calabrese Like a Pro: A DIY Guide
Hey there, fellow gardeners! Broccoli Calabrese is one of my absolute favorite vegetables to grow. There’s nothing quite like the taste of freshly harvested broccoli, especially when you’ve nurtured it from a tiny seedling. But knowing when and how to harvest your broccoli is crucial to getting the best yield and flavor. So, let’s dive into my tried-and-true method for harvesting broccoli Calabrese, ensuring you get the most out of your garden bounty!
Knowing When to Harvest: The Broccoli Whisperer
The key to delicious broccoli is harvesting it at the peak of perfection. Here’s what I look for:
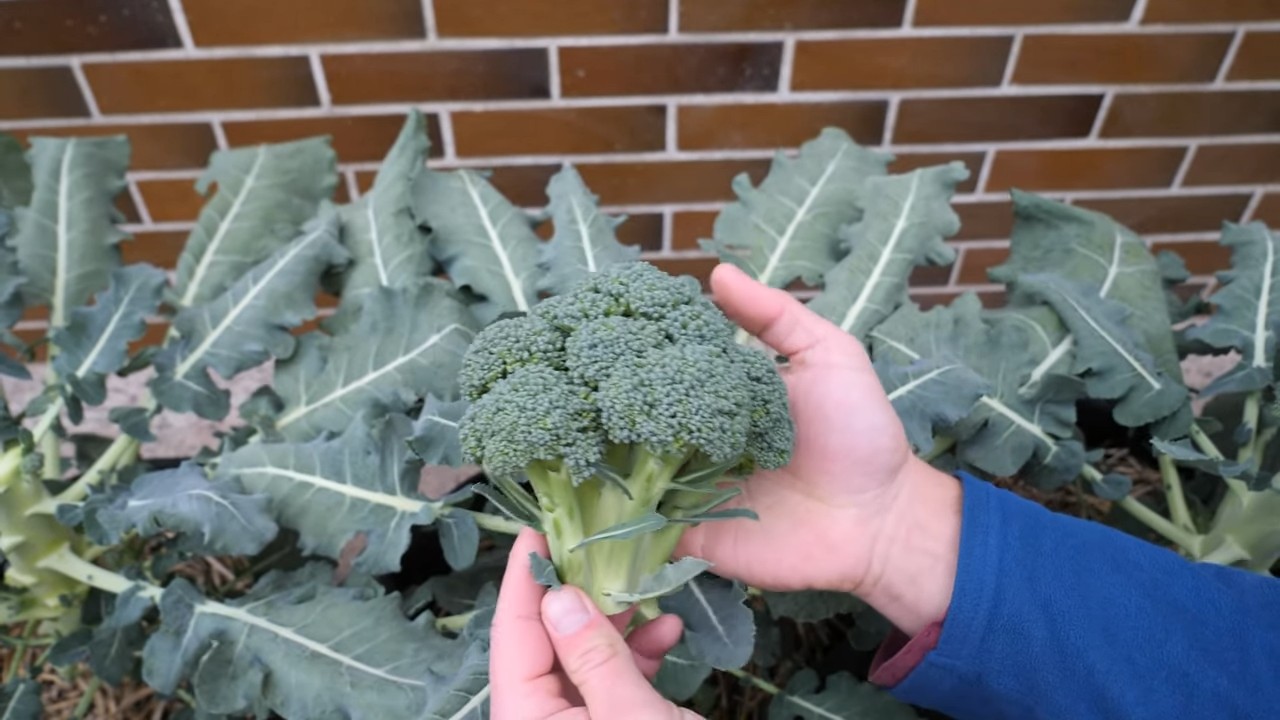
* Head Size: The main head should be a good size, typically 4-7 inches in diameter, depending on the variety. Don’t wait for it to get enormous! Overgrown broccoli can become tough and bitter.
* Tight Florets: This is the most important indicator. The individual florets that make up the head should be tightly closed and compact. If they start to separate or show signs of yellowing, it’s time to harvest immediately. Yellowing means the broccoli is starting to flower, and the flavor will suffer.
* Color: Look for a deep, even green color. Avoid heads that are pale or have brown spots.
* Firmness: Gently squeeze the head. It should feel firm and solid, not soft or spongy.
Tools You’ll Need: The Broccoli Arsenal
Before you head out to the garden, gather these essential tools:
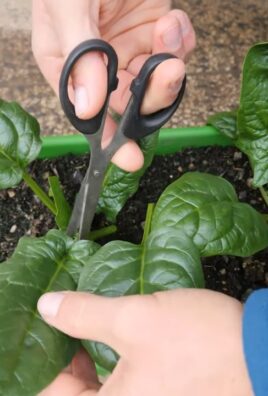
* Sharp Knife or Pruning Shears: A sharp blade is crucial for a clean cut, which helps prevent disease and encourages side shoot production. I prefer pruning shears for their ease of use.
* Gloves: Broccoli leaves can be a bit prickly, so gloves will protect your hands.
* Basket or Bag: To carry your precious harvest back to the kitchen.
* Water (Optional): A bucket of cool water to immediately submerge the harvested broccoli, helping to keep it crisp.
The Harvesting Process: Step-by-Step
Okay, let’s get down to the nitty-gritty of harvesting. Follow these steps for a successful broccoli harvest:
1. Timing is Everything: Harvest broccoli in the morning, after the dew has dried, but before the sun gets too hot. This helps to preserve the broccoli’s freshness and flavor.
2. Inspect the Head: Double-check that the head meets all the criteria mentioned earlier: good size, tight florets, deep green color, and firmness.
3. Make the Cut: Using your sharp knife or pruning shears, cut the main head from the plant at an angle. Leave about 5-6 inches of stem attached to the head. This encourages the plant to produce side shoots.
4. Handle with Care: Gently lift the harvested head and place it in your basket or bag. Avoid bruising or damaging the florets.
5. Cool Down (Optional): If you have a bucket of cool water ready, immediately submerge the harvested broccoli head. This helps to remove any dirt or insects and keeps it crisp.
6. Side Shoot Patrol: After harvesting the main head, keep an eye on the plant for side shoots. These smaller heads will develop along the stem and can be harvested in the same way as the main head. They’re usually ready to harvest a week or two after the main head.
7. Regular Harvesting: Check your broccoli plants every few days for side shoots. Regular harvesting encourages continued production.
Encouraging Side Shoot Production: The Broccoli Bonus
One of the best things about broccoli Calabrese is that it doesn’t just give you one head. By harvesting the main head correctly, you can encourage the plant to produce multiple side shoots, extending your harvest for weeks! Here’s how I maximize side shoot production:
* Leave Enough Stem: As mentioned earlier, leave about 5-6 inches of stem when you harvest the main head. This provides the plant with the energy it needs to produce side shoots.
* Fertilize Lightly: After harvesting the main head, give your broccoli plant a light feeding of a balanced fertilizer. This will provide the nutrients it needs to support side shoot growth. I usually use a liquid fertilizer diluted to half strength.
* Water Regularly: Keep the soil consistently moist, but not waterlogged. Broccoli needs plenty of water to produce those delicious side shoots.
* Remove Yellowing Leaves: As the plant focuses its energy on producing side shoots, some of the lower leaves may start to yellow. Remove these leaves to improve air circulation and prevent disease.
* Patience is a Virtue: Side shoots take time to develop. Be patient and keep an eye on your plants. You’ll be rewarded with a continuous supply of broccoli!
Dealing with Pests and Diseases: The Broccoli Defender
Even with the best care, broccoli plants can sometimes be affected by pests and diseases. Here are a few common problems and how I deal with them:
* Cabbage White Butterflies: These pesky butterflies lay their eggs on broccoli leaves, and the resulting caterpillars can devour your plants. I use netting to protect my broccoli from these butterflies. You can also handpick the caterpillars off the plants.
* Aphids: These tiny insects suck the sap from broccoli leaves, causing them to curl and distort. I control aphids by spraying the plants with a strong stream of water or using insecticidal soap.
* Clubroot: This soilborne disease causes the roots of broccoli plants to swell and distort, stunting their growth. To prevent clubroot, I practice crop rotation and amend the soil with lime to raise the pH.
* Downy Mildew: This fungal disease causes yellow spots on the upper surface of broccoli leaves and a white, downy growth on the underside. To prevent downy mildew, I ensure good air circulation around the plants and avoid overhead watering. If downy mildew does occur, I spray the plants with a fungicide.
Storing Your Harvest: Keeping Broccoli Fresh
Once you’ve harvested your broccoli, it’s important to store it properly to maintain its freshness and flavor. Here’s how I do it:
* Refrigerate Immediately: Don’t let your harvested broccoli sit out at room temperature for too long. Refrigerate it as soon as possible.
* Don’t Wash Until Ready to Use: Washing broccoli before storing it can encourage mold growth. Wait to wash it until you’re ready to cook it.
* Store in a Plastic Bag: Place the broccoli in a perforated plastic bag in the refrigerator. This will help to keep it moist and prevent it from drying out.
* Use Within a Week: Broccoli is best used within a week of harvesting. After that, it may start to lose its flavor and texture.
* Freezing Broccoli: If you have a large harvest, you can freeze broccoli for longer storage. To freeze broccoli, blanch it in boiling water for 3 minutes, then plunge it into ice water to stop the cooking process. Drain the broccoli well and spread it out on a baking sheet to freeze. Once frozen, transfer the broccoli to a freezer bag or container. Frozen broccoli can be stored for up to 12 months.
Enjoying Your Harvest: Broccoli Bliss
Now for the best part – enjoying the fruits (or rather, vegetables) of your labor! There are so many delicious ways to prepare broccoli. Here are a few of my favorites:
* Steamed Broccoli: A simple and healthy way to enjoy broccoli.
* Roasted Broccoli: Roasting broccoli brings out its natural sweetness. Toss it with olive oil, salt, and pepper, and roast at 400°F (200°C) until tender and slightly browned.
* Broccoli Salad: A classic summer salad with broccoli, bacon, cheese, and a creamy dressing.
* Broccoli Soup: A comforting and nutritious soup made with broccoli, broth, and cream.
* Broccoli Stir-Fry: Add broccoli to your favorite stir-fry for a healthy and flavorful meal.
Troubleshooting: Common Broccoli Problems
Even with the best intentions, things don’t always go according to plan. Here are some common broccoli growing problems and how to address them:
* Small Heads: If your broccoli heads are small, it could be due to a lack of nutrients, water, or sunlight. Make sure your plants are getting enough of all three.
* Loose Florets: Loose florets indicate that the broccoli is starting to flower. Harvest it immediately, even if the head is smaller than you’d like.
* Bitter Taste: Bitter broccoli can be caused by hot weather or overmaturity. Harvest broccoli in the morning and don’t let it get too big.
* Bolting: Bolting is when the broccoli plant prematurely flowers. This is usually caused by stress, such as hot weather or lack of water. To prevent bolting, provide your plants with consistent water and shade during hot weather.
Final Thoughts: Broccoli Bonanza
Harvesting broccoli Calabrese is
Conclusion
So, there you have it! Mastering the Broccoli Calabrese harvest routine isn’t just about getting broccoli; it’s about maximizing your yield, enjoying the freshest possible flavor, and becoming a more attuned gardener. This simple, yet effective, DIY trick transforms your broccoli growing from a one-time event into a continuous harvest, providing you with a steady supply of delicious, nutritious florets for weeks on end.
Why is this a must-try? Because it’s efficient, sustainable, and incredibly rewarding. Instead of settling for a single, large head, you unlock the potential for multiple side shoots, extending your harvest window and ensuring that no part of your precious plant goes to waste. Think of it as a broccoli buffet, right in your own backyard!
But the beauty of this method lies in its adaptability. Feel free to experiment with different harvesting techniques. Some gardeners prefer to leave a longer stem on the side shoots, believing it encourages further growth. Others might choose to fertilize lightly after the initial head is harvested to give the plant a boost. You could even try succession planting, starting new broccoli plants every few weeks, to ensure a continuous supply throughout the growing season. Consider companion planting with herbs like dill or chamomile to attract beneficial insects and further enhance your broccoli’s growth.
Don’t be afraid to get your hands dirty and personalize this Broccoli Calabrese harvest routine to suit your specific garden conditions and preferences. The key is to observe your plants closely, learn from your experiences, and adapt your approach accordingly.
We wholeheartedly encourage you to give this DIY trick a try. It’s easier than you might think, and the results are well worth the effort. Imagine the satisfaction of serving up a plate of freshly harvested broccoli, knowing that you nurtured it from seed to table.
Once you’ve tried this method, we’d love to hear about your experience! Share your tips, tricks, and any variations you’ve discovered in the comments below. Let’s build a community of broccoli enthusiasts and learn from each other’s successes (and even the occasional setback!). Your insights could be invaluable to other gardeners who are just starting out. So, grab your gardening gloves, head out to your broccoli patch, and get ready to unlock the full potential of your Broccoli Calabrese harvest! Happy gardening!
Frequently Asked Questions (FAQ)
What exactly is Broccoli Calabrese?
Broccoli Calabrese is a specific variety of broccoli known for its large, central head and its ability to produce numerous side shoots after the main head is harvested. It’s a popular choice for home gardeners because of its extended harvest potential. Understanding that you are working with this specific variety is key to successfully implementing this harvest routine. Other broccoli varieties may not produce side shoots as readily.
When is the best time to harvest the main head of Broccoli Calabrese?
The ideal time to harvest the main head is when the florets are tightly closed and the head is a deep green color. You want to harvest before the florets start to open and turn yellow, as this indicates that the broccoli is starting to bolt (go to seed) and the flavor will become bitter. The size of the head will depend on the variety and growing conditions, but generally, aim for a head that is 6-8 inches in diameter.
How do I harvest the main head without damaging the plant?
Use a sharp knife or pruning shears to cut the main head from the plant. Make the cut at an angle, about 5-6 inches below the head, leaving several leaves on the plant. This will encourage the growth of side shoots. Be careful not to damage the surrounding leaves or stems. A clean, precise cut is essential for promoting healthy regrowth.
How long does it take for side shoots to develop after harvesting the main head?
The time it takes for side shoots to develop will vary depending on factors such as temperature, sunlight, and soil fertility. Generally, you can expect to see side shoots starting to emerge within 1-2 weeks after harvesting the main head. Keep the plant well-watered and fertilized to encourage rapid growth.
How often should I harvest the side shoots?
Harvest the side shoots as they reach a usable size, typically when they are 3-4 inches in diameter. Regular harvesting will encourage the plant to continue producing more side shoots. Don’t let the side shoots get too large, as they will become tough and less flavorful. Aim for a continuous harvest of tender, young florets.
What if my Broccoli Calabrese doesn’t produce side shoots after I harvest the main head?
There are several reasons why your Broccoli Calabrese might not produce side shoots. First, make sure you are actually growing the Calabrese variety, as other varieties may not produce side shoots as readily. Second, ensure that the plant is getting enough sunlight, water, and nutrients. Broccoli needs at least 6 hours of sunlight per day and well-drained soil. Fertilize regularly with a balanced fertilizer. Third, check for pests or diseases that could be affecting the plant’s growth. Finally, be patient! Sometimes it takes a little time for the side shoots to develop.
Can I freeze Broccoli Calabrese after harvesting?
Yes, you can freeze Broccoli Calabrese for later use. To freeze broccoli, blanch it in boiling water for 3-5 minutes, then immediately transfer it to an ice bath to stop the cooking process. Drain the broccoli thoroughly and spread it out on a baking sheet to freeze individually. Once frozen, transfer the broccoli to a freezer bag or container. This method helps to preserve the color, texture, and flavor of the broccoli.
What are some common pests and diseases that affect Broccoli Calabrese?
Common pests that affect Broccoli Calabrese include aphids, cabbage worms, and flea beetles. Common diseases include clubroot, black rot, and downy mildew. Regularly inspect your plants for signs of pests or diseases and take appropriate action to control them. Companion planting with herbs like rosemary or thyme can help to deter pests. Ensure good air circulation around the plants to prevent fungal diseases.
How can I improve the flavor of my Broccoli Calabrese?
The flavor of Broccoli Calabrese can be influenced by several factors, including soil quality, watering practices, and harvesting time. Ensure that your soil is rich in organic matter and that the plants are getting consistent moisture. Avoid overwatering, as this can lead to bland-tasting broccoli. Harvest the broccoli when the florets are tightly closed and the head is a deep green color. Cooking methods can also affect the flavor; steaming or roasting broccoli can enhance its natural sweetness.
Is there anything else I should know about growing and harvesting Broccoli Calabrese?
Broccoli Calabrese is a cool-season crop, so it’s best to plant it in the spring or fall. Choose a sunny location with well-drained soil. Start seeds indoors 6-8 weeks before the last frost or direct sow them in the garden after the last frost. Water regularly and fertilize every few weeks. Monitor your plants for pests and diseases and take action as needed. With a little care and attention, you can enjoy a bountiful harvest of delicious Broccoli Calabrese. Remember that proper soil preparation is crucial for healthy growth and maximizing your yield.
Leave a Comment