
Growing purple bush beans might sound like something out of a fairytale, but I promise you, it’s a very real and rewarding experience! Forget the same old green beans – imagine vibrant, jewel-toned beans cascading from your garden, adding a pop of color and a burst of flavor to your plate. Intrigued? I thought you might be!
Bush beans, in general, have a rich history, cultivated for centuries across various cultures. They’ve been a staple food source, providing essential nutrients and playing a vital role in sustainable agriculture. But the purple variety? That’s where things get a little more exciting. While not as ancient as their green cousins, purple bush beans offer a unique twist on a classic favorite, bringing a touch of novelty to the home garden.
Why should you try growing purple bush beans? Well, for starters, they’re incredibly easy to grow, even for beginner gardeners. Plus, that striking purple hue isn’t just for show – it’s packed with antioxidants, making them a healthy and delicious addition to your diet. But the real magic lies in the “wow” factor. Imagine serving a dish featuring these vibrant beans – your friends and family will be amazed! This DIY guide will walk you through everything you need to know, from selecting the right seeds to harvesting your bountiful crop. So, let’s get our hands dirty and transform your garden into a purple paradise!
Growing Purple Bush Beans: A DIY Guide to a Vibrant Harvest
Okay, so you want to grow purple bush beans? Awesome choice! They’re not only delicious but also add a fantastic pop of color to your garden. Plus, they’re relatively easy to grow, making them perfect for beginner gardeners. I’m going to walk you through everything you need to know, from prepping the soil to harvesting your beautiful purple bounty.
Choosing Your Purple Bush Bean Variety
First things first, let’s talk varieties. There are a few different types of purple bush beans you can choose from, each with its own unique characteristics. Here are a couple of popular options:
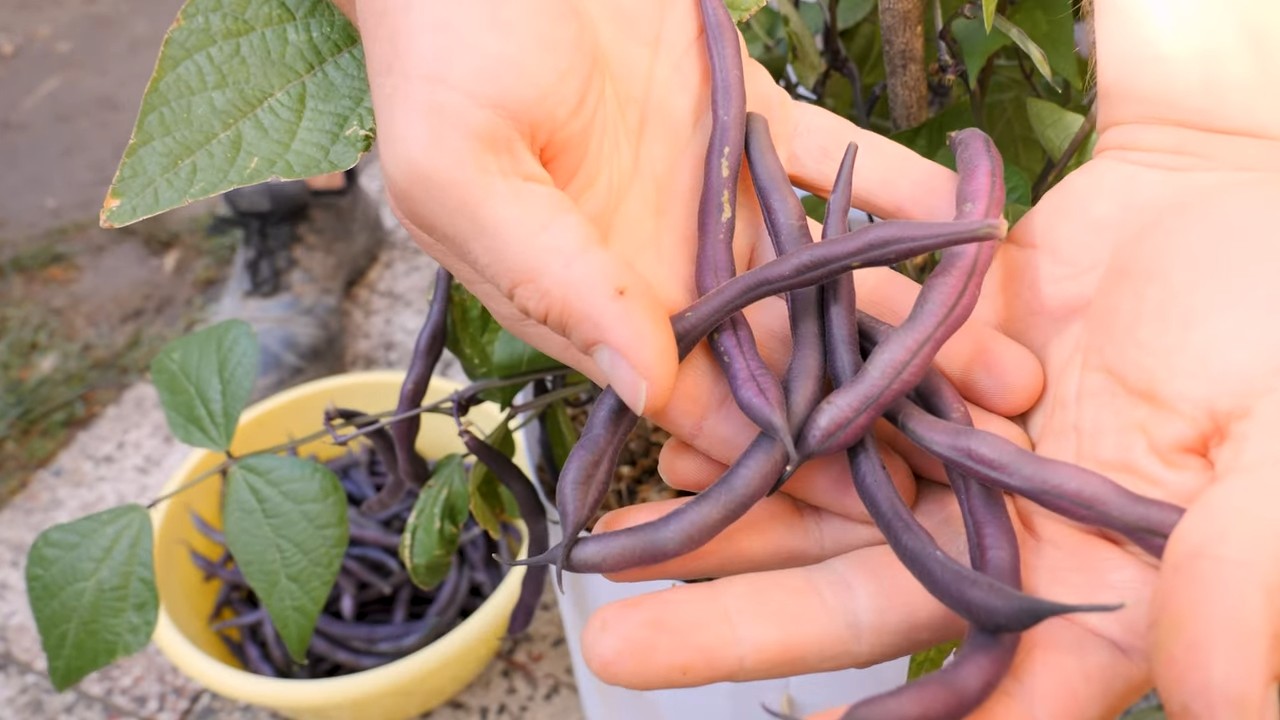
* Royal Burgundy: This is probably the most common and widely available purple bush bean. It’s known for its deep purple pods and excellent flavor. They turn green when cooked, which is kind of a fun surprise!
* Purple Queen: Another great choice, Purple Queen beans are known for their high yields and disease resistance. They also have a slightly sweeter flavor than Royal Burgundy.
I personally love Royal Burgundy because of their vibrant color and reliable performance. But feel free to experiment and see which variety you prefer!
Preparing Your Garden Bed
Before you even think about planting, you need to get your garden bed ready. Bush beans need well-drained soil and plenty of sunlight. Here’s how I prepare my beds:
* Sunlight: Choose a spot that gets at least 6-8 hours of direct sunlight per day. This is crucial for healthy bean growth and a good harvest.
* Soil: Bush beans prefer well-drained soil that’s rich in organic matter. If your soil is heavy clay or sandy, you’ll need to amend it.
* Soil Testing: I always recommend getting your soil tested. You can usually get a soil test kit from your local garden center or agricultural extension office. This will tell you the pH of your soil and what nutrients it might be lacking. Bush beans prefer a slightly acidic to neutral soil pH (around 6.0 to 7.0).
* Amending the Soil: Based on your soil test results, you can amend your soil accordingly.
* For clay soil: Add plenty of compost, aged manure, or other organic matter to improve drainage.
* For sandy soil: Add compost, peat moss, or other organic matter to help retain moisture.
* Fertilizing: Bush beans don’t need a lot of fertilizer, but a little boost can help. I like to add a balanced fertilizer (like 10-10-10) to the soil before planting. Follow the instructions on the fertilizer package for application rates.
* Weed Removal: Make sure to remove any weeds from your garden bed before planting. Weeds can compete with your bean plants for nutrients and water.
Planting Your Purple Bush Beans
Now for the fun part – planting! Here’s how I plant my purple bush beans:
1. Timing: Bush beans are warm-season crops, so you need to wait until the danger of frost has passed before planting. The soil temperature should be at least 60°F (15°C). I usually plant my beans about two weeks after the last expected frost.
2. Direct Sowing: Bush beans are best direct-sown, meaning you plant the seeds directly into the garden bed. They don’t transplant well, so starting them indoors is generally not recommended.
3. Spacing: Plant the seeds about 1 inch deep and 2-3 inches apart in rows that are 18-24 inches apart.
4. Watering: After planting, water the soil thoroughly. Keep the soil consistently moist until the seeds germinate.
5. Germination: Bush bean seeds usually germinate in 5-10 days, depending on the soil temperature and moisture levels.
Caring for Your Purple Bush Bean Plants
Once your bean plants have sprouted, it’s important to provide them with proper care to ensure a healthy and productive harvest.
* Watering: Water your bean plants regularly, especially during dry spells. Aim to keep the soil consistently moist, but not waterlogged. I usually water deeply once or twice a week, depending on the weather.
* Weeding: Keep your garden bed free of weeds. Weeds can compete with your bean plants for nutrients and water. I like to hand-pull weeds regularly or use a hoe to cultivate the soil.
* Mulching: Apply a layer of mulch around your bean plants to help retain moisture, suppress weeds, and regulate soil temperature. I use straw, shredded leaves, or wood chips as mulch.
* Fertilizing: If your bean plants are not growing vigorously, you can side-dress them with a balanced fertilizer. Side-dressing means applying fertilizer along the sides of the rows of plants. Follow the instructions on the fertilizer package for application rates.
* Pest Control: Keep an eye out for pests, such as aphids, bean beetles, and spider mites. If you notice any pests, take action to control them. I prefer to use organic pest control methods, such as insecticidal soap or neem oil. You can also hand-pick pests off the plants.
* Disease Prevention: Bush beans can be susceptible to certain diseases, such as powdery mildew and bean rust. To prevent diseases, make sure to provide good air circulation around your plants and avoid overhead watering. If you notice any signs of disease, take action to control it. You can use a fungicide to treat diseases, but I prefer to use organic methods whenever possible.
Harvesting Your Purple Bush Beans
The moment you’ve been waiting for – harvesting your beautiful purple bush beans!
1. Timing: Bush beans are usually ready to harvest about 50-60 days after planting. The pods should be firm, plump, and about 4-6 inches long.
2. Harvesting Technique: Harvest the beans by gently snapping them off the plant. Be careful not to damage the plant when harvesting.
3. Frequency: Harvest your beans regularly, about every 2-3 days. This will encourage the plants to produce more beans.
4. Enjoying Your Harvest: Purple bush beans are delicious eaten fresh, steamed, sautéed, or added to soups and stews. They’re also great for canning or freezing. Remember they will turn green when cooked!
Troubleshooting Common Problems
Even with the best care, you might encounter some problems when growing purple bush beans. Here are a few common issues and how to address them:
* Poor Germination: If your bean seeds are not germinating, it could be due to several factors, such as cold soil, poor soil drainage, or old seeds. Make sure to plant your seeds when the soil temperature is at least 60°F (15°C) and use fresh seeds. Improve soil drainage by adding compost or other organic matter.
* Yellowing Leaves: Yellowing leaves can be a sign of nutrient deficiency, overwatering, or disease. If your bean plants have yellowing leaves, check the soil moisture levels and make sure the soil is well-drained. You can also fertilize your plants with a balanced fertilizer.
* Pest Infestations: Pests can damage your bean plants and reduce your harvest. If you notice any pests, take action to control them. I prefer to use organic pest control methods, such as insecticidal soap or neem oil.
* Disease Problems: Diseases can also affect your bean plants. To prevent diseases, make sure to provide good air circulation around your plants and avoid overhead watering. If you notice any signs of disease, take action to control it. You can use a fungicide to treat diseases, but I prefer to use organic methods whenever possible.
Extending Your Harvest
Want to keep those purple beans coming? Here are a few tips for extending your harvest:
* Succession Planting: Plant a new batch of bean seeds every 2-3 weeks to ensure a continuous harvest throughout the growing season.
* Deadheading: Remove any spent flowers or pods to encourage the plants to produce more beans.
* Proper Watering and Fertilizing: Keep your bean plants well-watered and fertilized to promote healthy growth and a long harvest.
Saving Seeds for Next Year
If you want to save seeds from your purple bush beans for next year, here’s how:
1. Choose Healthy Plants: Select healthy, vigorous plants that produce high-quality beans.
2. Allow Pods to Mature: Allow some of the pods to mature completely on the plant. The pods should be dry and brown.
3. Harvest the Pods: Harvest the dry pods and remove the seeds.
4. Dry the Seeds: Spread the seeds out on a tray and allow them to dry completely in a cool, dry place.
5. Store the Seeds: Store the dried seeds in an airtight container in a cool, dark place.
Enjoying the Fruits (or Beans!) of Your Labor
Growing purple bush beans is a rewarding experience. Not

Conclusion
So, there you have it! Growing purple bush beans isn’t just a gardening project; it’s an adventure in vibrant color and delicious flavor right in your own backyard. We’ve explored the simple steps, from selecting the right seeds to harvesting those beautiful, bountiful beans. But why is this DIY trick a must-try?
Firstly, the sheer visual appeal of purple bush beans is undeniable. Imagine rows of deep violet foliage punctuated by the striking purple pods – a feast for the eyes that adds a unique aesthetic to any garden. Beyond the beauty, these beans offer a delightful culinary experience. They boast a slightly sweeter, more nuanced flavor than their green counterparts, making them a versatile addition to your kitchen.
Secondly, growing your own purple bush beans allows you to control the entire process, ensuring you’re enjoying fresh, organic produce free from harmful pesticides and chemicals. You know exactly where your food is coming from and how it was grown, giving you peace of mind and a healthier harvest. Plus, the satisfaction of nurturing a plant from seed to table is incredibly rewarding.
Thirdly, this is a fantastic project for gardeners of all skill levels. Whether you’re a seasoned pro or a complete beginner, growing purple bush beans is relatively straightforward and requires minimal effort. They’re also a great option for small spaces, as bush beans don’t require extensive trellising or support.
Ready to take your purple bush bean growing to the next level? Consider these variations:
* Succession Planting: Plant new seeds every few weeks to ensure a continuous harvest throughout the growing season.
* Companion Planting: Plant your purple bush beans alongside beneficial companions like marigolds (to deter pests) or carrots (which improve soil health).
* Container Gardening: If you’re short on space, grow your purple bush beans in containers on your patio or balcony. Just make sure to choose a large enough pot with good drainage.
* Different Varieties: Explore different varieties of purple bush beans, such as ‘Royal Burgundy’ or ‘Purple Queen,’ to discover your favorite flavor and color.
Don’t be afraid to experiment and adapt the techniques to suit your specific climate and growing conditions. The most important thing is to get started and enjoy the process!
We’re confident that you’ll find growing purple bush beans to be a rewarding and enjoyable experience. So, grab your seeds, prepare your soil, and get ready to witness the magic of these vibrant vegetables.
We encourage you to try this DIY trick and share your experiences with us! Post photos of your purple bush bean harvest on social media using [Your Hashtag Here] and tell us about your favorite ways to enjoy them. We can’t wait to see what you create! Happy gardening!
Frequently Asked Questions (FAQ)
What are the best conditions for growing purple bush beans?
Purple bush beans thrive in well-drained soil and full sun, requiring at least 6-8 hours of direct sunlight per day. The ideal soil temperature for germination is between 60°F and 70°F (15°C and 21°C). Before planting, amend the soil with compost or other organic matter to improve drainage and fertility. Consistent watering is crucial, especially during flowering and pod development. Avoid overhead watering, which can lead to fungal diseases. Instead, water at the base of the plants.
How long does it take for purple bush beans to mature?
Purple bush beans typically mature in 50-60 days from planting. However, this can vary depending on the specific variety, climate, and growing conditions. Keep an eye on the pods; they are ready to harvest when they are firm, plump, and easily snap off the plant. Regular harvesting encourages continued production.
What are some common pests and diseases that affect purple bush beans, and how can I prevent them?
Common pests that can affect purple bush beans include aphids, bean beetles, and spider mites. To prevent infestations, inspect your plants regularly and remove any pests you find by hand. You can also use insecticidal soap or neem oil to control infestations. Crop rotation and companion planting (e.g., with marigolds) can also help deter pests.
Common diseases include bean rust, powdery mildew, and anthracnose. To prevent these diseases, ensure good air circulation around your plants, avoid overhead watering, and choose disease-resistant varieties. If you notice signs of disease, remove affected leaves or plants immediately.
Can I grow purple bush beans in containers?
Yes, purple bush beans are well-suited for container gardening. Choose a large container (at least 12 inches in diameter) with good drainage. Use a high-quality potting mix and provide consistent watering and fertilization. Place the container in a sunny location that receives at least 6-8 hours of direct sunlight per day. Bush bean varieties are generally better suited for containers than pole beans.
How often should I water my purple bush beans?
Water your purple bush beans regularly, especially during dry periods. The soil should be consistently moist but not waterlogged. Water deeply at the base of the plants, avoiding overhead watering. Check the soil moisture regularly by sticking your finger into the soil; if the top inch feels dry, it’s time to water.
Do purple bush beans need fertilizer?
Purple bush beans benefit from regular fertilization, especially during flowering and pod development. Use a balanced fertilizer (e.g., 10-10-10) or a fertilizer specifically formulated for vegetables. Follow the instructions on the fertilizer package. You can also amend the soil with compost or other organic matter to provide a slow-release source of nutrients.
How do I harvest purple bush beans?
Harvest your purple bush beans when the pods are firm, plump, and easily snap off the plant. Regular harvesting encourages continued production. Use scissors or pruning shears to avoid damaging the plant. Harvest in the morning when the pods are cool and crisp.
Why are my purple bush beans turning green?
Some varieties of purple bush beans will turn green when cooked. This is a natural process and does not affect the flavor or nutritional value of the beans. If you want to preserve the purple color, try steaming or stir-frying the beans briefly.
Can I save seeds from my purple bush beans?
Yes, you can save seeds from your purple bush beans, but it’s important to choose open-pollinated varieties to ensure that the seeds will produce plants that are true to type. Allow some pods to mature fully on the plant until they are dry and brown. Remove the seeds from the pods and store them in a cool, dry place until the next planting season.
What are some delicious ways to prepare purple bush beans?
Purple bush beans can be prepared in a variety of ways. They can be steamed, boiled, stir-fried, roasted, or added to soups and stews. They are also delicious in salads. Try sautéing them with garlic and olive oil, or roasting them with herbs and spices. Their slightly sweeter flavor makes them a versatile addition to any meal.


Leave a Comment